

Today’s project is a loose version of a “SIP” card. “SIP” is an acronym for Stamps, Ink, and Paper.
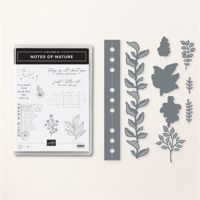
When I first saw the Notes of Nature Bundle, my thought was to create a stamped collage design. Notes of Nature is the perfect stamp set to create a design like this. I kept the colors toned down and just started stamping. Some of the images are stamped off once to create depth. I added texture with the large Basic White die cut and the Wild Wheat Designer Series Paper layer background.
So, let’s make a card!
Pieces And Parts

- I cut a Basic White cardstock card base 4 1/4″ x 11″ and scored at 5 1/2″.
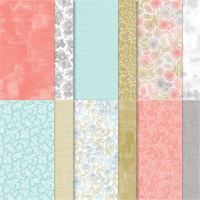
- The Wild Wheat patterned paper card front layer is 4 1/4″ x 5 1/2″.
- The Basic White cardstock top layer (the finished stamped layer) is 3 3/4″ x 4 3/4″.
- I die cut the left edge of the Basic White top layer using the die from the Notes of Nature Dies.
- I started stamping in the bottom right corner of the white layer using Wild Wheat ink and the large corner stamp. See below.
- I stamped the leaf image next using Old Olive ink. See below.
- With Wild Wheat ink, I stamped the grid image on the left side of the layer. See below.

- Next came the ink splatter. I love ink splatter! I stamped this image on the right side of the grid image.
- I stamped the ink splatter off once with Moody Mauve ink and stamped it to the left of my leaf image. See below.

- I trimmed the layer to 3 3/4″ x 4 3/4″, making sure the stamped design would dominate the layer.
- I die cut the left edge of the layer and stamped the sentiment.
So, find those great background image stamps, pick your favorite colors, and just have fun creating your own design. Add it to a card front, and send someone a smile.
… the only limitation is your imagination!


FEBRUARY CUSTOMER CARD KIT GIFT
February Host Code – JYARZNJF

The February cards are showcasing the Everyday Details Dies along with the Delightfuly Eclectic Designer Series Paper.
- You will receive everything you need to put the cards together as I’ve designed them.
- The kit will include the card bases, layers, die cuts, embellishments, sentiment layers, and envelopes.
- I cannot send stamped images, but you will have a sentiment layer you can customize to a stamps you already owm.
- You will also receive a printed PDF Tutorial, along with a video link so you can put the cards together along with me.
- You will automatically receive the kit with a minimum product purchase of $50.00 through my online store. When completing your purchase, you MUST use the Monthly Host Code that I provide in every blog post. (Feel free to reach out to me with any questions you may have).
- If your order is more than $150.00, plese don’t use the Host Code. You will receive rewards directly from Stampin’ Up!, and you will also receive the mini kit from me.
SHOP WITH ME


