

Hello Friends and happy Wednesday!
The Flowering Tulips stamp set was not at the top of my wish list. I decided to get it because I liked the sentiments. It was the Windowpane Check ribbon and the Flowering Fields Designer Series Paper that were “must haves”. I can tell you with complete candor that as soon as I started playing with colors and doing some two-step stamping again, I couldn’t imagine not having the stamp set. It’s been quite a while since I did two-step stamping and it was like riding a bicycle. Once I got started, it was hard to put the stamps away.
Now I can say with complete candor that if you didn’t get the Flowering Tulips stamp set, give it some thought. Once you line up these stamps, you will have so much fun blending color combinations. For my card today, I used Pumpkin Pie and Pale Papaya. I love these two colors together!

Today’s Card Bits & Pieces
- Cut a top fold A-2 Basic White card base 4 1/4″ x 11″ and score at 5 1/2″‘.
- Attach a layer of Evening Evergreen cardstock 4 1/8″ x 5 3/8″ to the front of the Basic White card base.
- The Pumpkin Pie and Pale Papaya shaded Designer Series Paper layer is 4″ x 5 1/4″.
- Attach it to the Evening Evergreen layer.
- While you have your Paper Trimmer in front of you, cut an Evening Evergreen smaller card layer 2 3/4″ x 4″.
- Cut a Basic White layer 2 5/8″ x 3 7/8″. This is going to be your stamping layer.
- I used my Stamparatus to stamp. It made positioning the stamps so much easier.
- The Pumpkin Pie base layer of the tulip is the stamp in the center of the top row of the stamp set.
- Position the stamp where you want it and stamp!
- The second stamp in the two step process is located in the top row right side.
- With Pale Papaya ink, position it so it lines up with the Pumpkin Pie stamped image and stamp directly over the Pumpkin Pie image.
- Keep the center and edges of each stamp lined up. It will match perfectly.
- The second flower is stamped the same way. The base image is the stamp in the second row, second from the right and the second top stamp is the one in the second row on the far right.
- The stems and leaves are stamped with Evening Evergreen ink.
- A quick line of color with a Light Granny Apple Green Stampin’ Blend will add interest to the leaves.
Masking Technique
- Take a close look at the flower images. You’ll see I masked the smaller flower before I stamped the leaf.
- Masking makes the leaf appear as though it’s behind the small flower.
- I used a sticky note and stamped the flower base image on it making sure I had the edge of the stamp along the very top of the sticky note.
- Some of the glue from the sticky note will be on the back of your stamped image. This will help keep the image in place when you stamp over it.
- Cut the stamped image directly along the edges.
- Place the sticky note cut image over the stamped image on your card layer.
- Stamp the leaf right over the flower.
- When you life the mask, your leaf will appear to be behind the flower.
- Store your mask inside your stamp set case. You’ll have it for next time.

Finishing The Card
- The Happy Birthday sentiment is from the Special Moments stamp set. This is a Sale-A-Bration set that is FREE with a $100 product purchase. You will love owning a stamp set full of sentiments for just about anything.
- I stamped the sentiment with Evening Evergreen ink onto a strip of Basic White cardstock that measures 3/4″ x 2 3/4″.
- The Evening Evergreen patterned paper flagged banner under the ribbon is 4 1/8″ x 1″.
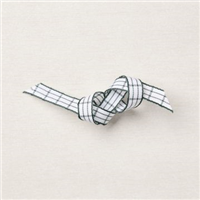
- I cut a piece of the gorgeous 3/8″ Evening Evergreen Windowpane Check Ribbon about 11 1/2″, formed an untied bow and attached it to the Evening Evergreen layer with glue dots.
- The sentiment is attached with a Dimensional on the top left and bottom right corners and a few lines of Multipurpose Glue in the middle.
- Sprinkle a few Brass Butterflies around the flowers for a little shimmer.
This is a long post, so I won’t add anything more. I hope you enjoy creating this card as much as I did. The products are amazing together.
So, cut some layers, attach a fabulous piece of ribbon, add a little shimmer and create something special!
…the only limitation is your imagination!

Today’s Product Details


Click to Shop


This card reminds me of spring. The yellows are so pretty.
Thank you, Monica! This does look like Spring. I think with all the cold and snow we’ve had, I was thinking of April Tulips!! You are always so thoughtful.