Hello! It’s Monday, and I wish you a happy new week!
I suppose you already know that I’m a fan of the Gorgeously Made Dies. I expecially love the notebook page die. I notice I’m using it quite a bit. I’m thinking that for my next post, I’ll have to try something different. (smile).
I enjoy crafting after showcasing new Bundles and Suites. The product Bundles and Suites are beautifully coordinated, and help get your creativity going. Once I get to know a Suite or Buncle, I always find at least one die or stamp that I want to use with something else. The Designer Series Paper is gorgeous and inspiring! Today’s card is a perfect example this.
The Designer Series Paper and the Embossing Folder are from the Counrtyside Inn Suite, the die cut sentiment circle is from the Radiating Stitches Dies, and both the card front and inside sentiments are from the Timeless Arrangements stamp set. Whether or not you have all of these proeucts, the card design is simple and very versatile. You can fill in with products you already have to re-create this design.
Let’s make a card!
Today’s Card Parts & Pieces
I used Basic White Thick cardstock for my card base and embossed layer.
The card base is 4 1/4″ x 11″ and scored at 5 1/2″.
The embossed cardstock layer is 4″ x 5 1/4″.
The patterned paper layer is 2 3/4″ x 4″ and die cut across the top.
The ribbon layer is 3″ wide. You can also use a piece of patterned paper or cardstock for this layer. It’s 3″ x 3/8″. A half inch width strip would work well also.
I stamped an image from Timeless Arrangements onto the envelope and inside of the card and added a strip of patterned paper to the inside.
I hope you enjoy creating this quick, easy and very pretty project. Make a few cards using this design and your supplies. It’s a great way to have some fun in your carft space. Always remember …
From July 1st through July 31st, with a minimum product purchase of $40.00 (before shipping and tax), you will receive my festured FREE Mini Card Kit along with a Video Tutorial link and Project Sheet so you can assemble the cards with me. The card bases, layers and elements are all included. You add your sentiment, and supply your favorite adhesive. July’s Mini Card Kit features the Gorgeously Made Designer Series Paper and Dies. I look foreard to creating these cards with you!
New Online Exclusives Are Here!
Click This Image To Download The Flyer
Bonus Days During July
Click the image above for Bonus Days Details.
Clearance Rack Refresh
The Clearance Rack Refresh includes past holiday themed Bundles. Don’t hesitate, they go fast. Take advantage of the Bonus Days Coupons and my FREE Card Kit of the Month.
Click the image abopve to go to the Clearance Rack Refresh
Today’s card features the Hello, Irresistible Designer Sereies Paper. It’s part of the 15% off Designer Series Paper Sale for the month of June. I paired it with the Cheerful Daisies and Countryside Corners Dies.
This is a quick and easy card to make. The design is versatile enough to use for many of the stamp and die sets you already have.
It’s importantto look at some of the “basics” to add to your paper crafting supplies. The Countryside Corners Dies are a good ‘basic” die set. The dies create nesting layers that could serve to “ground” any elements you want to use. Keep this in mind when wandering thguth the Annual Catalog. This is always a great place to find many “basics” to add to your papercrafting supplies.
Let’s make a card!
Today’s Card Parts & Pieces
I cut a Lost Lagoon cardstock card base 4 1/4″ x 11″ and scored it at 5 1/2″.
The Hello, Irresistible DSP layer is 4 1/4″ x 5 1/2″. It covers the fornt of the card.
I die cut two cardstock layers using the Countryside Corners Dies. The Daffodil Delight layer measures about 2 1/4″ x 3 3/4″. The Lost Lagoon layer measures aobut 1 3/4″ x 3 1/2″.
The daisies are die cuts from the Cheerful Daisies large die. I snipped off two of the thre die cut daisies.
I used a sponge dauber and Daffodil Delight ink to add color to the center of the daisies.
The sentiment, stamped with Lost Lagoon ink, is fron the Cheerful Daisies stamp set and die cut with one of the dies from the Gorgeously Made Dies.
That little Brushed Brass butterfly adds a perfect finishing touch.
It’s always fun to add a little something to the inside of a card. For today’s project, I stamped a daisy and the sentiment. I stamped the cluster of daisies off once and added it over the sentiment. I thought it added a little more color to the inside.
So, grab your favorite “basics” layering dies, die cut a few layers, add some large elements and a sentiment and create something to send some gratitude. Don’t forget the butterfly!
We all love beautiful Designer Series Paper, and in June, you can enjoy a 15% discount on select Designer Series Papers from our new 2023–2024 Annual Catalog and Online Exclusives. Whether you’re a scrapbooker, a card maker or simply a paper lover, this is a great time to stock up and save on gorgeous paper!
Free June Mini Card Kit
June Mini Card Kit
From June 1st through June 30th, with a minimum product purchase of $40.00 (before shipping and tax), you will receive a FREE Mini Card Kit along with a Video Tutorial link and Project Sheet so you can assemble the cards with me. The card bases, layers and elements are all included. You add your sentiment, and supply your favorite adhesive. This Mini Card Kit features the Delightfully Eclectic Designer Series Paper. I look foreard to creating them with you!
Aren’t the colors in the Masterfully Made Designer Series Paper strikingly beautiful together? Take a look at the Masterfully Made Product Suite. It’s like peanut butter and jelly … you can’t have one product without the other. The Gorgeously Made Bundle has to be used with the Masterfully Made DSP, at least for a few projects. The Bundle can do very well on its own, however. I think it’s one of those you’ll be happy to own.
Imagine the images in the Gorgeously Made stamp set used as a Christmas or holiday card. I can see that very clearly. The coordinating Dies include a notebook page die, and a die you can use to simulate torn paper. Look at the sentiment layer in this card, it resembles a torn scrap of cardstock, or a piece of torn Washi Tape. The creative possibilities for this entire Suite are endless.
During my web wandeing, I checked in on a favorite design challenge, Freshly Made Sketches. I thought this week’s sketch would be perfect to showcase this Product Suite, so I decided to join in the Chellenge. You can take a look at all of the sketch inspiration by clicking the image below.
Let’s make a card!
Today’s Card Parts & Pieces
This is a quick and easy card to put together.
I cut a Pretty Peacock cardstock card base 4 1/4″ x 11″ and scored at 5 1/2″.
The “torn notebook page” layer measures 3 3/4″ x 4 1/4″. It’s die cut on the right side of the layer.
The Designer Series Paper strip is 5 1/2″ x 1″. I cut it from the patterned paper sheet and quickly fussy cut the right edge following the pattern in the DSP.
I die cut a patterned paper circle to “ground” the elements in this design. The circle is 2 1/2″ in diameter.
The Crushed Curry and Pretty Peacock leaf spray elements are die cuts.
I stamped the sentiment with Berry Burst ink onto Bubble Bath cardstock and die cut it.
I attached the circle to the card front with Dimensionals, glued the elements to the circle, and added a Gray Granite Baker’s Twine bow with a glue dot.
The sentiment is attached on top of the bow with Dimensionals.
A small strip of DSP and two stamped-off twice images serve as a background for the inside sentiment.
So, grab your Masterfully Made Designer Series Paper, find a fun sketch, cut some layers, add a circle, and create a “gorgeously made” gratitude card!
From now through May 31st, with a minimum product purchase of $50.00 (before shipping and tax), you will receive a FREE pack of the Tinsel Gems Four Pack. You must use the Host Code below. You will also receive your Creative Coins for each $50 order increment before shipping and tax.
Tinsel Gems Four Pack
May, 2023 HOST CODE IS QCYTPDXD
If your order is under $150.00, please use the Host Code above when prompted. You will receive Rewards from me (for oreders of $50.00 or more before shipping and tax), along with your gift from me featured this month. If your order is over $150.00 (before shipping and tax), please do not use the Host Code. You will receive Stampin’ Rewards directly from Stampin’ Up!. You will also receive Creative Coins and the featured FREE gift from me. You can get all of my Customer Rewards Program details by clicking here.
I’ve missed sitting in my craft room lately. I somehow developed a pinched nerve. The pain travelled from my neck, straight down my left arm. I had to refrain from stamping and using my computer for a while. It’s healing quickly and I’m slowly cutting my cardstock again. I’m hoping to be able to showcase more of the new products soon, so stay tuned.
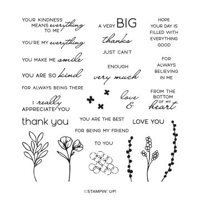
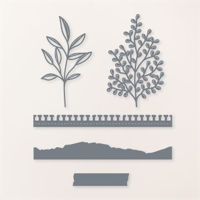
Today’s post features the Wonderful Thoughts Bundle. The stamp set includes mixed font sentiments that you can use for just about any occasion. The coordinating dies are designed to wrap around each sentiment. The Dies also include a simple flower cluster that adds a focal point to your project design. Wonderful Thoughts is certainly one of those Bundles that you will use time and again!
Once again, I was so excited to put this card together, I forgot to take a “Parts & Pieces” photo. This is an easy “put together”, so it should be easy to follow using the card photo.
Today’s Card Parts & Pieces
I cut a Basic White card base 5 1/2″ x 8 1/2″ and scored at 4 1/4″ on the 8 1/2″ side.
The Night of Navy cardstock layer is 4″ x 5 1/4″.
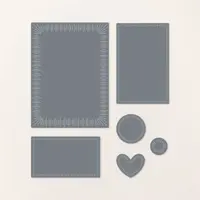
I used the Countryside Corners Dies to create the layers that frame the focal point.
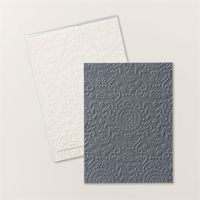
The bottom Countryside Inn Designer Series Paper layer is about 4 1/2″ x 2 3/4″.
The Smoky Slate and Night of Navy layers are about 4″ x 2 3/8″, and about 2 7/8″ x 1 3/4″, respectively.
The flower cluster is die cut from Basic White cardstock, and the sentiment, stamped with Night of Navy ink, is also on Basic White cardstock.
I used Linen Thread to tie a bow and attach it to the flowers.
I stamped the inside sentiment with Night of Navy ink and die cut a small Bubble Bath cardstock heart (from the Wonderful Thoughts dies).
So, find a pretty piece of Designer Series Paper, add a few frame layers, a flower cluster and a die cut sentiment, and create something to send a “wonderful thought” to someone special.
From now through May 31st, with a minimum product purchase of $50.00 (before shipping and tax), you will receive a FREE pack of the Tinsel Gems Four Pack. You must use the Host Code below. You will also receive your Creative Coins for each $50 order increment before shipping and tax.
Tinsel Gems Four Pack
May, 2023 HOST CODE IS QCYTPDXD
If your order is under $150.00, please use the Host Code above when prompted. You will receive Rewards from me (for oreders of $50.00 or more before shipping and tax), along with your gift from me featured this month. If your order is over $150.00 (before shipping and tax), please do not use the Host Code. You will receive Stampin’ Rewards directly from Stampin’ Up!. You will also receive Creative Coins and the featured FREE gift from me. You can get all of my Customer Rewards Program details by clicking here.
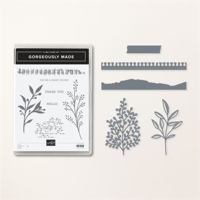
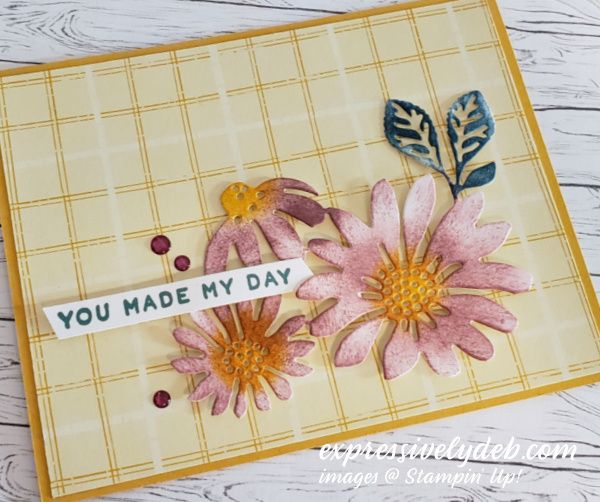
Today’s card is a simple one layer design featuring the large daisies die from the Cheerful Daisies Bundle. This wasn’t what I originally planned. It’s one of those cards that just evolved through a few edits.
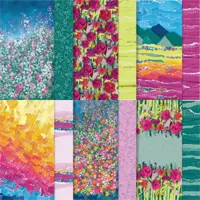
I started with the pretty plaid pattern from the Inked Botanicals Designer Series Paper, and cut a Crushed Curry card base. I went through my stamps and chose Cheerful Daisies. I knew the large daisy die would work well as a focal point.
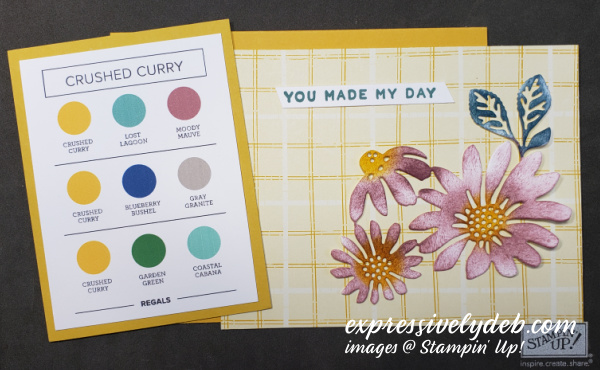
I chedked my Color Coach to help with my color choices. I decided to die cut a few of the daisy die cut overlays in Moody Mauve. After I placed them on the focal point, I thought it was a little too stark. I really didn’t like Moody Mauve with Crushed Curry. So, I took a different turn and decided to try inking the daisies with my Sponge Daubers. I liked the softer look for the patterned paper I chose. I think it has a nice contrast.
Today’s Card Parts & Pieces
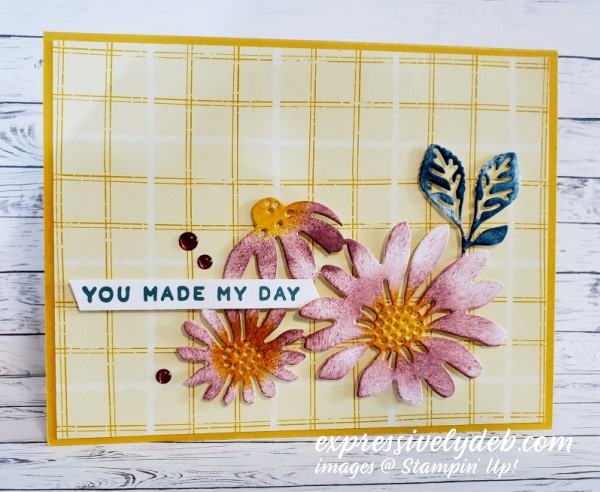
The Crushed Curry card base is 5 1/2″ x 8 1/2″, and scored at 4 1/4″ on the long side.
I used Basic White Thick cardstock to die cut the daisies.
I added color to the daisies starting from the Crushed Curry centers and working out to the flower edges with Moody Mauve ink.
The leaves are inked with Lost Lagoon.
I attached the daisies with Mini Dimensionals.
The sentiment is stamped with Lost Lagoon ink and attached with Dimensionals, as well.
Today’s card is quick and easy. There’s something about inking cardstock. I truly enjoyed that process.
So, attach a pretty patterned paper layer to your card base, add some ink to a large focal pint, scatter some bling, and create something to make someone’s day!
From now through May 16th, with a minimum product purchase of $50.00 (before shipping and tax), you will receive a FREE pack of the Tinsel Gems Four Pack. You must use the Host Code below. You will also receive your Creative Coins for each $50 order increment before shipping and tax.
Tinsel Gems Four Pack
May, 2023 HOST CODE IS QCYTPDXD
If your order is under $150.00, please use the Host Code above when prompted. You will receive Rewards from me (for oreders of $50.00 or more before shipping and tax), along with your gift from me featured this month. If your order is over $150.00 (before shipping and tax), please do not use the Host Code. You will receive Stampin’ Rewards directly from Stampin’ Up!. You will also receive Creative Coins and the featured FREE gift from me. You can get all of my Customer Rewards Program details by clicking here.
I am Debbie Crowley and welcome to my blog. Here you'll find fun projects that are sure to inspire you. I hope you'll stop
by often and leave a comment or two. To contact me, you can email me at: expressivelydeb@gmail.com
Current Catalogs
What are you looking for?
The content of this blog is the sole responsibility of Debra Crowley, expressively deb.com, as an Independent Stampin' Up! Demonstrator. The use of and content of classes, services or products offered is not endorsed by Stampin' Up!