
Welcome to the Stampin’ Pretty Pals’ Blog Hop!
This month, our blog hop theme is Party Time! We hope you will be inspired by all the beautiful creations the Pals made for you! As you hop from blog to blog, we would love for you to leave a comment. You will find the lineup at the end of my post to help you “hop” along from Pal to Pal.
A Party For Your Birthday!

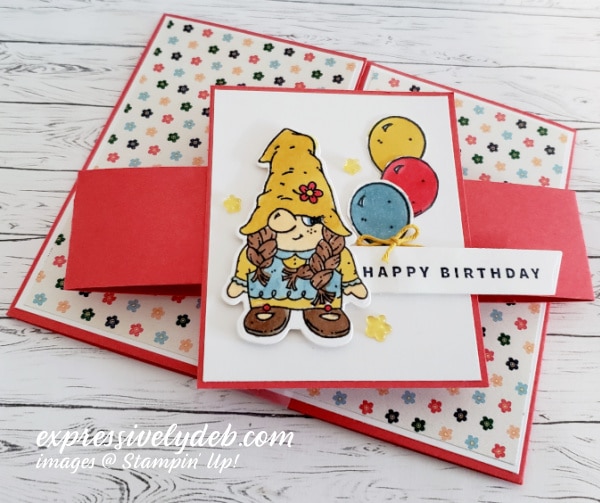
What’s more fun than to celebrate a birthday party with balloons and magical gnomes? I’m showcasing the Friendly Gnomes stamp set in today’s Fun Fold card. I’ve recently seen this Fun Fold in several inspirational places and thought I would try it. The image below shows the card opened.

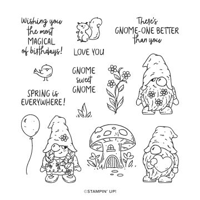
The Friendly Gnomes stamp set is one that wants you to pull out your Blends, Watercolor Pencils, or Watercolor Brushes and color. Many decades ago (smile), coloring was one of my pasttimes. I always had a new coloring book and box of crayons. For all of the stamped images in today’s card, I used my Blends. I enjoyed coloring for this card as much as I did years ago.
Each image is samped with Black Memento ink onto a piece of Basic White cardstock. I added my color and fussy cut most of the images. I did this before I put the card together.
Let’s Make A Fun Fold!
- Cut a Sweet Sorbet cardstock base 11″ x 4 1/4″ and score at 2 3/4″, 5″, 6″, and 8 1/4″.
- Fold the left flap toward the center of the card base, fold to the back on the next score line, fold to the back on the 3rd score line and fold the last score line toward the center of the card base.

- Cut two additional Sweet Sorbet cardstock layers 2 3/4″ x 3 1/4″. One is for the inside sentiment base and the second is for the belly band focal point.
- The Sweet Sorbet belly band is 1 1/4″ x 11″.
- I used thin layers for the Basic White and DSP layers. (1/8″ increments).
- Cut 4 Basic White layers 2 5/8″ x 4 1/8″. These are for the card front and inside right and left panels.
- Cut two Basic White layers 2 1/8″ x 4 1/8″. These are for the center larger inside layers.
- Cut one Basic White layer 7/8″ x 4 1/8″. This is for the inside center layer.
- I cut four DSP layers 2 1/2″ x 4″ for the front of the card and the inside outer panels.
- Next, cut two DSP layers 2″ x 4″ for the inside center panels.
- Cut one 3/4″ x 4″ DSP layer for the inside center panel.
Easy Assembly
Once you cut your layers, you can assemble your card and add the elements.

When you assemble the belly band, wrap it around the card from back to front. It’s a ltitle shorter than the width of the card, but you’ll cover the small gap with your card front focal point layer.
So, pull out your paper trimmer, find some fun Designer Series Paper and coordinating cardstock, color and fussy cut a few elements, and create something fun to dislpay at a birthday party!
… the only limitation is your imagination!

More inspiration awaits, so use the lineup below to visit the rest of the Design Team. The Pals are excited to show you what they’ve created! Then, please mark your calendars for our next blog hop on April 12th, when our theme will be Flowers in the Garden, showcasing cards/projects with flowers.
Until then, have fun in your craft space.
Stampin’ Pretty Pals Blog Hop
- Mary Fish at Stampin’ Pretty
- Jackie Beers at Blue Line Stamping
- Beth McCullough at Stamping Mom
- Debbie Mageed at Secrets to Stamping
- Lori Webb at Clever Copies
- Sue Jackson at Just Peachy Stamping
- Deb Walker at Deb Stamps Life
- Rosanne Mulhern at Heartfelt Stamping
- Stesha Bloodhart at Stampin’ Hoot!
- Windy Ellard at Windy’s Wonderful Creations
- Debbie Crowley at expressively deb…
- Lisa Ann Bernard at Queen B Creations
- Peggy Noe at Pretty Paper Cards
- Jill Loveland at Simple Stamping
- Tricia Chuba at ButterDish Designs
- Su Mohr at Aromas And Art
- Melissa Seplowitz at The Stamping Ninja
- Rae Harper Burnet at Wild West Paper Arts
Today’s Product Details
March FREE MINI CARD KIT

From now through March 31st, with a product purchase of $50.00 (before shipping and tax), you will receive a FREE Mini Card Kit along with a Video Tutorial link and Project Sheet so you can assemble the cards with me. The card bases, layers and elements are all included. You add your sentiment, and supply your favorite adhesive. This Mini Card Kit uses the Dandy Designs DSP. There’s a Fun Fold Bomus this month. I added a third card (in the center of the photo). It’s a quick and easy insert card. You can wtire your message and attach a gift card to the insert. They’re all quick, easy and fun to put together.
March HOST CODE – NTRWBBCT
If your order is $50.00 (before shipping and tax), please use the Host Code above when prompted. You will receive Rewards from me along with the Mini Card Kit featured this month. If your order is over $150.00 (before shipping and tax), please do not use the Host Code. You will receive Stampin’ Rewards. You will also receive Creative Coins and the FREE Mini Card Kit from me.
Online Exclusives
Don’t forget to check in on the current Online Exclusives. You can click the images below to see the new products.

SHOP WITH ME









This is a new fold to me with the center bump! It is so cute and a great pair with the fun gnomes. I love it!
Thank you, Jackie. It’s a fun one.
Love this Party Time fold Debbie! Always a pleasure to see how you put your own stamp on our Pals Hop!
Thank you, Deb! I wasn’t sure what to call it, but I love the “Party Time” name you gave the fold. Enjoy the rest of your day.
Such a cute card, Debbie! I need to try this fun fold; thank you for the instructions!
Thank you, Su. My pleasure!
Awesome card inside and out…love a belly band!
Thank you, Windy. I love belly bands, too!
Ok, ok Deb … I’ve been fending off the desire for these gnome sets. You just made me cave in with your adorable card. Thank you?
LOL… I’ve been there, Rae. I know when you’re trying to resist something and just can’t. Oh, just get it, right? Thank you for your kind words.
This fold is really unique and makes for a wonderfully fun card and the gnome is just adorable.
Thank you, Rosanne.
I love your fun fold Debbie! That cute little gnome is the icing on the cake, just adorable!!
Thanks so much, Melissa.
Such a fun and sweet card, Debbie! Thank you for sharing your creativity.
Thank you, Tricia.
I get such a smile at seeing a gnome at a party! This card is adorable! I absolutely love this version of a gatefold. Hope I can make one soon. Thanks for joining the blog hop this month!
Thank you, Deb. This is truly a fun, Fun Fold.