

Hello Friends! I Hope you’re enjoying your week. The weather here in NJ is crazy! We were at 70 degrees over the weekend and this morning, we were back in the 30’s. I’m ready for some warmer weather and more daylight. Looking forward to our Spring Ahead clock change this coming weekend. It’ll take a week or so to get used to our new clock, but the change is welcomed by me.
Here’s Today’s Stampin’ Story
I had this post ready to go. When I went to post my pictures, I notices the back of a Stampin’ Dimensional right in the middle of my Pale Papaya die cut. I took the pictures, added my watermark, brought them into my picture file and never noticed it! A picture re-take fixed all that and I’m off to a fresh start.

Card Pieces And Parts
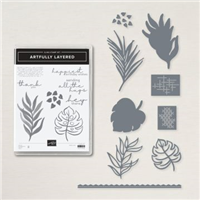
- Isn’t this Bundle fabulous? It’s the Artfully Layered Bundle on page 34 in the Mini Catalog.
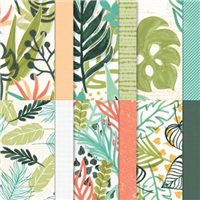
- Because I’m such a patterned paper fan, it was the coordinating Artfully Composed DSP that originally caught my eye.
- I relented and got the Bundle because I didn’t have anything like it in my stash. I’m happy I did. I’ve used it over and over.
- This is a 5″ square card. The Basic White card layer is 5″ x 10″, scored at 5″.
- I used one of the patterns in the Artfully Composed DSP. Since I wanted to add die cuts to this design, I needed a low profile background. This Calypso Coral, distressed design worked for a card front layer.
- As I was putting the card together, I changed my design. The patterned paper distressing inspired me to add texture to it.
- Now, I know this sounds “out there”, but I did it and, to me it looks great! Included in the Tropical Layers Dies are two “texture dies” . They pierce the paper so you can create a detailed, texture design.
- I took one of the dies and colored the back with my White Chalk Marker before running it through my cutting machine.
- It pierced the DSP and added more color to the already textured pattern. The die cut leaves are bold enough to work together with the texture.
- I like the result. A small detail that added that extra something.
- By the way, I cleaned my die with alcohol and a paper towel and it’s as good as new!

- The Basic White layer is a 4″ square and the top patterned paper layer with the added texture is a 3 3/4″ square.
Tips & Tricks
- I suppose you could say that chalking the back of a die is a tip and trick… it worked for this design.
- I wanted to shadow cut the white embossed sentiment but my eyes aren’t what they used to be. This is a cling red rubber stamp. I used the backing on the stamp as a guide to fussy cut the embossed sentiment. Take a look at the photo below. So easy! I will save these little tools from now on.

So, add some fun texture to a distressed patterned paper, die cut some strong, bold elements, emboss a sentiment and create something square!
…the only limitation is your imagination!

Product Details For Today’s Card


SHOP MY ONLINE STORE


