What do you think? A few years ago, I created a card using the same layout I used today. I actually went back into my archives looking for inspiration. I found it! You can see my original card here.
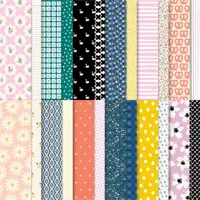
As with so many posts, when I sat down to make a card, I needed some inspiration. I wanted to use this pattern from the Delightfully Ecclectic Designer Series Paper. If you don’t already have it, take a look at the amazing patterns. This paper pack will take you through lots of beautiful paper caradting projects, I promise!
Let’s make a card!
Today’s Card Parts & Pieces

- The Thick Basic White card base is 4 1/4″ x 11″, scored at 5 1/2″.
- The Garden Green cardstock layer is 4″ x 5 2/4″.
- I cut the Designer Series Paper layer 4 3/4″ x 3 1/2″.
- The Basic White cardstock circle is 3″ in diameter.
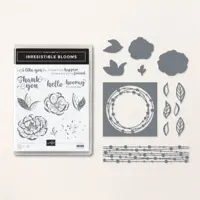
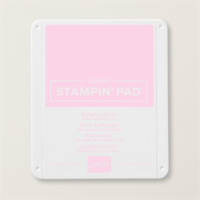
- The die cut flowers and leaves are stamped on Basic White cardstock. I used Bubble Bath, Garden Green, and Granny Apple Green ink. The flowers and leaves are from the Irresistible Blooms Bundle. (It’s in the Online Store).
- I adhered the patterned paper layer to the cardstock layer with glue.
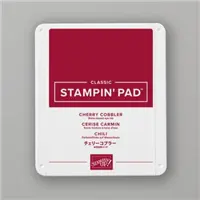
- Stamp the sentiment (I used Cherry Cobbler ink) to the circle.
- Attach the flowers and leaves to the circle as shown.
- Glue the circle to the cardstock layer as shown.
- I tied a double bow with White Bakers Twine and added a few Bubble Bath sequins for some sparkle.
You can find more details in the PDF Tutorial by clicking the button below.


I stamped the sentiment on the inside of the card with Cherry Cobbler ink and added a stamped and die cut image from the Irresistible Blooms Bundle.

So, find that fabulous piece of patterned paper, add a large circle, a few elements and a pretty bow and create something to make someone smile!
… the only limitation is your imagination!

Today’s Product Details
July Free Customer Mini Card Kit

From July 1st through July 31st, with a minimum product purchase of $40.00 (before shipping and tax), you will receive my festured FREE Mini Card Kit along with a Video Tutorial link and Project Sheet so you can assemble the cards with me. The card bases, layers and elements are all included. You add your sentiment, and supply your favorite adhesive. July’s Mini Card Kit features the Gorgeously Made Designer Series Paper and Dies. I look foreard to creating these cards with you!
New Online Exclusives Are Here!

Bonus Days During July

Clearance Rack Refresh
The Clearance Rack Refresh includes past holiday themed Bundles. Don’t hesitate, they go fast. Take advantage of the Bonus Days Coupons and my FREE Card Kit of the Month.

SHOP WITH ME


