It’s been consistently hot and dry here in New Jersey, but I’m thinking “snow”.
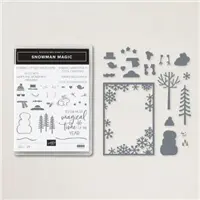
Today, I’m showcasing the Snowman Magic Bundle. The Snowman Magic stamp set has lots of mini stamps that build a snowman in a snow scene. It’s great for the winter and holiday seasons. The Snowman Dies coordinate with the stamps and also feature a large frame die, bordered with snowflakes, that makes it easy to frame your snow scene. You can also use the large frame die alone to frame a sentiment or a pretty holiday image. Do you have a fun family photo you want to display or send to loved ones? Create a beautiful photo frame.
I kept this card “clean” with lots of white space and minimal elements. You can use this design to add ink to the edges of your snow drifts, or place a little sparkle in the Starry Sky.

Today’s Card Pieces And Parts

- My card base is 5 1/2″ x 8 1/2″. scored at 4 1/4″.
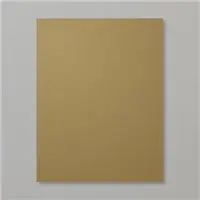
- I cut two layers 4″ x 5 1/4″. One is Starry Sky and the other is Basic White.
- Using one of the larger dies from my Layering Circles Dies, I die cut a circle on the right side of the Basic White layer.
- I cut two smaller Basic White layers 2 1/2″ x 4″, and hand cut swirls into the top of these layers to create my snow drifts.
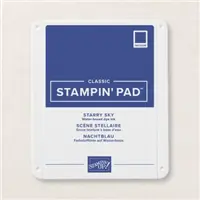
- On a smaller strip of Basic White cardstock, I stamped the snowman’s scarf and hat with Starry Sky ink.
- On another strip of Basic White cardstock, I stamped the three trees with Mossy Meadow ink.
- With one pass through my Mini Cut & Emboss Machine, I die cut the white tree, hat, scarf, snowman arms, and snowman.
- Turn the large Basic White, circle die cut layer so that the circle is on the left.
- Position the first snow drift layer on the back of the circle opening, checking to see if you like the way it appears on the front of the circle.
- Attach it from the back side with Dimensionals.
- Do the same with the second snow drift layer. Attach it from the back with Dimensionals.
- Stamp the face on the snowman with black ink.
- Arrach the hat, scarf and die cut arms to the snowman.
Add The Elements
- Attach the white die cut tree to the snowdrifts as shown.
- Attach the snowman as shown.
- Fussy cut the Mossy Meadow Trees and attach them to the snowdrift.
- Stamp your sentiment with Starry Sky ink and adhere it to the card front.
- Attach your snow scene to the Starry Sky layer, slightly offsetting the Starry Sky layer.
- Attach the snow scent to your card base.

So, cut your layers, offset them on the card front and create something to share winter gratitude.
… the only limitation is your imagination!

Today’s Product Details
Stampin’ Up! Notes & News
- The Pool Party and Soft Sea Foam Notes And Envelopes and the Tree Lot Dies from the Sale-A-Bration Brochure are no longer available.
- Stampin’ Up! has made more products available for FREE with a qualifying purchase so we all can continue to enjoy the benefits of Sale-A-Bration.
- Click the flyer below for details.
DON’T FORGET TO SALE-A-BRATE NOW THROUGH AUGUST 31ST.
A FREE GIFT FROM ME
FESTIVE PEARLS WITH A MINIMUM OF $50.00 PRODUCT PURCHASE
SHOP WITH ME


This is so cute. Love the layering. And not just a Christmas card!