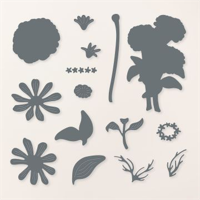
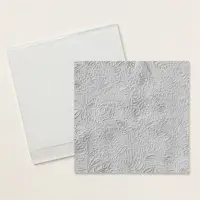
These little zinnias are so cute! They’re cropped using dies in the Simply Zinnia Die Set. Today is the first time I used the Zinnia 3-D Embossing Folder. The embossed layer on my card is stunning! It’s hard to truly appreciate it in my photo, but when you actually use the Embossing Folder and see the results, you’ll say, “Wow”!
Although I’m drawing attention to some of the products in the Flowering Zinnias Suite (available in the Online Exclusives), I’m also showcasing three of the 2022-2024 In Colors that are retiring as of April 30th. Starry Sky, Sweet Sorbet, and Orchid Oasis will leave the Stampin’ Up! color family, only to be replaced by five new, on trend colors. There will also be a new color added to the Basics Collection – Basic Beige.
I am already imagining some wonderful color combinations using these new colors. I’ll be sharing these combinations with you in a new post.
So, let’s make a quick and easy card!
Parts And Pieces
The Orchid Oasis cardstock card base is 5 1/2″ x 8 1/2″, scored at 4 1/4″.
The Basic White mat layer is 3 5/8″ x 4 7/8″.
The embossed Orchid Oasis cardstock layer is 3 1/2″ x 4 3/4″.
I die cut the zinnias using Starry Sky, Sweet Sorbet, Basic White and Old Olive cardstock.
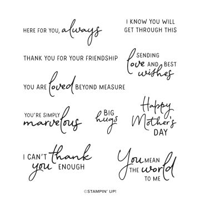
The sentiment is from the Perennial Postage Stamp Set. (The Stamp Set is retiring, however the Perennial Postage Dies will stay with us).
Attach the layers as shown, then attach the die cut elements as shown.
So, create an amazing embossed layer, attach it to a card base, add a few pretty die cut flowers and send love and best wishes to someone special.
I thought I would take a look at the current January – April Mini Catalog to get inspiraion for today’s card. Inspiration came as soon as I saw the card on page 40 of the Mini Catalog.
I changed the base color of the card, but the color combination is what inspired me. Calypso Coral paired with Pebbled Path and Granny Apple Green, along with lots of white space, is striking. I liked it and hope you do, as well.
There are two predominant neutral colors in this card. Adding two bright colors to the neutrals, especially in the card focal point, will always work well.
Take a look at these color combinations, and imagine them on this card design.
So, my alternate color combination for this design is Sweet Sorbet, Pebbled Path, and Pretty Peacock. What’s yours? I think any one of these combinations would be a fun alternative to today’s card.
So, fina some great inspiration, switch up the colors, and create your unique design.
My masculine birthday card is showcasing the Trusty Toolbox Designer Series Paper. It’s free for just about another week during Stampin’ Up!’s Sale-A-Bration promotion.
As you can see, I mixeed color and patterns using a neutral Gray Granite cardstock card base. My color palette is inspired by the Designer Series Paper. The neutral base colors, Gray Granite and Crushed Curry, give the top colorful layer a little more depth. The top layer is attached to the card base with glue, but it almost looks as though I attached it with Dimensionals.
The large “Happy Birthday” sentiment is attached with Dimensionals.
This is a quick and easy card design you can use with any patterned paper you have. Remember to keep the background patterns simple, and make the top layer bolder. It’s fun to play with your patterns this way.
So, let’s make a card!
Parts And Pieces
I cut a Gray Granite cardstock card base 4 1/4″ x 11″, amd scored it at 5 1/2″ on the long side.
The Gray Granite and white patterned paper layer is 4 1/8″ x 5 3/8″.
I cut a long Gray Granite mat layer 2 1/8″ x 5 1/8″.
The long Crushed Curry patterned paper layer is 2″ x 5″.
The Gray Granite mat layer for the top patterned paper layer is 3 1/8″ x 4 1/8″.
The patterned paper layer for the top layer is 3″ x 4″.
The Basic White “Happy” sentiment layer measures 1 1/2″ x 1 1/4″.
I cut the Basic White “Birthday” sentiment layer 2 3/8″ x 1 1/4″.
I stamped the inside of the card with a sentiment from the He’s All That stamp set.
I hope you enjoyed reading this post, and today’s card as much as I enjoyed putting it all together.
So, find some fun patterned paper, add a large sentiment, a few layers, and create a masculine birthday wish.
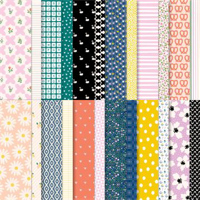
The February cards are showcasing the Everyday Details Dies along with the Delightfuly Eclectic Designer Series Paper.
You will receive everything you need to put the cards together as I’ve designed them.
The kit will include the card bases, layers, die cuts, embellishments, sentiment layers, and envelopes.
I cannot send stamped images, but you will have a sentiment layer you can customize to a stamp you already owm.
You will also receive a printed PDF Tutorial, along with a video link so you can put the cards together along with me.
You will automatically receive the kit with a minimum product purchase of $50.00 through my online store. When completing your purchase, you MUST use the Monthly Host Code that I provide in every blog post. (Feel free to reach out to me with any questions you may have).
If your order is more than $150.00, plese don’t use the Host Code. You will receive rewards directly from Stampin’ Up!, and you will also receive the mini kit from me.
Hi! I hope you were able to schedule some tme in your craft space this weekend.
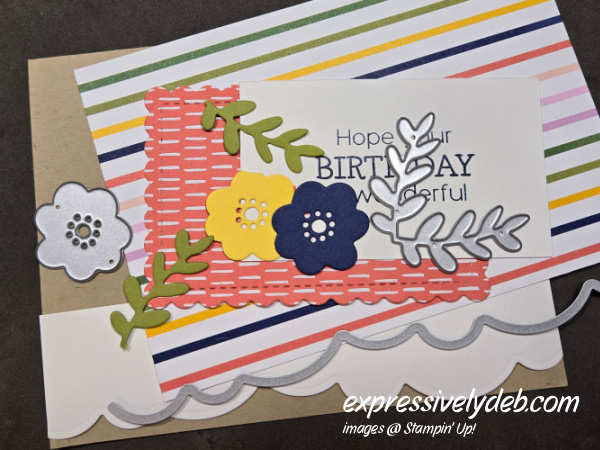
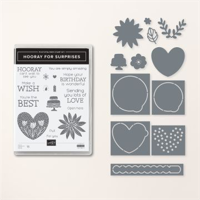
I paired the Delightfully Eclectic Designer Series Paper (FREE with a $50 product purchase until February 29th), with the Hooray For Surprises Bundle. These are two of my favorites. The patterns in the Delightfully Eclectic Designer Series Paper will take you and your paper crafting a long way. The same goes for the Hooray for Surprises Bundle. When I first saw this Bundle, I knew I would use it often. It’s a fun bundle with a lot of versatility.
Did you notice the scalloped edge at the bottom of my card? The Basic White cardstock layer is die cut with one of the dies from the Brifght Skies Dies. This is another Bundle I had to have. I’ve already done a lot with it, and I’m sure it’ll be on my craft table again.
So, let’s make a card!
Parts & Pieces
When I choose a color palette for a project, I generally use patterned paper as a guide. There were so many pretty color combinations in this patterned paper, I had to make a decision. I wanted a “bright and happy” card, so I decided to go with Calypso Coral, Daffodil Delight, and Night of Navy.
The Crumb Cake cardstock card base is 5 1/2″ x 8 1/2″, scored at 4 1/4″ on the long side.
The Basic White layer is 1 1/2″ x 5 1/2″. I die cut the edge with a scalloped die from the Bright Skies Dies.
This layer is tucked under the striped patterned paper layer with the scalloped edge even with the bottom of the card front.
The striped patterned paper layer is 3 3/4″ x 5 1/2″.
The Calypso Coral scalloped layer is die cut with one of the Scalloped Contours Dies. It measures about 2 1/2″ x 3 3/4″.
The Basic White sentiment layer is 2″ x 3 3/8″.
The die cut flower elements are from the Hooray For Surprises Dies, as is the sentiment.
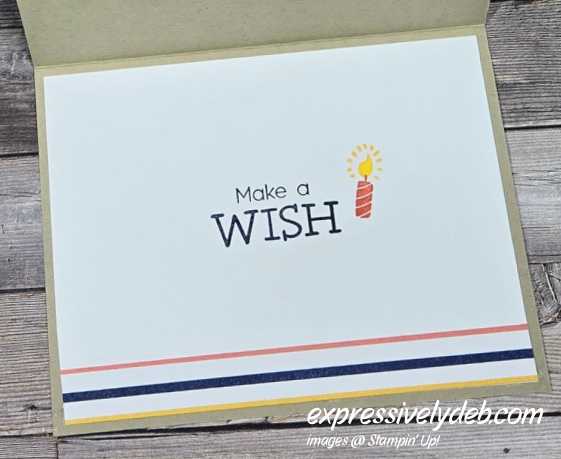
I added a patterned paper strip to the writing layer, stamped the sentiment with Night of Navy ink, and stamped the birthday candle with Calupso Coral and Daffodil Delight ink.
So, make a britht and happy birthday card. Find a fun piece of patterned paper, add it to a Neutral card base, decorate the front with a few scallops, and bright elements, and light up the inside with a glowing candle.
The February cards are showcasing the Everyday Details Dies along with the Delightfuly Eclectic Designer Series Paper.
You will receive everything you need to put the cards together as I’ve designed them.
The kit will include the card bases, layers, die cuts, embellishments, sentiment layers, and envelopes.
I cannot send stamped images, but you will have a sentiment layer you can customize to a stamp you already owm.
You will also receive a printed PDF Tutorial, along with a video link so you can put the cards together along with me.
You will automatically receive the kit with a minimum product purchase of $50.00 through my online store. When completing your purchase, you MUST use the Monthly Host Code that I provide in every blog post. (Feel free to reach out to me with any questions you may have).
If your order is more than $150.00, plese don’t use the Host Code. You will receive rewards directly from Stampin’ Up!, and you will also receive the mini kit from me.
I am Debbie Crowley and welcome to my blog. Here you'll find fun projects that are sure to inspire you. I hope you'll stop
by often and leave a comment or two. To contact me, you can email me at: expressivelydeb@gmail.com
Current Catalogs
What are you looking for?
The content of this blog is the sole responsibility of Debra Crowley, expressively deb.com, as an Independent Stampin' Up! Demonstrator. The use of and content of classes, services or products offered is not endorsed by Stampin' Up!