My Meandering Meadows Designer Series Paper thank you card design is a bit out of the ordinaty for me.
Although the card layout is one of my favorites, it’s not typical for me to use an embossing folder, and to distress my layer edges. I also added a little curl to the corner of my layers. This is quite a stretch … all three techniques in one card!
I had fun purting this project together for this post, and encourage each of you to “stretch” your tyical card making designs by trying a technique you haven’t done in a while, or have never tried.
Add a curl to a layer corner using your Bone Folder, or try distressing the edges of a layer. I used one of the blades on my Paper Snips scissors to distress these layers. Slowly scrape the edges of the cardstock with the blade of an open pair of scissors. Work slowly down the edge of the layer breaking the paper fibers with the scissors’ blade. Work slowly and use card moving the blade.
So, let’s make a card!
Parts & Pieces
I cut the Night of Navy cardstoc card base 4 1/4″ x 11″, and scored it at 5 1/2″ on the long side.
The embossed Night of Navy cardstock layer is 4″ x 5 1/4″. I used the Distressed Tile 3D Embossing Folder.
The patterned paper layer is 3″ x 3 1/2″.
The Basic White mat layer is 2 1/8″ x 2 3/4″”.
The embossed Night of Navy cardstock layer is 2″ x 2 5/8″.
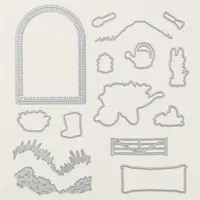
The die cut elements are from the Gorgeously Made Dies.
I stamped the sentiment with Night of Navy ink.
The top layer is embellished with a few Bubble Bath sequins and Sweet Sorbet Mini Metallic Ribbon.
Distressing the edges of the layers took a little time, but for the most part, this card came together quickly. I kept the inside simple by adding a Basic White cardstock writing layer.
So, start with a beautiful piece of patterned paper, add a coordinating card base, cut a few layers, emboss, curl, distress, and create a beautiful card to send gratitude.
December Monthly Free Customer Card Kit With Host Code – UGVBTBBE
During the month of December, with a minimum product purchse of $50.00 from my Online Store, you will receive all of the supplies to create these two cards as I’ve designed them, along with a PDF Tutorial.
You will need your favorite adhesive and sentiment stamp.
To receive this FREE Card Kit, you must use the Host Code above when placing your order.
If your order is $150.00 or more, please don’t use the Host Code. You will receive Stampin’ Rewards directly from Stampin’ Up!, and you will also receive the FREE Card Kit.
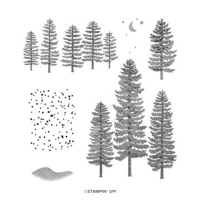
This time of the year brings me thoughts of gratitude. It’s also time for another Clean and Simple card. I combined my ideas, stamped some trees from the Forever Forest Stamp Set (which, by the way, has become a favorite), and used lots of Basic White cardstock.
Wanting to draw attention to the trees, I framed them with the large frame die from the Garden Meadow Dies. I also added “Crystal Detail” to the trees. Some of you may remember Crystal Detail. Here’s my story…
… There’s a “snow” stamp in the Forever Forest Stamp Set. I wanted to add some white embossed falling snow over the stamped trees. (Wouldn’t that have been pretty?) It turned out that my VersaMark stamp pad was a little dry. I looked for my refill and couldn’t find it. Instead, I pulled the Crystal Detail from my refill drawer. That was a nice surprise! It’s been a while since I’ve used it, but I enjoyed scattering this amazing “liquid glitter” on the trees. It’s hard to see in the photo, but the tree branches do sparkle!
I will definitely add the VersaMark Refill to my next order, or maybe just treat myself to a new pad. I’m happy to have made this little discovery. I’m sure I have many more surprises in my craft room. It’s probably time to get into some of the nooks and crannies I have in here to see what other source of amazement I can find.
So, go into that drawer you haven’t opened in a while. There may be a sparkled surprise or two in there for you!
ENJOY FREE SHIPPING THURSDAY, DECEMBER 14TH. GET READY FOR THIS ONE-DAY SPECIAL.
December Host Code – UGVBTBBE
December Monthly Free Customer Card Kit
During the month of December, with a minimum product purchse of $50.00 from my Online Store, you will receive all of the supplies to create these two cards as I’ve designed them, along with a PDF Tutorial.
You will need your favorite adhesive and sentiment stamp.
To receive this FREE Card Kit, you must use the Host Code above when placing your order.
If your order is $150.00 or more, please don’t use the Host Code. You will receive Stampin’ Rewards directly from Stampin’ Up!, and you will also receive the FREE Card Kit.
Last Chance Product List
September – December Catalog Product Carty Over List
You can easily access all of the products by going to my Online Stors and clicking “Last Chance Products”. There, you will see the products, a description, and the discounted price, if applicable.
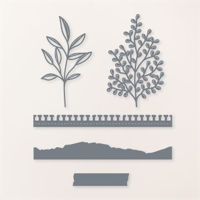
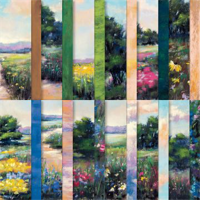
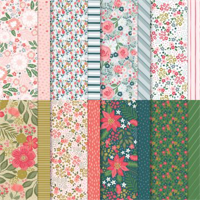
The Garden Walk 6″ x 6″ Designer Series Paper is on the Last Chance List and available while supplies last. It is pretty! The patterns coordinate so well with each other, making it easy to create a beautiful card by simply adding a coordinating cardstock card base and sentiment layer.
My inspiration for this card is the Designer Series Paper. I chose the patterns I wanted to showcase, then looked for a card sketch that would give me room to display how easily the patterns work together. This is a Mojo Monday Sketch from Pinterest.
Parts & Pieces
The Pretty Peacock cardstock card base is 4 1/4″ x 11″, scored at 5 1/2″.
The Basic White cardstock layer is 4 1/8″ x 5 3/8″.
The striped patterned paper layer is 2″ x 5 3/8″.
There are two Pretty Peacock cardstock strips that measure 1/2″ x 5 3/8″. I attached them to each side of the long patterned paper layer.
The floral patterned paper layer is 2 1/2″ x 3 1/2″.
The Pretty Peacock mat layer for the floral layer is 2 5/8″ x 3 5/8″.
The polka dot patterned paper layer is 2″ x 2 1/2″, and the mat layer for it is 2 1/8″ x 2 5/8″.
The Pretty Peacock cardstock strip along the bottom of the card front is 1/2″ x 4 1/8″.
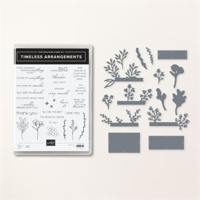
The die cuts, the sentiment layer, and the sentiment stamp are from the Timeless Arrangements Bundle.
I used the Garden Walk Designer Series Paper to create the card below, as well. It’s a cmpletely different design, but it also displays the patterns working together.
So, get your hands on the Gaerden Walk Designer Series Paper, find a great card sketch, cut some layers, and create something to share gratitude.
You can click the button below to download the September-December, 2023 Mini Catalog Last Chance List. Save up to a 60% discount on select products. As always, the products are only available while supplies last. The Last Chance Sale runs today through January 3, 2024.
Also, there are several products currently in the Mini Catalog that will be carried over. They’re not leaving us. Click the button below to download the PDF version of the Carry Over List.
You can easily access all of the products by going to my online stors and clicking “Last Chance Products”. There, you will see the products, a description, and the discounted price, if applicable.
November Card Kit
November Host Code EJJXMSSF
During the month of November, with a minimum product purchse of $50.00 from my online store, you will receive all of the supplies to crewate these two cards as I’ve designed them, along with a PDF Tutorial.
You will need your favorite adhesive and sentiment stamp.
To receive this FREE Card Kit, you must use the Host Code above when placing your order.
If your order is $150.00 or more, please don’t use the Host Code. You will receive Stampin’ Rewards directly from Stampin’ Up!, and you will also receive the FREE Card Kit.
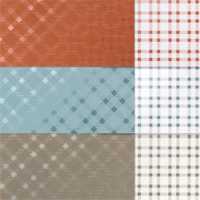
In my daily travels, I’ve been noticing how beautiful the trees look displaying the colors of Autumn. Here in New Jersey, we’ve been enjoying the Fall colors at their peak. My inspiration for today’s card are the colorful leaves I see everywhere. I’m showcasing the Autumn Leaves Bundle and the Tartan Foil 12″ x 12″ Specialty Designer Series Paper.
If you look closely at the top Copper Clay layer, you can see the pretty tartan tone on tone pattern. The paper pack includes 6 sheets of double sided paper, two each of three designs. The colors featured in this Specialty Paper are Copper Clay, Pebbled Path, and Lost Lagoon. It’s part of the Online Exclusives. The details are below.
So, let’s make a card!
Parts & Pieces
The Copper Clay cardstock card base is 8 1/2″ x 5 1/2″, scored at 4 1/4″ on the 8 1/2″ side.
The Basic White cardstock mat layer is 4 1/8″ x 5 3/8″.
The Copper Clay patterned paper top layer is 4″ x 5 1/4″.
I cut a Pretty Peacock cardstock strip 3/4″ x 5 1/4″. This is a “grounding layer” for the leaf elements.
The leaves are stamped with Wild Wheat, Copper Clay, and Pretty Peacock ink.
I die cut a few leaves using Pretty Peacock and Wild Wheat cardstock.
The layers are adhered with glue, and the leaves are attached with Dimensionals.
I thought it best not to embellish too much since I wanted to display the patterned paper.
The inside Basic White writing layer is 3 3/4″ x 5″.
This card was lots of fun to put together and I enjoyed putting these colors together. A nice Autumn combination!
So, cut a few cardstock layers, stamp and die cut some leaves, add a simple bow, and create something heartfelt to celebrate the Fall Season.
Today is the last day to take advantage of this amazing “Join” promotion.
Those who join can choose one of the following options for their Starter Kit:
Option 1: Get 35% OFF the normal cost of a Stampin’ Up! Starter Kit. Those who select this option will receive $125 worth of product for only $64.35 and FREE SHIPPING!
Option 2: Get 35% MORE product with their Starter Kit. Those who select this option will receive $168.75 worth of product for $99 and FREE SHIPPING
It gets better! Those who sign up for a Starter Kit during this offer will also be automatically registered for FREE* to our virtual OnStage event on November 11th. This is a $77 value.
For more details about joining Stampin’ Up!, click here. You can also click the “Join” tab in the top menu bar of this post.
Last Day!
OCTOBER MINI CUSTOMER CARD KIT
OCTOBER HOST CODE CFWTTJ6D
The Ocrober Mini Card Kit features “Autumn Leaves”. You will receive the Kits with a minimum product purchase of $35.00 from my online store using the Host Code CFWTTJ6D. Each Mini Kit includes:
The cut cardstock and patterned paper to complete both cards, sentiment layers, embellishments, envelopes, a printed and emailed PDF Tutorial. A video link will be emailed to you so you can complete these designs along with me at your leisure.
I always enjoyed creating a CAS card (Clean and Simple). A CAS design should have lots of white space, few layers, and little or no embellishments. There are no limits on how you can use your stamps, ink, paper, and dies to create a CAS project.
Here’s how I put mine together.
The Very Vanilla card base is 8 1/2″ x 5 1/2″, and scored at 4 1/4″ on the 8 1/2″ side.
The Very Vanilla card front layer is 4″ x 5 1/4″. I used one of the larger Stitched With Whimsy Dies to create a “stitched” outline on this layer.
The leaves are die cut from the Autumn Leaves Dies using the All About Autumn Designer Series Paper.
I stamped the sentiment with Copper Clay ink.
For a little shine, I scattered a few Gold Festive Pearls.
I added a strip of patterned paper to the bottom of the inside of the card, and stamped one of the leaf vein images from the Autumn Leaves stamp set.
A CAS card is quick and easy, and the simplicity of the design is always pretty.
So, find a great border die, add a few die cut images, a sentiment, pop the layer up on Dimensionals, and create a quick and easy CAS card.
My September Mini Card Kit features the One Horse Open Sleigh Designer Series Paper. You will receive the Kit with a minimum product purchase of $50.00 from my online store using the Host Code XWWPUMY7. Each Mini Kit includes:
The cut cardstock and patterned paper to complete both cards.
Sentiment layers so you can customize each design using sentiments you already have.
Embellishments and Dimensionals to complete the cards as I’ve designed them.
Envelopes.
A printed PDF Tutorial with photos and measurements.
A video link to make the cards along with me.
To receive your Kit, use the Host Code below when prompted during the ordering process.
I am Debbie Crowley and welcome to my blog. Here you'll find fun projects that are sure to inspire you. I hope you'll stop
by often and leave a comment or two. To contact me, you can email me at: expressivelydeb@gmail.com
Current Catalogs
What are you looking for?
The content of this blog is the sole responsibility of Debra Crowley, expressively deb.com, as an Independent Stampin' Up! Demonstrator. The use of and content of classes, services or products offered is not endorsed by Stampin' Up!