May 11, 2021 | Clean and Simple, Gallery, Note Cards, Quick & Easy, Thinking of You |

Happy Tuesday!
Isn’t today’s card pretty? I can’t think of another word to describe it. I’m not sure why. Is it the scalloped frames or the gingham Designer Series Paper? Is it the open lined floral art, or the pretty crinkled bow? Stampin’ Up! did all of that. I simply and quickly put it all together.

Let’s just imagine for a minute that it’s my coloring that makes this card so pretty. I did it with my Blends and felt like an artist! I followed the open lines in the image with the bullet side of the Blend and in a matter of seconds, my image looked like it was water colored. Can you see the little bit of ink splatter behind the flower? The Color & Contour stamp set has a “splatter” (as I call it) stamp. I inked the splatter stamp with Fresh Freesia ink and stamped off once to get a subtle look.
I die cut the smaller scalloped frame and saw there were slits cut into all sides. This Scalloped Contour Die was designed that way making it easy to add a sentiment banner, ribbon, twine or any other element. You can slide your element under or over the frame. I snapped a quick photo to show you how I added the ribbon.


By the way, the White Crinkled Seam Binding ribbon is soft and easy to work with. It’s a thin 1/4″ ribbon, which makes it a good alternative to twine. The gingham Designer Series Paper is from the Pansy Petals Designer Series Paper.
So, die cut a scalloped frame, add some gingham patterned paper and soft ribbon and create something “pretty”.
…the only limitation is your imagination.

For more details on the products I used today, you can click on the images below.
Click below to shop my online store at Stampin’ Up!

Apr 8, 2021 | Clean and Simple, Gallery, Note Cards, Pretty Packaging, Thinking of You |

Happy Thursday my stamping friends! Hope you’re having a great day!
As promised in yesterday’s post, I’m sharing my latest note card set. I make these sets to keep on hand and give as gifts. They make beautiful gifts. I’m featuring the Boho Indigo Product Medley and the matching Refill Kit. Both are retiring. The Refill Kit is discounted at 40% off, making the price $13.80. For that amount, you can put together quite a few note card sets.

My feature card above is clean and simple. The embossed cardstock in the Product Medley and Refill Kit is gorgeous. The pattern matches the pattern in the die cut DSP vase. The Boho Dies are part of the Product Medley.
Card 2 is also clean and simple. I featured this card a few posts ago. You can see the original post here. The Night of Navy and Garden Green die cuts are from the Product Medley as are the printed die cuts. The vases are die cut from the DSP and the sentiment tag is in both the Refill Kit and Product Medley.

Card 3 is a bit different. It’s clean and simple with no sentiment. It’s a card for any type of personal note. I embellished this one with some Linen Thread and a Gold Metallic Pearl. The Metallic Pearls are a staple in my craft room.

Card 4 is a little more traditional. I wanted to showcase the beautiful Designer Series Paper. The gold foil flowers are in the Product Medley and Refill Kit. The sentiment is part of the Product Medley stamp set. Actually, all of the DSP is beautiful.

And last but not least, Card 5 was posted yesterday. It makes a great addition to the cards in the set. Click here to see more of this card.

Here are all of the cards together.
And here is the gift packaging. I used an Acetate Box tied with the matching ribbon from the Product Medley. I don’t have to say much about Stampin’ Up! ribbon. It’s soft, easy to tie and beautiful. I punched a quick tag and added some DSP, one of the Layering Circle Dies and a sentiment from the Quite Curvy stamp set.

Now for the surprise I promised you. Click on the button below to download a FREE PDF Tutorial with all of the measurements for the cards featured in this set.

I hope you enjoyed my note card designs. You can click on the images below for more product details.


So, get out your cardstock, cut some layers, add pretty patterned paper, a few sentiment layers and create a note card gift for someone special.

Mar 14, 2021 | Clean and Simple, Gallery, Note Cards, The Paper Players |
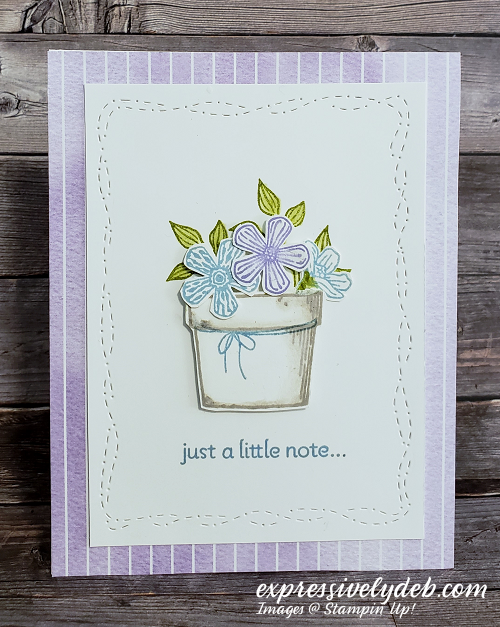
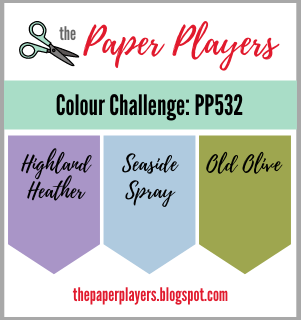
It’s Sunday and time for another Paper Players challenge. This is Joanne’s week with a soft and subtle color challenge for us. She chose Highland Heather, Seaside Spray and Old Olive.
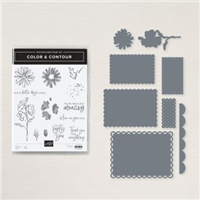
Any time is a perfect time for flowers! The Basket of Bloom stamp set has pretty flower blooms, a few leaf stems, a flower pot, basket and vase. These images can take your flower arranging imagination from simple to stunning and anywhere in between.
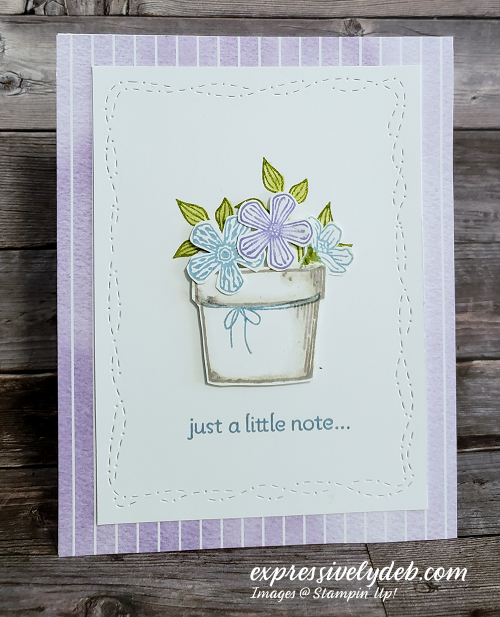
When I saw Joanne’s colors for this week’s Challenge, I thought of the Hydrangea Hill Designer Series Paper. All three colors are together in this paper pack. Below is how today’s project came together.
- Starting with an A-2 Basic White card base, I added a layer of the Highland Heather and Basic White striped pattern paper.
- On Basic White cardstock, I stamped the flower pot image with Sahara Sand ink and lightly shaded the edges of the pot with my Blender Pen.
- I stamped the twine bow image to the flower pot with Seaside Spray ink.
- Next, I stamped the flower blooms on Basic White cardstock.
- I fussy cut the pot and flower blooms.
- I cut a Basic White card layer 3 1/2″ x 4 3/4″ and added some texture with one of the Stitched With Whimsy dies.
- In the center of the white layer, I stamped the leaf stems with Old Olive ink.
- With a few Stampin’ Dimensionals, I attached the flower pot and arranged my flower blooms.
- The Seaside Spray stamped sentiment is from the Lots of Heart stamp set.
- The Stitched With Whimsy frame did the embellishing for me.
So, match up your colors to Joanne’s Challenge and create something subtle to link up with us at the Paper Players.
…the only limitation is your imagination!

For more inspiration, pop over to the rest of the Design Team’s blogs.
The Paper Players Design Team
For more details on the products I used in my project today, you can click on the images below.

Feb 26, 2021 | Gallery, Note Cards, Quick & Easy, Thinking of You |
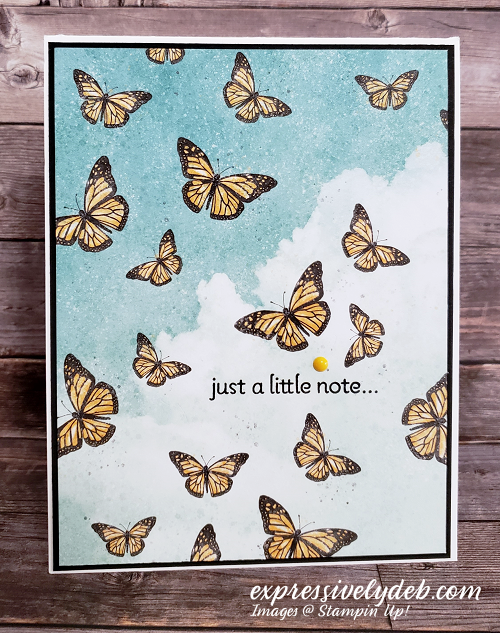
Hello Friday! Here’s a quick and easy Sneak Peek at the new Butterfly Brilliance Collection that will be available on March 2nd.
As I’ve mentioned before, I very much enjoy creating cards with patterned paper. Today’s post is no exception. I spent a little time going through the patterns in the Butterfly Bijou Designer Series Paper and couldn’t resist putting together a quick card with this design. This is another one of those cards that came together in literally a few minutes.
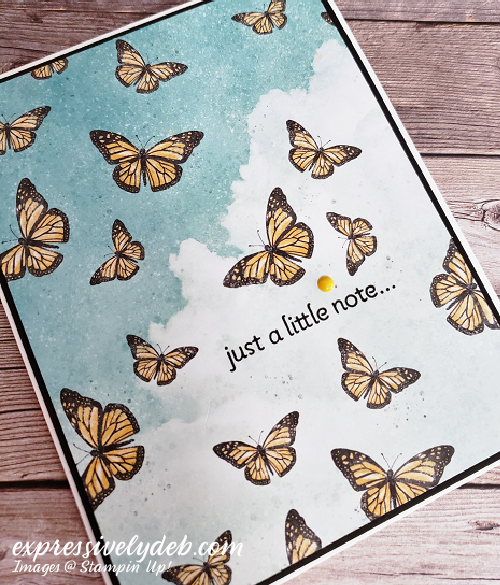
The Mango Melody and So Saffron butterflies are floating through clouds and a Bermuda Bay sky. There’s just enough white space to place a small sentiment. I was experimenting with a small sentiment layer, but thought stamping the sentiment directly onto the DSP would keep the flow of the floating butterflies. To me, the design is too pretty for a sentiment layer.
There’s quite a bit of speckled ink splatter in this paper which gives a good amount of texture to the pattern.
Below is a card from an earlier post featuring the Butterfly Brilliance Bundle. You can click on the image below to view that post.

So, pull out a pack of patterned paper, find that one special design, add it to a few layers and create something quick and easy.
…the only limitation is your imagination!
CLICK TO SHOP MY ONLINE STORE AT STAMPIN’ UP!
Feb 25, 2021 | Gallery, Note Cards, Thinking of You |

Hello there! Happy Thursday!
Today’s post is about stamps, ink and patterned paper. I enjoy creating cards with patterned paper and I think most of you do, as well. The first Sale-A-Braion of 2021 is ending on Sunday. I’m taking this opportunity to share as much of the beautiful Designer Series Paper from Sale-A-Bration as possible.
I designed this card with a pattern from the Berry Delightful Designer Series Paper. This patterned paper is a simple, casual and fun plaid in Poppy Parade and Basic White. I chose Pacific Point as an accent color. The Corals and Blues mix well together and give this design a little interest.

- On a Basic White A-2 top fold card base, I added layers of Poppy Parade cardstock and patterned paper.
- I die cut a stitched rectangle from Basic White cardstock.
- This is the layer for your sentiment and flower cluster.
- The fussy cut, Soft Suede stamped flower cluster is from the Sweet Strawberry stamp set.
- The stamped flowers are covered with punched flowers from the patterned paper using the Strawberry Builder Punch. This punch perfectly cuts the flowers. I attached the punched flowers over the stamped flowers with Mini Dimensionals.
- The sentiment, from the Sweet Strawberry stamp set, is stamped with Pacific Point ink.

Here’s a tip for you:
- I colored the white Baker’s Twine bow with the Light Night of Navy Stampin’ Blend.
- Unravel your anticipated amount of White Baker’s Twine onto a plain sheet of copy paper or any other scrap paper you have on hand.
- Hold one end of the twine and lightly run the brush tip of the Blend over the twine slightly rolling the twine back and forth.
- You’ll get the feel of the ink application. Once you do, your coloring will be quick.
- Continue shading the twine until you have your desired shade.
I hope you enjoyed today’s card.
So, find a casual piece of patterned paper, add it to a few layers, attach a stitched rectangle, color some Baker’s Twine and create a Sweet Strawberry hello!
…the only limitation is your imagination!

For more details on the supplies I used today, click on the images below.