Jan 1, 2021 | Birthday, Gallery, Note Cards, Spring, Thinking of You |

Happy New Year! I wish you all lots of joy, good health and much love in 2021.
Here’s my Sneak Peek for the Garden Wishes Bundle. When I was thinking about what to do for my first post of 2021, many ideas came to mind. I kept going back to the Garden Wishes Bundle. The Bundle has been available for a while now and I’ve seen many versions of it. It’s part of the Dandy Garden Suite featured in the upcoming January-June 2021 Mini Catalog scheduled to go live on January 5th.
One of the perks I receive by being a Stampin’ Up! Demonstrator is that I get to see, touch and feel all of the new products before they’re available to the customer. This is probably the most exciting perk since excitement is generated early for the new and I look forward to that bit of a refresh. I’m sure you do, as well. We all need a refresh from time to time.
I’ve been stamping so many holiday cards and putting together holiday projects that stamping and coloring a few wisps of flowers blowing in the breeze is refreshing. Along with all of this, I love Misty Moonlight and here I go again with the blue and yellow color combination. I am going to work on “refreshing” that fact….maybe!

So, on to my card. Actually, my inspiration for this design was that little bee. I saw the bee stamp in the stamp set and had to use it somewhere. I’m not sure if you know it but the name “Debbie” means bee and I’ve always loved bumblebees. When you think about it, they are smart and industrious. Okay, enough about that. (smile)
This card design grew from that little bee. I love when that happens. It’s proof that inspiration can come from just about anyplace. I stamped all of the images except for the bee in Smoky Slate ink and used my Blends to color the images. A few layers later, my card was complete. There’s no sentiment today. This card will be one of my personal handwritten notes.
So, find that one little thing that you love, add a few colored images and a layer or two and create something simple and soothing.
…the only limitation is your imagination!


Sep 11, 2020 | Christmas, Gallery, Note Cards, Pretty Packaging |

In yesterday’s post, I featured a clean and simple note card set using products from the Heartwarming Hugs Suite. I use these note cards to give a little thank you to special friends during the holiday season. Here’s the link to yesterday’s post.

I thought I would share my gift wrapping design for this year’s gift. All the patterned paper is from the Heartwarming Hugs Suite. Matching up the patterns was so easy with the color coordination in the Heartwarming Hugs Designer Series Paper.
The color palette is a classic Christmas combination as are the patterns: stripes, polka dots, gingham, plaid and smaller subtle combinations of shapes all mixed together in Mossy Meadow, Pear Pizzazz, Real Red and Whisper White.

Below is the “how to” for the note card decorated gift box.
- Start with a Whisper White Mini Pizza Box (p.152 in the Annual Catalog);
- Add a 3 1/4″ square of patterned paper to the top inside flap;
- The Real Red belly band is 10″ by 2 1/4″.
- The rosette base is 12″ by 1 3/4″. I punched one 12″ side with a linear scalloped punch I had in my stash. Actually you can use a scalloped edgelit or framelit if you want the scalloped edge. Score each scallop or if you don’t have a scalloped edge, score the rosette base every 1/2″.
- Fan fold the rosette base on each score line. (I use my Bone Folder to burnish the edges for a clean fold line);
- Attach the ends together. I used green glue (Multipurpose Liquid Glue – p. 162 in the Annual Catalog) because I always do, but you can use the Stampin’ Seal which will also securely bond your edges.
- With my 1 1/2″ circle punch, I punched two circles from Pear Pizzazz card stock
- On a Silicone Craft Sheet, I flattened the rosette, held it in place and ran a generous amount of green glue around the center.
- Attach one circle and hold it in place for a few seconds.
- Repeat the glue application on the other side of the rosette and attach the second cropped circle. Hold that in place for a few seconds.
- I used the Lovely Labels Pick A Punch to create the “celebrate” sentiment banner, added a few cropped trees from the Warm Hugs Bundle (I just love those little trees), and a little red heart.
Please comment with any questions you might have, I’d be happy to help.

So, grab your beautiful note cards, make a belly band and a rosette, add your sentiment, a few embellishments and give a handmade gratitude gift!
The only limitation is your imagination!

CLICK HERE TO SHOP MY ONLINE STORE AT STAMPIN’ UP!

Sep 10, 2020 | Christmas, Gallery, Note Cards |
The holiday season will soon be here and I’m starting to work on my little “gratitude” gifts, as I call them. 3″ X 3″ note card sets are always fun to make and more fun to give. This four card note card set was inspired by Stampin’ Up!’s Heartwarming Hugs Suite. This Suite made it to my “serious” ordering phase almost as quickly as the Plaid Tidings DSP.
These clean and simple note cards were so easy to put together and so much fun to design. I do love to play with patterns and my two favorite patterns from the Heartwarming Hugs Designer Series Paper are featured here.
The colors featured are Real Red, Pear Pizzazz and Mossy Meadow. I’ve written in past posts that when in doubt, add a little yellow. Yellow happens to be a great neutral. My cards needed just a little something extra, so I went through my embellishment stash and found Crushed Curry dots and stars. The little dots and stars gave these cards that little something extra, and that’s not mentioning the scalloped edge envelope liner. Don’t you agree?
Below is the supply list for today’s project:
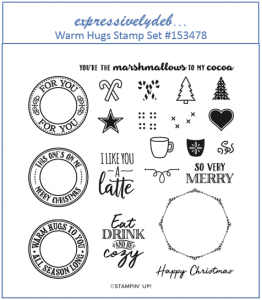
- Stamp Sets – Warm Hugs and Wrapped in Christmas stamp sets;
- Card stock – Whisper White, Real Red, Pear Pizzazz, Mossy Meadow and Heartwarming Hugs Designer Series Paper;
- Ink – Real Red, Mossy Meadow
- 3″ X 3″ Whisper White Envelopes (Annual Catalog, p.153)
- Tools – Envelopes Dies, Warm Wraps Dies
So, grab your holiday patterned paper, match a few patterns, add some fun holiday elements and a star or two and create your custom “gratitude” gifts!
The only limitation is your imagination!

SHOP MY ONLINE STORE AT STAMPIN’ UP!


Aug 8, 2018 | Blog Hops, Note Cards |

Welcome to the Pals August, 2018 Blog Hop. We love to cut it out so this month our creations feature our favorite “cuts” using punches, Framelits and Thinlits from the current Stampin’ Up! catalog.
You may be starting the hop here or coming from a previous Pal’s blog. Either way, you’ve come to the right place. You’ll find the the full line-up below to help you move, or “hop” along from Pal to Pal.

My “Cut It Out” project is all about Thinlits and Framelits. How did we ever do without them?
When I got my new Annual Catalog, I put the Botanical Tags Thinlits on top of my Wish List. I simply loved the beautiful tags pictured in the Catty. When I started working on today’s project, I had to use them in some way, but I knew I did’t want a tag. I enjoy creating 3 X 3 notes, so I knew little note cards would be it.
I just received the new Holiday Catalog along with my new order full of some of the most beautiful stamp sets and patterned paper I’ve seen in a while so I was, of course, confused… do I go with my pretty Framelits or do I venture into a Sneak Peek project for Fall? I thought it best to follow the rules and Framelits it was, but with a few of my favorite Fall colors: Rich Razzleberry, Night of Navy, Mossy Meadow and Crushed Curry. Once all my decisions were made (and believe me, it wasn’t easy), my Big Shot went into high gear and my four note cards were completed in just a few minutes.
I didn’t think a sentiment was necessary because the cropped flower is so beautifully detailed. Of course, I had to add a little bling and was leaning toward a few sequins. My friend, Rory, saw my cards on my stamping table and suggested I use a few of the Clear Rhinestone Basic Jewels… she was right. All each flower needed was just a little sparkle. The flower and little rhinestone sit perfectly on a circle Framelit from the Stitched Shapes Framelits Dies.
These little notes can be used for just about any occasion tucked into a gift bag, or package them into a decorated Mini Pizza Box and give them as a gift. They fit perfectly into Stampin’ Up!’s 3″ X 3″ Whisper White Envelopes.
So, grab your favorite Thinlit, cut it out on bold card stock add a little bling and create something simple and pretty!


Now it’s time to use the Blog Hop Line-up below to see what the rest of my Pals have created to inspire you.. Don’t forget to show us some love by commenting on our creations.
Mark your calendars for September 12, 2018 for the next Pals Blog Hop. We’ll inspire you with projects for the upcoming holidays and seasons including Autumn, Winter, Halloween, Thanksgiving or Christmas. . Don’t miss the fun.
- Mary Fish at Stampin’ Pretty
- Sara Stuart at Sentiments by Sara
- Jennifer Michalski at Stamping Serenity
- Lisa Ann Bernard at Queen B Creations
- Terri George at Stamp Me Crafty
- Peggy Noe at Pretty Paper Cards
- Beth McCullough at Stamping Mom
- Jackie Beers at Blue Line Stamping
- Debbie Crowley at expressively deb…
- Karen Hallam at Karen’s Stamping Habit
- Denise at The Mountain Magpie
- Su Mohr at Aromas And Art
- Stesha Bloodhart at Stampin’ Hoot!
- Lori Pinto at LollyPop Paper and Ink
- Wendy Klein at Doggone Delightful Stampin’
- Rachael Shedeed at Bluebonnet Stampin
- Jeanie Stark at Just Stampin’
- Pamela Sadler at Stampin Pink Rose
- Lisa Milligan at Stamp Create Share
- Mary Hanson at Up North Stampin’

Oct 1, 2017 | Clean and Simple, Note Cards, Quick & Easy, Thinking of You |

Happy Sunday and Welcome October!
Here’s a sweet and simple note card that I put together in just a few minutes. A few strands from a piece of 5/8″ Burlap Ribbon is just the right amount of embellishment!

- The Whisper White Note Cards and Wood Words stamp set are 15% off starting today through October 10th. Take a look at the details below.
- The Wood Textures Designer Series Paper Stack, which coordinates with the Wood Words stamp set can be FREE with the purchase of three Designer Series Paper selections.
So, pick out a stamp set ON SALE, grab yourself a set of Note Cards ON SALE, stock up on your favorite Designer Series Paper, add a little Burlap Ribbon and create something sweet!

World Card Making Day has been an annual event for a very long time. The actual Day is always in the beginning of October and those of us who enjoy making hand made cards celebrate the creativity and personal connection hand made cards make between loved ones and friends. This year, the world celebrates the Day on Saturday, October 7th. I’m looking forward to meeting up with some old and new friends in Atlanta for the celebration… it’s always a fun day.
- To make it more exciting and fun for you to celebrate along with us, Stampin’ Up! is offering a fabulous new promotion that will last 10 days… from today through October 10th. With 15% off selected items, you can order a few “essentials” to celebrate your creativity your way! Click here for all the details.
- AND… To make it even more interesting…. Stampin’ Up! is also giving away one FREE Designer Series Paper selection if you purchase three.
- NOW, if you take advantage of the “World Card Making Day” sale and choose a stamp set or two, or three, purchase the Fast Fuse adhesive, (you will get two Fast Fuse refills FREE), and choose some Designer Series Paper to coordinate with your stamp sets, you’ll have the essentials to create your own beautiful cards.


