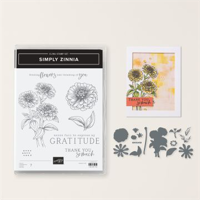
Here’s a preview of the Flowering Zinnia Suite. Wow! If you like bright, happy colors, this one’s for you. Zinnia’s are beautiful, hardy flowers that attract both bees and butterflies. We need them, right? The Simply Zinnia stamp and die Bundle focuses on gratitude and beautiful bold zinnias!
The Flowering Zinnias Designer Series Paper is, as we’ve come to expect, outstanding! The color palette lights up any project you create with it.
I thought the Z-Fold Fun Fold design would be a perfect canvas to showcase the Designer Series Paper. You can download the PDF Tutorial by clicking the blue button below.
I created my card using a Basic White cardstock card base. I wanted to show off the colors, and I think the white showcases them nicely. The focal point Zinnias are fussy cut directly from the Flowering Zinnias Designer Series Paper.
The “Z-Fold Fun Fold design is so easy to create. I think it’s the perfect Fun Fold for this amazing patterned paper.
So, pull out your Paper Trimmer, cut and score a simple card base, add beautiful patterned paper layers, a sweet sentiment, and create something to brighten someone’s day.
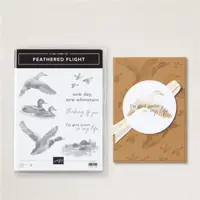
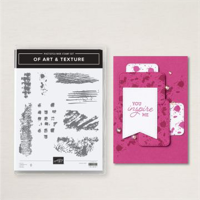
I think it’s time for a CAS card! CAS is an acronym for Clean And Simple. This means the design has lots of white space, few layers, and little or no embellishments.
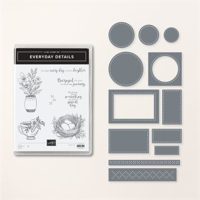
I usually focus on patterned paper and color, so I forget about creating a CAS design. The dies in the Everyday Details Bundle are perfect for simple texture. Background texture works well in a CAS design. Embossing folders also create beautiful background texture.
I channeled my inner artist :), and used Watercolor Pencils and Stampin’ Blends to add color to my robin’s nest. I colored the eggs with a Light Balmy Blue Blend, and then used the Color Lifter to get creative and remove some of the color.
So, let’s make a card!
Parts & Pieces
I cut a Thick Basic White cardstock card base 4 1/4″ x 11″ and scored it at 5 1/2″.
The Basic White cardstock card layer is 4″ x 5 1/4″.
I used the long die from the Everyday Details Dies to die cut a “textured” side panel on the layer.
I stamped the bird’s nst with Crumb Cake ink and used Watercolor Pencils to add a little color to it.
The robin’s eggs are shaded with my Light Balmy Blue Stampin’ Blend, and I used the Color Lifter to add a little interest.
The bird’s nest is die cut with the largest circle die in the Die Set.
I stamped the sentiment with Crumb Cake ink and die cut it, as well.
A few Iridescent Pasterl Gems add a little sparkle.
So, cut your white cardstock, add some texture on the side, stamp a peaceful image, and create a Clean and Simple card design.
The February cards are showcasing the Everyday Details Dies along with the Delightfuly Eclectic Designer Series Paper.
You will receive everything you need to put the cards together as I’ve designed them.
The kit will include the card bases, layers, die cuts, embellishments, sentiment layers, and envelopes.
I cannot send stamped images, but you will have a sentiment layer you can customize to stamps you already owm.
You will also receive a printed PDF Tutorial, along with a video link so you can put the cards together along with me.
You will automatically receive the kit with a minimum product purchase of $50.00 through my online store. When completing your purchase, you MUST use the Monthly Host Code that I provide in every blog post. (Feel free to reach out to me with any questions you may have).
If your order is more than $150.00, plese don’t use the Host Code. You will receive rewards directly from Stampin’ Up!, and you will also receive the mini kit from me.
I hope you were able to spend some time in your craft space this weekend. It was a busy weekend for me. I did make time to complete some projects I started, and now I have to schedule some organizational time in my space.
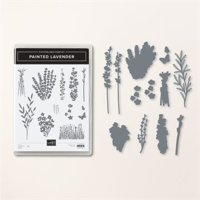
My card is a Paper Pumpkin alternative card. I used some of the supplies from the January Lovely Lavender Paper Pumpkin Kit, and added a few Perennial Postage die cut layers, and a sentiment from the Perennial Postage Stamp Set.
Reasons I’m A Paper Pumpkin Subscriber
I enjoy receiving this little “surprise” in my mail box each month. I see exactly what you see before I receive the Kit… a few snippets of the project designs and colors.
When I open the Kit, I enjoy creating one or two of the projects as designed, but then I usually create other projects using the supplies in the Kit. The Kit is that versatile.
I put together the tag in the photo above according to the Kit instructions.
I decided to go my own way when I sat down to make the cards from the Kit instructions.
There’s always a new stamp set, a new ink color, and some form of adhesive or embellishment in the Kit. What I don’t use on the projects gets added to my supplies to be used on something else.
It’s a monthly “refresh” for me.
So, let’s make a card!
Parts & Pieces
I cut a Basic White cardstock card base 5 1/2″ x 8 1/2″, and scored it at 4 1/4″ on the long side.
The Crumb Cake polka dot layer is one of the cards in the Paper Pumpkin Kit. I cut it in half and cut a layer 4″ x 5 1/4″.
Each of the patterned paper layers is die cut from card fronts in the Kit. I used the Perennial Postage Dies.
I stamped the white die cut layer with a stamp from the Kit and Lost Lagoon ink.
The Lost Lagoon leaves and the lavender stem are die cuts from the Kit.
I stamped the sentiment with Gorgeous Grape ink, fussy cut it, glued it to a piece of Gorgeous Grape cardstock, then fussy cut it again.
I adhered all of the die cut elements to the card front with glue.
I attached the Linen Thread bow with a glue dot and adhered the sentiment layer on top of it with Dimensionals.
You can get all of the details for Paper Pumnpkin by clicking here or scrolling down the “Shop With Me” tab on the Menu Bar at the top of my blog.
February Paper Pumpkin Kit
Click the image to subscribe to Paper Pumpkin
Sweet Springtime February Paper Pumpkin Kit – Celebrate Easter and Spring with adorable cards and treat boxes.
Subscription Deadline: February 10th
The Kit makes 9 projects – 3 each of 3 designs.
Projects include printed cards, coordinating envelopes, and gift boxes.
Also included are precut paper pieces, baker’s twine, and embellishments.
Coordinating colors: Petal Pink, Daffodil Delight, Granny Apple Green, Berry Burst, Crumb Cake, and an Early Espresso Stampin’ Spot.
So, get yourself a Paper Pumpkin Kit, follow the instructions, make a few cards, then let your creativity take over and make projects that are yours, alone. You’ll have everything you need to do it.
Refresh your papercrafting stash with new Online Exclusives. All of the products that are part of the Online Exclusives are always available in the online store while supplies last.
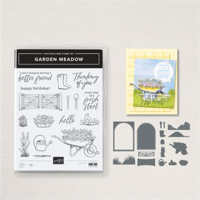
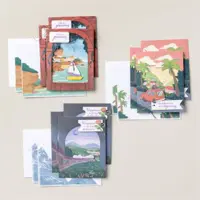
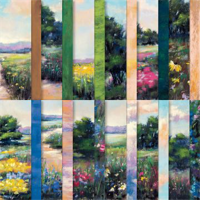
My card showcases the Garden Meadow Bundle and the Meandering Meadow Designer Series Paper. The Bundle features garden images and mixed font generic sentiments. The 6″ x 6″ Designer Series Paper illustrates beautiful watercolored garden scenes on one side and watercolor washed patterns on the other. The DSP can be used for just about any occasion.
Parts & Pieces
Start with a Crushed Curry cardstock card base cut 4 1/4″ x 11″ and scored at 5 1/2″.
Cut a Crushed Curry cardstock layer that measures 4″ x 5 1/4″. This is the layer you will die cut.
Cut a Basic White cardstock layer 4 1/8″ x 5 3/8″. This is the mat layer.
Cut the Designer Series Paper layer 3 1/2″ x 5″.
Stamp the sentiment with Mossy Meadow ink and die cut it with the coordinating die.
Attach the die cut layer over the Designer Series Paper layer using your favorite adhesive. I used liquid glue and added a thin line on the back of the arched open part of the frame and a thin line on the back of the outside of the layer.
I adhered the completed top layer to the Basic White layer and attached the layers to the front of the card base.
Attach the sentiment with Mini Dimensionals.
I stamped the inside of the card with one of the sentiments from the Garden Meadow stamp set. The little flower image at the bottom corner of the writing layer is stamped with Mossy Meadow ink and shaded with a Dark Daffodil Delight Stampin’ Blend.
This is a quick, easy and fun card to put together. The Designer Series Paper features floral meadow scenes in lots of colors. Simply match up some cardstock, add a sentiment, and create a pretty card to send a special birthday wish.
During the month of November, with a minimum product purchse of $50.00 from my online store, you will receive all of the supplies to crewate these two cards as I’ve designed them, along with a PDF Tutorial and a Video Tutorial so you can make the cards along with me.
You will need your favorite adhesive and sentiment stamp.
To receive this FREE Card Kit, you must use the Host Code above when placing your order.
If your order is $150.00 or more, please don’t use the Host Code. You will receive Stampin’ Rewards directly from Stampin’ Up!, and you will also receive the FREE Card Kit.
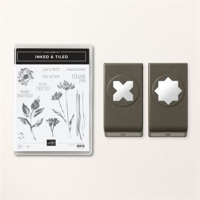
Today’s card is a CASE (Copy And Selectively Edit) from the Annual Catalog. The catalog card is a Slimline card. My card is an A-2 (4 1/4″ x 5 1/2″), and I changed the sentiment and sentiment focal point punched layers by using different patterns from the Inked Botanicals 6″x 6″ Designer Series Paper.
I was attracted to the Inked Botanicals Suite as soon as I saw it. I especially love the images and clean sentiment fonts in the Inked & Tiled Stamp Set. This Suite includes a stamp and punch Bundle. The punches caught my eye also. There are a lot of fun projects you can complete with these punches. Who doesn’t love a unique punch Bundle?
Today’s Card Pieces & Parts
You can download the PDF Tutorial below for more pictures and details on putting this card together.
I cut a Very Vanilla cardstock card base 5 1/2″ x 8 1/2″ and scored it at 4 1/4″ on the 8 1/2″ side.
The Crushed Curry patterned paper layer is 4 1/4″ x 5 1/2″. It covers the card front.
The Lost Lagoon patterned paper layer is 5 1/4″ x 2 1/2″.
The top Very Vanilla cardstock layer is 4 1/2″ x 3″.
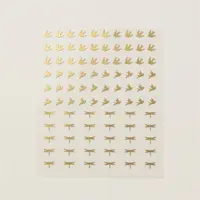
The stamped images are stamped off once using Lost Lagoon, Crushed Curry and Calypso Coral ink.
I punched two “star” shapes directly from the Designer Series Paper.
The sentiment, stamped with Lost Lagoon ink, is punched with the “star” shaped punch.
To download the Tutorial, click the button below.
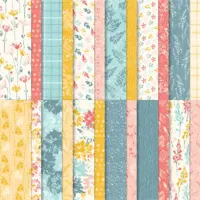
I love the colors in the Inked Boanicals Designer Series Paper. Although I’ve used three colors, Pool Party and Petal Pink (the lighter versions of Calypso Coral and Lost Lagoon), give a more subtle look to the Suite’s color palette.
Inked Botanicals Designer Series Paper
I just realized something about todsy’s colors… Lost Lagoon and Calypso Coral are “Complementary Colors” (they’re opposite on the Color Wheel), along with a “yellow” (Crushed Curry). Here’s the rule: When in doubt, go with a yellow”! It works!
OK, I promise, no more rules!
So, pull out that fabulous Product Suite, stamp some pretty botanical images, add a layered sentiment cluster and a beautiful ribbon, and create something to say “hello” to a treasured friend!
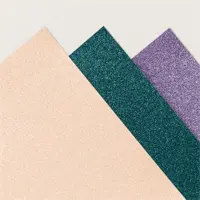
From now through May 16th, with a minimum product purchase of $50.00 (before shipping and tax), you will receive a FREE pack of the Tinsel Gems Four Pack. You must use the Host Code below. You will also receive your Creative Coins for each $50 order increment before shipping and tax.
Tinsel Gems Four Pack
May, 2023 HOST CODE IS QCYTPDXD
If your order is under $150.00, please use the Host Code above when prompted. You will receive Rewards from me (for oreders of $50.00 or more before shipping and tax), along with your gift from me featured this month. If your order is over $150.00 (before shipping and tax), please do not use the Host Code. You will receive Stampin’ Rewards directly from Stampin’ Up!. You will also receive Creative Coins and the featured FREE gift from me. You can get all of my Customer Rewards Program details by clicking here.
I am Debbie Crowley and welcome to my blog. Here you'll find fun projects that are sure to inspire you. I hope you'll stop
by often and leave a comment or two. To contact me, you can email me at: expressivelydeb@gmail.com
Current Catalogs
What are you looking for?
The content of this blog is the sole responsibility of Debra Crowley, expressively deb.com, as an Independent Stampin' Up! Demonstrator. The use of and content of classes, services or products offered is not endorsed by Stampin' Up!