This month, the theme is the new 2024-2026 In Colors. We hope to inspire you with our creations today! You will find the lineup at the end of my post to help you “hop” along from Pal to Pal.
Here’s a Clean and Simple In Color Sampler that is quick and easy to put together. A Clean And Simple (CAS) card has lots of white space, few layers, and little or no embellishments. The design is versatile. You can reverse the squares and circles, add a different die cut element, embellish differently, and customize your sentiment.
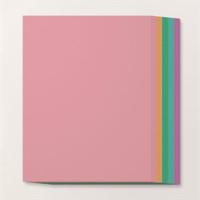
My card showcases three of the five new In Colors: Peach Pie, Petunia Pop, and Summer Splash. I enjoy combining these three. They’re crisp, clean and will give any project a fun pop of color.
Below are the five new 2024-2026 In Colors.
So, let’s make a card!
Parts & Pieces
Cut a Thick Basic White cardstock card base 11″ x 4 1/4″, and score at 5 1/2″ on the 11″ side.
I cut a Basic White cardstock layer 3 1/2″ x 5″.
Each of the cardstock squares are 1 3/4″.
I die cut three cardstock circles using the Everyday Details Dies. The circle is about 1 7/8″ in diameter.
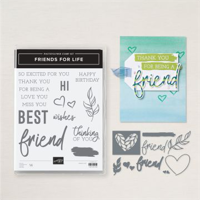
The Basic White die cut decorative elemtns are from the Friends For Life Dies.
Put It All Together
Attach the cardstock squares to the back side of the Basic White layer as shown.
The Summer Splash layer is centered on the back of the right side.
The bottom of the Petunia Pop square is about 1/2″ from the bottom of the layer.
The top of the Peach Pie square is about 1/2″ from the top of the layer.
Stamp your sentiment.
I attached the circles with Dimensionals.
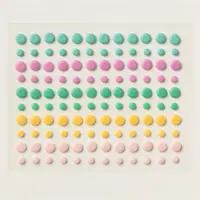
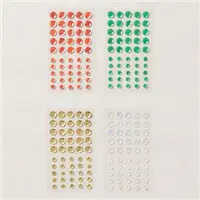
I embellished with the coordinating 2024-2026 In Color Resin Dots.
I stamped the inside and added a little stamped and die cut heart.
So, I hope you enjoy my In Color circles and squares sampler as much as I enjoyed putting it together. Have fun with this clean and simple design. Try your favorite colors, and add a die cut element.
Most importantly, have fun creating your design.
… the only limitation is your imagination!
There’s more inspiration to show you, so use the lineup below to visit the rest of the Design Team. Please mark your calendars for our next blog hop in July, when our theme will be Our Favorites in the New Catalog.
It’s time for a new Customer Card Kit. The June, 2024 Monthly Customer Card Kit celebrates Country Flowers and Country Lace. The Card Kits feature a Fun Fold and an easy layered card design.
Below are additional Kit details.
You will receive everything you need to put the cards together as I’ve designed them.
The kit will include the card bases, layers, die cuts, embellishments, sentiment layers, and envelopes.
I cannot send stamped images, but you will have a sentiment layer you can customize to a stamp you already own, or you can purchase the Country Flowers Bundle.
You will also receive a printed PDF Tutorial, along with a video link so you can put the cards together along with me.
You will automatically receive this kit with a minimum product purchase of $50.00 through my online store.
This card kit will be available through June 30th.
Bundle Savings Are Even Better
Do you love Bundles? I do. It’s rare that I purchase a stamp set without the dies, or dies without the stamp set. Aside from that, there’s ALWAYS a 10% discount on Bundles. Starting today, Wednesday, June 5th, Stampin’ Up! is dicounting Bundles an additional 10%. If there’s a Bundle you’ve had your eyes on, you can save more from June 5th through June 30th with the additional discount.
Even Better! As much as I love Bundles, you absolutely have to have a cutting machine. If you don’t have one, think about investing in one during the month of June. From today, June 5th through June 30th, the Stampin’ Cut And Emboss Machine and the Mini Stampin’ Cut And Emboss Machine will be discounted 10%.
I’m sure you’ve heeard me say that I love my “Mini”. I do! Its smaller size makes it easy for me to keep it on my work surface when I’m making a card or project. The dies run through the machine smoothly and it cuts evenly.
This month, the theme is See How My Garden Grows. We hope to inspire you with our creations today! You will find the lineup at the end of my post to help you “hop” along from Pal to Pal.
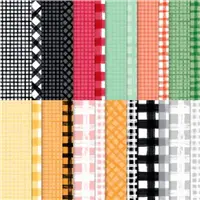
My card is also a Sneak Peek showcasing the Flowers of Beauty Bundle and the Unbounded Beauty Designer Series Paper. Along with these amazing new products, I’m featuring three of the new 2024-2026 In Colors – Summer Splash, Petunia Pop, and Pretty In Pink. As it usually does, my inspiration came from the patterned paper. These colors are beautiful together.
So, let’s make a card!
Parts & Pieces
For those who don’t know, my card design is a Step Fun Fold. It’s been around for a while, and there are many versions of it. It’s actually easier than you think.
I cut a Petunia Pop cardstock card base 5 1/2″ x 8 1/2″.
On the 5 1/2″ side, place the cardstock from right to left on the Paper Trimmer up to the 1 1/4″ mark.
Lift the arm and move the cutting blade to the 1″ mark (on the side ruler), cut down to the 4 1/4″ mark on the side ruler.
Move the cardstock to the 4 1/4″ mark and repeat the instruction line above.
Rotate the cardstock to the long side making sure the larger panel is on the right.
Move the cardstock to the 1″ mark on the top ruler.
With the scoring blade, score from the top down to the 1 1/4″ mark on the side ruler. Lift the scoring blade. Move the blade to the 4 1/4″ mark and score to the bottom.
Slide the cardstock to the 2″ mark on the top ruler and repeat the instruction line above.
Slide the cardstock to the 4 1/4″ mark on the top ruler.
Life the scoring blade and bring it down to the 1 1/4″ mark on the side ruler. Score from the 1 1/4″ mark to the 4 1/4″ mark on the side ruler.
Slide the cardstock over to the 5 1/4″ mark on the top ruler.
Score from the top down to the 1 1/4″ mark on the side ruler.
Lift the scoring blade, go to the 4 1/4″ mark on the side ruler and score to the bottom of the cardstock.
Fold the card base as shown.
Cut And Adhere the layers
Cut two Basic White mat layers 1 1/8″ x 3 1/8″. These are for the side front panels.
Cut one Basic White mat layer 7/8″ x 5 3/8″. This is for the bottom of the card front.
Cut one Basic White mat layer 2 7/8″ x 3 1/8″. This is for the center front panel.
Cut two patterned paper layers 1″ x 3″ (side front panels).
Cut one patterned paper layer 3/4″ x 5 1/4″ (bottom layer).
Cut one patterned paper layer 2 3/4″ x 3″ (center front panel).
Adhere the layers as shown. Fold and burnish on all of the score lines. The folds will form the step design.
Click the button below to download the PDF Tutorial for this project.
You can add a writing layer to the inside. I used Basic White cardstock cut 3 1/8″ x 5 3/8″.
So, find your special paper trimmer, make a cut, score, lift, and score again, and create a fun Step Ful Fold design you can send to someone special.
… the only limitation is your imagination!
More inspiration awaits. Use the lineup below to visit the rest of the Design Team. Please mark your calendars for our next blog hop in May, when our theme will be Fun Family Occasions.
You will receive everything you need to put the cards together as I’ve designed them.
The kit will include the card bases, layers, die cuts, embellishments, sentiment layers, and envelopes.
I cannot send stamped images, but you will have a sentiment layer you can customize to a stamp you already own, or you can purchase the Bright Skies Bundle.
You will also receive a printed PDF Tutorial, along with a video link so you can put the cards together along with me.
You will automatically receive this kit with a minimum product purchase of $50.00 through my online store.
This card kit will be available through April 30th.
This month, the theme is “It’s All About the Kids.” We hope that you will be inspired by the creations the Pals are sharing with you! You will find the lineup at the end of my post to help you “hop” along from Pal to Pal.
My fun candy filled Easter Basket reminds me of the times when I made baskets for my kids (limited on the chocolate, of course).
I was inspired by a photo I saw on Etsy. I foollowed the Seller to You Tube (Septeria18) and saw how quick and easy these little baskets were to make. They were made with patterned paper. I thought it was adorable, so I deciced to create my cardstock and patterned paper version to share with you all.
You can create this little basket along with me. Click the button below for the Video Tutorial.
Today’s Parts & Pieces
You can click the blue buttom below to download a PDF Tutorial.
I cut a 6″ x 6″ piece of Lemon Lolly cardstock.
I scored it at 2″ and 4″ vertically, then rotated the piece once and scored it horizontally at 2″ and 4″.
The score lines look like a tic-tac-toe board. (Nine 2″ squares).
I adhered 1 7/8″ patterned paper squares to both sides of each of the cardstock squares, except for the middle square. You will need a total of 16 1 7/8″ squares.
If you choose to use patterned paper instead of cardstock, all you have to do is score and assemble. I used cardstock to make the basket stronger.
Easy Assembly
Place the scored piece in front of you and cut the first vertical score line at the bottom up to the first horizontal score line.
Cut the second vertical score line up to the first horizontal score line.
Rotate the piece twice and cut in the same sequence as above.
The center square is the bottom of the basket.
Burnish all of the score lines with your bone folder.
Attach all of the patterned paper squares with glue. See photo below.
I rounded the corners of the top and bottom edges of both the cardstock and the patterned paper.
Fold both sides up toward the center.
Place glue on the bottom left corner of the right square, and the bottom right corner of the left square.
Grab both the right and left bottom squares and overlap them pushing the center flap in toward the center. Hold in place to adhere the glue. See below.
Follow the same procedure on the opposite side.
Cut a Lemon Lolly cardstock strip 1/2″ x 6″.
Cut a DSP strip 3/8″ x 6″. Glue this strip to the top of the cardstock strip.
Attach the strip to the inside of the center of the basket on both sides as shown below.
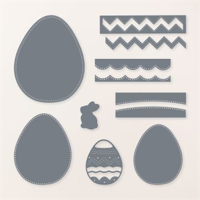
Decorate the front as you wish. I used die cut eggs from the Excellent Eggs Dies.
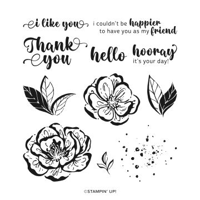
The stamped and fussy cut Lost Lagoon sentiment and flower are from the Bright Skies Stamp Set.
Fill with candy.
So, cut a cardstock square, create a 2″ scored tic-tac-toe board, add fun patterned paper, adhere the sides, attach a handle, and fill with your favorite candy. The kids will love it.
It’s all about the kids!
More inspiration awaits, so use the lineup below to visit the rest of the Design Team. Then, please mark your calendars for our next blog hop next month, when our theme will be “See How My Garden Grows.”
This month, the theme is “Love Is In The Air.” We hope you will be inspired by the creations the Pals are sharing with you! You will find the lineup at the end of my post to help you “hop” along from Pal to Pal.
Happy Valentine’s Day, and without a douvt, love is in the air.
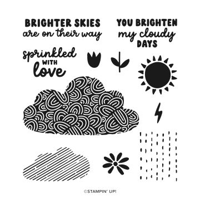
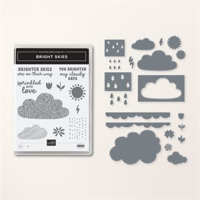
I thought it would be fun to use the Bright Skies Bundle to sprinkle some love. It’s snowing here in New Jersey as I’m writing this post, and it’s beautiful to watch. What comes to mind is this is a part of nature’s love that gives us the pretty flowers and blooming trees in the Spring!
So, let’s make a card!
Parts & Pieces
As you can see, my die cutting machine was movin’ and shakin’. The die cutting was quick. I lined up the dies using small scraps of cardstock. Most were done in one sweep.
I cut the Coastal Cabana cardstock card base 8 1/2″ x 5 1/2″, and scored it at 4 1/4″ on the long side.
The Basic White die cut large cloud is my first “layer”. I attached it to the center of the card front.
The patterned paper die cut cloud was next, followed by the Daffodil Delight sun.
I stamped the sentiment with Berry Burst ink onto a small die cut white cloud, and attached it with Dimensionals.
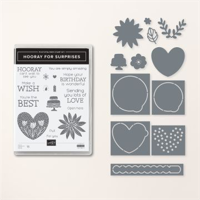
The Berry Burst stamped and die cut heart (from the Hooray For Surprises Bundle) is also attached with Dimensionals.
The little flowers, rain drops, and hearts are all attached with liquid glue.
I used a few Rhinestone Basic Jewels for a little sparkle.
I stamped the inside of the card with a sentiment from the Irresistible Blooms stamp set, and added a patterned paper strip to the writing layer, along with a die cut flower.
So, die cut a few clouds, a bright sun, a few raindrops and hearts, add a little sparkle, and sprinkle love to someone special.
… the only limitation is your imagination!
More inspiration awaits, so use the lineup below to visit the rest of the Design Team. Then, please mark your calendars for our blog hop next month. Our theme will be “It’s All About The Kids.”
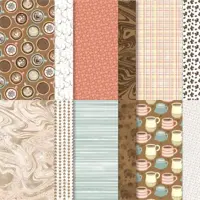
The February cards are showcasing the Everyday Details Dies along with the Delightfuly Eclectic Designer Series Paper.
You will receive everything you need to put the cards together as I’ve designed them.
The kit will include the card bases, layers, die cuts, embellishments, sentiment layers, and envelopes.
I cannot send stamped images, but you will have a sentiment layer you can customize to a stamp you already owm.
You will also receive a printed PDF Tutorial, along with a video link so you can put the cards together along with me.
You will automatically receive the kit with a minimum product purchase of $50.00 through my online store. When completing your purchase, you MUST use the Monthly Host Code that I provide in every blog post. (Feel free to reach out to me with any questions you may have).
If your order is more than $150.00, plese don’t use the Host Code. You will receive rewards directly from Stampin’ Up!, and you will also receive the mini kit from me.
This month, the theme is Last Minute Gifts/Cards to inspire you with your holiday list. We really hope that you will enjoy all the amazing creations the Pals are sharing with you! As you hop from blog to blog, we would love for you to leave a comment. You will find the lineup at the end of my post to help you “hop” along from Pal to Pal.
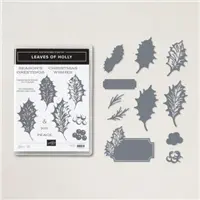
Here’s a super sweet gift card holder and Christmas ornament. Hang a few on your tree, your mantle, or attach one to a gift box or gift bag. I was inspired to come up with this when I saw a picture on Pinterest of an envelope filled with wire pine boughs and a little gift box. It was an adorable tree ornament. I knew I could do something like it with the Leaves of Holly Bundle.
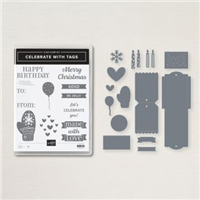
The design called for large elements. I thought the holly leaves were perfect. I die cut the gift card holder using the die from the Celebrate With Tags Bundle. Another large element for the envelope ornament.
Today’s Pieces And Parts
Lots of die cuts, a 6″ x 6″ piece of cardstock and some sparkle!
Get your cardstock and cutting machine ready to go.
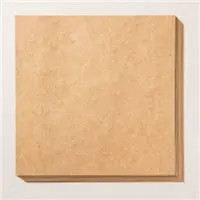
The envelope is a 6″ x 6″ pirce of Kraft cardstock. I used my Scoring Tool to create the “center” of the 6″ x 6″ piece.
I scored from corner to corner, diagonally, twice so I had a scored “X” on the square cardstock piece.
Once I had my “center”, I folded the bottom up to about 1/8″ past the center mark. (This is where the two diagonal scored lines crossed in the center of the square).
Then, I folded each side in to about 1/8″ past the center mark.
With my corner round punch, I punched the top point and the bottom flap point for a rounded edge.
I used a 1/4″ circle punch to punch a hole in the top.
With the borrom flap unfolded, I folded the two sides in toward the center.
I added a thin line of glue to the bottom portion of each side, then folded the bottom flap up to adhere to the glued sides.
The envelope is finished.
Decorate The Envelope
I die cut four large holly leavea and three white twigs and attached them to the top inside of the envelope as shown.
I assembled the gift card holder, die cut the sentiment layer, and stamped the sentiment with Real Red ink.
I crumpled a small amount of tisssue paper and put it down inside the decorated envelope. This helps the gift card holder stay in place.
I added a few Adhesive Basked Seasonal Sequins for a little sparkle.
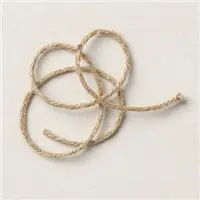
The “ornament hanger” is created with about 10″ of Silver Threaded Twine, folded in half and put through the front of the 1/4″ hole in the top of the envelope.
I glued the ends together to form a loop. The glue worked!!
I used the same Twine to make a bow for the gift card holder and attached it with glue dots.
I had so much fun putting this together, I made another one.
The complete PDF will be here on Friday morning. I’ll be sure to include plenty of pictures.
So, die cut a few large elements, attach them to the inside of your envelope, add your favorite gift card holder, and create something pretty to present to someone special.
… the only limitation is your imagination!
More inspiration awaits, so use the lineup below to visit the rest of the Design Team. The Pals are excited to show you what they’ve created! Then, please mark your calendars for our next blog hop on January 11th when our theme will be Sale-A-Bration Time. The design team will showcase projects made from Sale-A-Bration items.
I am Debbie Crowley and welcome to my blog. Here you'll find fun projects that are sure to inspire you. I hope you'll stop
by often and leave a comment or two. To contact me, you can email me at: expressivelydeb@gmail.com
Current Catalogs
What are you looking for?
The content of this blog is the sole responsibility of Debra Crowley, expressively deb.com, as an Independent Stampin' Up! Demonstrator. The use of and content of classes, services or products offered is not endorsed by Stampin' Up!