Here’s some weekend inspiration for you. As I mentioned a few posts ago, this is the time of year I go through my stamp sets and Bundles, and mix and match. I usually find somehting interesting to put together. It’s also the time of year I start to work on my personal holiday cards and tags. It’s something I always look forward to.
Inspired by the Celebrate With Tags Bundle, specifically the Celebrations Tag Dies, I created what I’m calling “elegant tags” and a matching gift box.
It was the snowflake die in the Celebrations Tag Dies that caught my eye. This tag design evolved from that little snowflake.
Today’s Project pieces and parts
The little gift box holds six tags comfortably. I include two of each color design in mine.
I die cut the tag with the tag die and Very Vanilla cardstock.
The snowflake stamp is from the Christmas Lights stamp set.
The pine bough is a stamp from the Christmas Banners stamp set.
The snowflake die is from the Celebrations Tag Dies and the pretty bow die is from the Cottage Wreath Dies.
I die cut the sentiment label and stamped the sentiment using a stamp and die from the Brightest Glow Bundle.
I stamped the snowflakes and pine bough off once using Cherry Cobbler and Mossy Meadow ink, then adhered the red glimmer die cuts.
The tag with the gold glimmer die cuts is stamped with Crumb Cake ink and the tag with the green glimmer die cuts is stamped with Soft Succulent ink.
The quick and easy gift box
I put together a quick PDF Project Sheet you can download and print. It includes the gift box dimensions.
Click the button below to download the PDF Project Sheet.
You can also watch the Video Tutorial belopw to see how I put this little “gratitude gift” together. You can also click here for the video tutorial.
So, create a few tags and a pretty gift box, add a belly band, and give a handmade gift of gratitude to someone special.
We finally got a glimpse of the sun here in New Jersey yesterday. It’s been unusually hot, but I enjoy seeing the sun and blue skies. I hope you have some outdoor weekend plans and can spend some time in your craft room.
In yesterday’s post, I gave you the directions for the matching clip board to today’s pocket notebook. Today, as promised, I have a PDF tutorial for this adorable project. You can download the tutorial at the end of this post.
Each month, my Stampin’ Up! Team and I get together to talk about the latest and greatest over at Stampin’ Up! and we each create a project to share. I’m a card maker at heart but the ladies are testing my creative abilities with more and more 3-D projects. I’ve been enjoying them and hope to mix it up a little more for you. I think this little pocket notebook is so much fun to create and share. Alone, or matched with the clip board, it makes a pretty little gift.
I’m listing the supplies I used below and they will also be listed in the tutorial. If you have any questions at all, feel free to reach out to me.
Here’s What I Used:
Basic Black, Basic White, Polished Pink, Bermuda Bay and So Saffron Cardstock;
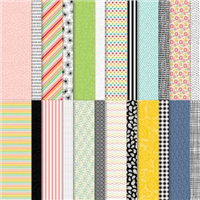
Pattern Party Designer Series Paper (Annual Catalog);
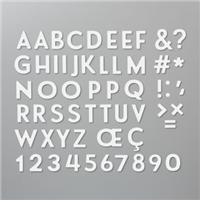
Playful Alphabet Dies;
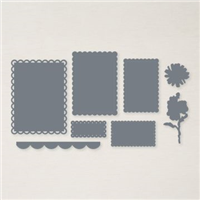
Scalloped Contours Dies;
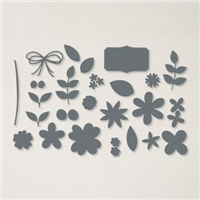
Pierced Blooms Dies;
Multipurpose Glue and Tear & Tape Adhesive;
Small lined note pads purchased at Dollar Tree. They come 5 to a pack and measure 3 1/2″ x 5″.
Mini Ballpoint Pens purchased at Amazon. They come 48 to a pack and are in assorted colors with blue ink. The pens measure 3 1/4″ in length.
The finished notebook size is 4″ X 5 1/4″. This is a good size to slip into your bag.
Click on the button below for a complete PDF tutorial with photos and directions.
So, get yourself some note pads and small pens, pick a favorite Designer Series Paper, add a few blooms and create something handy to give or keep for yourself.
My Team and I had our monthly meet up and once again, shared projects. Georgia came up with both of these ideas and we decided to get together to create a set. Today, I’m featuring the mini clip board. The recipe is below.
The mini clip board can hang on either your bulletin board or refrigerator. It’s within reach when you need it. I thought it would be a great little gift or stocking stuffer. Tuck it into a cellophane bag, tie it up with a pretty ribbon and add a custom tag. This project is quick and easy.
Check back tomorrow for the note book cover “how to”.
Supplies and where to get them:
Chip board. I purchased the chip board at Amazon. It’s medium weight and you can cut it with your paper trimmer.
Mini note pads. I purchased these at Dollar Tree. They come 5 to a pack.
1 1/4″ document clips.
Clear barrel pens.
Magnet strips
A lollipop stick or skewer.
Pattern Party Designer Series Paper (we used the buffalo check pattern).
Detailed Trio Punch
Here’s the “how to”:
Cut two pieces of chipboard 4 3/4″ x 6 1/2″.
Round the corners with the Detailed Trio Punch.
Glue them together with Multipurpose Glue.
The patterned paper is 4 5/8″ x 6 3/8″. Cut two and attach them to both the front and back of your chip board.
Cut a small patterned paper strip 1 1/2″ x 1 1/4″. This wraps around the binder clip.
As you’re wrapping the patterned paper strip over the binder clip, hold it in place, The Multipurpose Glue works great since drying time is minimal.
Remove the ink from the pen by twisting the pen top.
Cut a small patterned paper strip 1 1/4″ x 3 1/4″.
Tightly wrap this around a lollipop stick or skewer (something thin and round).
This helps you get the patterned paper into the pen barrel so you have a matching pen.
Attach a magnet strip to the back.
So, pop over to the dollar store, cut your favorite Designer Series Paper, add some pretty packaging and create a fun gift!
Today I have Free PDF downloads of each of the projects my Team created for our January stamping night. We meet once each month to share, stamp, create and eat pizza! It’s always a lot of laughs and, if I may say, we are a great group!
Below is Georgia’s project. We made 3 X 3 note cards with matching envelopes. The supplies came from a past Paper Pumpkin kit. I didn’t create a tutorial for this project. You can easily CASE this one with 3 x 3 notes, matching envelopes the new Lots of Heart Bundle.
Barbara shared a quick and easy Valentine with us in traditional Valentine’s Day colors. The Lots of Heart Bundle is also a favorite for this card.
Monica shared a Washi Tape card case/purse. This was a fun and unique project. The finished case measures 4″ x 6″ and can comfortably hold 4 note cards and envelopes. We completed the project with washi tape, but you can use your favorite Designer Series Paper for the case and create matching note cards for a great hand made gift.
Last, but certainly not least, Karen shared a Fun Fold design using the pretty Flower & Field Designer Series Paper. This is a FREE DSP with a $50.00 product purchase.
So, download the tutorials for all of these projects and create something beautiful.
Todays project is a “Brightly Gleaming” star created by Samantha Gerity. Samantha enjoys creating 3-D projects and shared her beautiful star ornament with me along with a tutorial that she provided.
This 3D star is so versatile. It can be a beautiful hand crafted holiday ornament, a package ornament, gift tag, or as the center of a holiday wreath. With a quick patterned paper change, this 3-D star can be used all year for almost any occasion. The finished star measures 5″ by 5″ from point to point in all directions.
I am Debbie Crowley and welcome to my blog. Here you'll find fun projects that are sure to inspire you. I hope you'll stop
by often and leave a comment or two. To contact me, you can email me at: expressivelydeb@gmail.com
Current Catalogs
What are you looking for?
The content of this blog is the sole responsibility of Debra Crowley, expressively deb.com, as an Independent Stampin' Up! Demonstrator. The use of and content of classes, services or products offered is not endorsed by Stampin' Up!