I always enjoyed creating a CAS card (Clean and Simple). A CAS design should have lots of white space, few layers, and little or no embellishments. There are no limits on how you can use your stamps, ink, paper, and dies to create a CAS project.
Here’s how I put mine together.
The Very Vanilla card base is 8 1/2″ x 5 1/2″, and scored at 4 1/4″ on the 8 1/2″ side.
The Very Vanilla card front layer is 4″ x 5 1/4″. I used one of the larger Stitched With Whimsy Dies to create a “stitched” outline on this layer.
The leaves are die cut from the Autumn Leaves Dies using the All About Autumn Designer Series Paper.
I stamped the sentiment with Copper Clay ink.
For a little shine, I scattered a few Gold Festive Pearls.
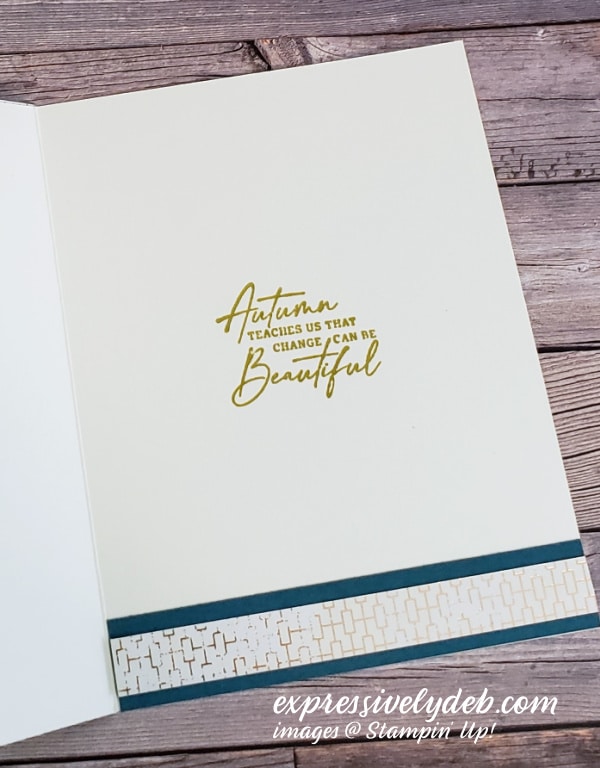
I added a strip of patterned paper to the bottom of the inside of the card, and stamped one of the leaf vein images from the Autumn Leaves stamp set.
A CAS card is quick and easy, and the simplicity of the design is always pretty.
So, find a great border die, add a few die cut images, a sentiment, pop the layer up on Dimensionals, and create a quick and easy CAS card.
My September Mini Card Kit features the One Horse Open Sleigh Designer Series Paper. You will receive the Kit with a minimum product purchase of $50.00 from my online store using the Host Code XWWPUMY7. Each Mini Kit includes:
The cut cardstock and patterned paper to complete both cards.
Sentiment layers so you can customize each design using sentiments you already have.
Embellishments and Dimensionals to complete the cards as I’ve designed them.
Envelopes.
A printed PDF Tutorial with photos and measurements.
A video link to make the cards along with me.
To receive your Kit, use the Host Code below when prompted during the ordering process.
When I first saw this leaf pattern in the All About Autumn Designer Series Paper, I knew I would have to to something with it. I loved the pink leaves mixed with the golden browns. Today’s card celebrates the upcoming Fall Season, but it’s a birthday card. I have quite a few Fall birthdays coming up, and this design will work perfectly.
All of the products used here are from the All About Autumn Suite of products that is featured in the upcoming September – December 2023 Mini Catalog. The launch date is just about a week away. Yay!
Today’s Card Parts & Pieces
There are a bit more parts and pieces than my last few cards, but be assured that this is a fun design that goes together quickly.
I cut a Pebbled Path cardstock card base 4 1/4″ x 11″ and scored it at 5 1/2″.
The leaf patterned paper layer covers the card front. It measures 4 1/4″ x 5 1/2″.
I die cut the two offset cardstock layers using one of the Deckled Edge Rectangle Dies. The Pebbled Path and Bubble Bath cardstock layers measure about 2 1/2″ x 4″.
The leaf and branch elements are die cuts from the Autumn Leaves Bundle.
I used my sponge dauber and Pebbled Path ink to ink the edges of the layers and elements.
The sentiment (from the Autumn Leaves Bundle) is stamped with Pebbled Path ink.
I added a large bow with some Sweet Sorbet Metallic Woven Ribbon (Annual Catalog).
This design also called for a few Adheaive Backed Speckled Dots. They’re part of the All About Autumn Suite.
The sentiment layer and elements are attached with Dimensionsls.
I found this simple birthday sentiment in the Something Fancy stamp set (Annual Catalog).
So, it’s almost time to get your hands on the All About Autumn Suite and create beautiful cards to celebrate the beautiful Fall Season and any September, October, and November birthdays on your list.
From August 1st through August 31st, you can take advantage of up to 30% off Stampin’ Up!’s Kit Collection.
August Free Card Kit
You will receive the supplies to assemble these cards above. Along with the cardstock, Designer Series Paper, elements, and embellishments, you will receive a PDF Tutorial with detailed instructions, and a video link to assemble the cards along with me.
For the month of August, there’s no minimum purchase required. You will receive this gift from me with any order you place. Remember, August is the time to redeem your Bonus Days Coupons! Redemption period ends tomorrow.
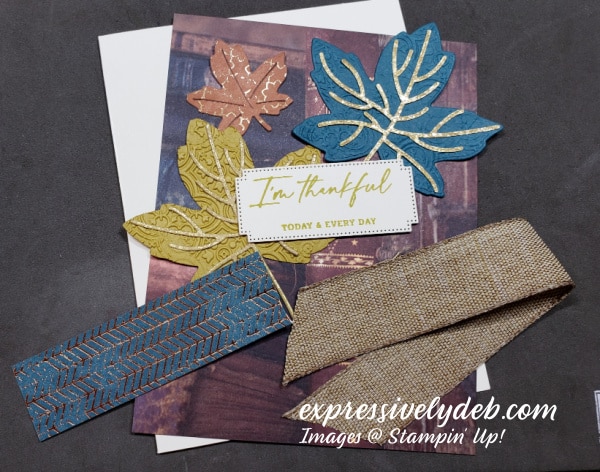
Hello! I wish you a happy day! I’m truly thankful you stopped by. Today’s card is my second Sneak Peek of the Autumn Leaves Dies. They’re part of the All About Autumn Product Suite I showcased in my last post. You can see the entire Suite Collection here.
In the Autumn Leaves Dies, there are two dies that I refer to as “filler dies”. These dies will give you a cut embossed look and add amazing texture to the simplest of projects. I thought I would show you how I used them in today’s post.
Today’s Card Pieces & Parts
There isn’t much to this CAS card. (CAS is an acronym for Clean And Simple). There’s lots of white space on this design, and few layers and embellishments. It meets all of the “CAS” qualifications.
Take a look at the left side of the Very Vanilla layer in the photo above.
I created a textured design using two of he dies from the Augumn Leaves Dies.
I placed the longer die along the left edge of the card layer, then placed the smaller die along the right edge of the long die about an inch down from the top. With both dies secured to the layer using low tack tape, I ran it through my die cutting machine.
Next, using the smaller die, I repeated the same process as above, making sure the bottom of the die was about an inch from the bottom of the longer die cut edge.
I wanted a little more texture in the center of my layer, so I placed the smaller die on the edge of the last “row” and centered it.
I created a pattern of texture that would anchor the die cut leaves.
You can come up with your own design for these dies, and know that they are fun to use and will surely spark your creativity.
The leaves are die cut using the small leaf dies. I used the All About Autumn foiled Designer Series Paper to die cut the leaves.
All of the product I used to make this card are from the All About Autumn Suite. It will be available for customers on September 6th with the launch of the new September-December, 2023 Mini Catalog.
So, cut a card base layer, add some amazing texture, a few elements and an embellishment or two, and create something Clean and Simple.
From August 1st through August 31st, you can take advantage of up to 30% off Stampin’ Up!’s Kit Collection.
August Free Card Kit
You will receive the supplies to assemble these cards above. Along with the cardstock, Designer Series Paper, elements, and embellishments, you will receive a PDF Tutorial with detailed instructions, and a video link to assemble the cards along with me.
For the month of August, there’s no minimum purchase required. You will receive this gift from me with any order you place. Remember, August is the time to redeem your Bonus Days Coupons!
Today’s post is a Sneak Peek of the All About Autumn Suite Collection. A beautiful Suite, full of rich colors and amazing texture. All About Autumn will be available to customers with the launch of the new September-December 2023 Mini Catalog. The card I created to showcase the Suite is a close Catalog Case. I loved the design, colors, and texture the designers at Stampin’ Up! created, so I decided to try it.
To more closely showcase the Suite, I’ve created a Video that will take you through the featured products and you can see how I put this card together. Click the button below to take a tour through the All About Autumn Suite Collection.
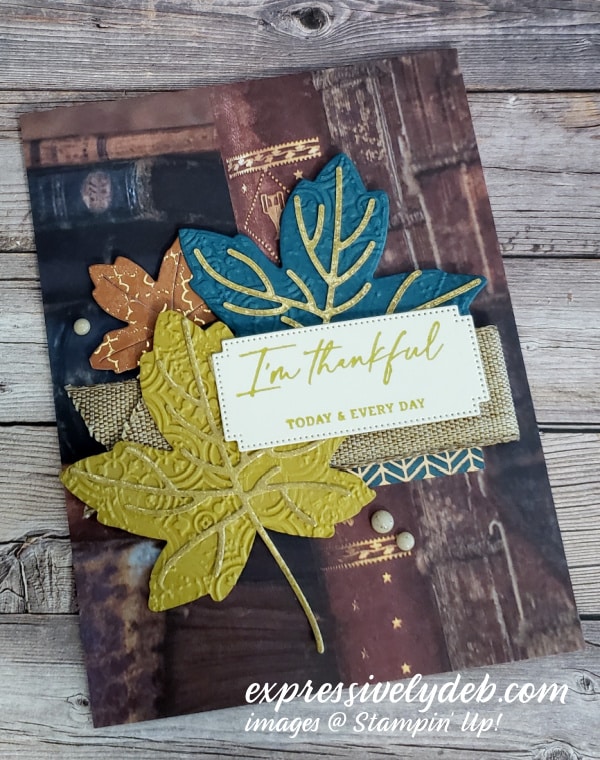
Today’s Card Parts & Pieces
This is an easy design to put together. A little embossing, die cutting and layering gives you a design you can duplicate using many products you already own.
I cut a Very Vanilla cardstock card base 5 1/2″ x 8 1/2″ and scored at 4 1/4″.
The Designer Series Paper card front layer is 4 1/4″ x 5 1/2″.
The leaves are die cuts, as is the sentiment layer.
Some embossing and embellishing finished this card nicely.
Click the button below to download a PDF Tutorial with more assembly details.
So, let’s share some gratitude! Find that beautiful Designer Series Paper, add lots of texture, a beautiful sentiment and create something to send to someone special!
From August 1st through August 31st, you can take advantage of up to 30% off Stampin’ Up!’s Kit Collection.
August Free Card Kit
You will receive the supplies to assemble these cards above. Along with the cardstock, Designer Series Paper, elements, and embellishments, you will receive a PDF Tutorial with detailed instructions, and a video link to assemble the cards along with me.
For the month of August, there’s no minimum purchase required. You will receive this gift from me with any order you place. Remember, August is the time to redeem your Bonus Days Coupons!
Today is a big day at Stampin’ Up! FREE SHIPPING!Yes, free shipping starting midnight Mountain Time all day today, October 4th, ending at 11:59 p.m. Mountain Time. The FREE SHIPPING will automatically be credited to your order once your purchase totals $75.00. Below are some of the FREE SHIPPING DAY details:
The minimum qualifying amount to receive free shipping is $75 or more (before tax).
Free shipping only applies during the 24-hour period the promotion is live; this means that the order must be opened and closed on October 4, 2022.
With the exception of month-to-month Paper Pumpkin subscriptions, all Stampin’ Up! products qualify for the promotion.
The free shipping promotion does not cover the additional cost for expedited shipping.
If you’ve had your eye on some special products to begin your Holiday crafting, today is the day to place your order!
A FREE Gift From Me
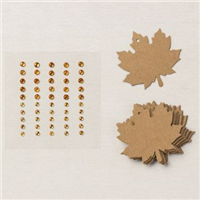
If you don’t already have a Demonstrator, I would love for you to shop with me. I always reward my customers with a gift and a surprose! Along with FREE SHIPPING from Stampin’ Up!, you will receive a FREE package of Adhesive Backed Seasonal Sequins with a product order of $50.00 or more from me. Remember though, a $50 product purchase qualifies you for a FREE gift from me, but your order must be $75 for the FREE shipping.
These sequins will certainly add sparkle to any of your holiday or any day projects!
Today’s Card
Now, let’s talk about my paper hug for you today! At the bottom of page 119 in the Annual Catalog, there is a stamp set called “Limited Edition”. I passed right over it when I first looked through the Annual Catalog. During Stampin’ Up’s last stamp sale, I purchased it and am so glad I did. There are so many who just need to know someone is thinking of them. This sentiment is perfect.
Limited Edition has a variety of stamps you can stamp to the back of a card to show your card is a “one of a kind”, “hand stamped” or “made with love”. You can use the @ Stampin’ Up! stamps on projects you sell to comply with the Stampin’ Up! Agngel Policy. No matter how you use them, this is a versatile little stamp set to own.
Today’s Card Parts And Pieces
Cut a Basic White card base 4 1/4″ x 11″ and score at 5 1/2″.
Cut the pumpkin patterned paper layer 4 1/4″ x 5 1/2″. This is adhered to the front of the card base.
I cut the Mossy Meadow DSP layer 3′ x 4 1/2″, and the Cajun Craze DSP layer is 3″ x 4″.
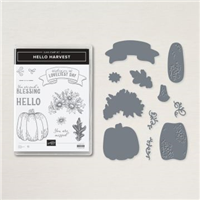
I stamped the pumpkin image from the Hello Harvest stamp set with Cajun Craze ink and shaded it with my ink pad and Blender Pen.
The pumpkin and “pumpkin leaf swirls” are die cut with the coordinating dies.
The sentiment is stamped with Mossy Meadow ink and punched with a punch I had in my stash.
I stamped the inside pumpkin with Cajun Craze ink and used a sentiment from the Limited Edition stamp set.
This sentiment stamp has a lotus flower with it, but I taped off the lotus flower and inked only the sentiment – “Just For You”.
So, stamp a pumpkin, add a few layers and some sparkle, and send someone a “paper hug”! You’ll be happy you did!
I am Debbie Crowley and welcome to my blog. Here you'll find fun projects that are sure to inspire you. I hope you'll stop
by often and leave a comment or two. To contact me, you can email me at: expressivelydeb@gmail.com
Current Catalogs
What are you looking for?
The content of this blog is the sole responsibility of Debra Crowley, expressively deb.com, as an Independent Stampin' Up! Demonstrator. The use of and content of classes, services or products offered is not endorsed by Stampin' Up!