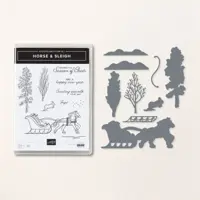
I finally opened my Horse & Sleigh Bundle and made some cuts in my One Horse Open Sleigh Designer Series Paper. I had a few projects in mind, but couldn’t resist doing something with this paper pattern. The cozy cottage looks like a work from Thomas Kindaid’s Gellery. He painted light so beautifully. Unfortunately, my photography doesn’t do this “picture” the justice it deserves. The lights on the cottage look as though they’re sparkling!
This design is quick and easy to put togther using the One Horse Open Sleigh Designer Series Paper and the Horse & Sleigh Bundle.
So, let’s make a card!
Today’s Card Pieces & Parts
The Night of Navy card base is 5 1/2″ x 8 1/2″, scored at 4 1/4″ on the 8 1/2″ side.
The Cherry Cobbler mat layer is 3 7/8″ x 5 1/8″.
The Designer Series Paper layer is a cut from a 6″ x 6″ sheet. The layer measures 3 3/4″ x 5″.
To get the picture of the cottage somewhat centered, I cut 1/2″ off both the bottom and top.
Cut about 2 1/4″ off from the left side of the patterned paper so the cottage is somethat centered.
The Pebbled Path die cut tree filled in the left side of the cottage scene and creates balance with the tree on the right side of the cottage.
I stamped the sentiment with Cherry Cobbler ink.
Scatter a few gold Adhesive Backed Snowflakes for a little sparkle.
I added the remainder of the patterned paper (from the left side front layer), to the left side of the inside writing layer. The sentiments are stamped with Cherry Cobbler ink.
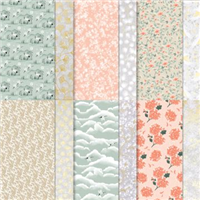
This is only one image from the Designer Series Paper pack. There are several winter scenes you can use to create quick and easy holiday cards.
So, cut a warm country cottage layer filled with glistening lights, add a coordinating cardstock mat, attach it to a card base, add some golden snowflakes, and create something warm to share for the holiday season.
This past week, I decided it was time to reorganize my supplies, do some purging and work on a better inventory system. It took some time away from creating cards, but it is well worth the effort.
Today’s post showcases the Symbols of Fortune Specialty Designer Series Paper. The patterns are beautiful with a soft mix of colors and neutral grays flecked with gold foil. I chose a delicate floral pattern, the polka dot pattern and fussy cut a large camellia from the patterned paper to create this card.
Today’s Card Bits & Pieces
This is a simple card layout. I can put this in the category of “Quick and Easy”. Fussy cutting the flower will take a bit of time, but not as much as you might think.
I cut an Evening Evergreen card base at 11″ by 4 1/4″ – score at 5 1/2″.
The Calypso Coral patterned paper layer is 3 1/4″ x 4 1/4″.
Attach the polka dot layer to the front card base about 1/2″ down from the top.
The Mint Macaron sentiment layer is 7/8″ x 4 1/4″.
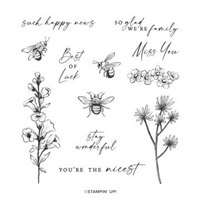
The sentiment, from the Honeybee Home stamp set, is stamped with Evening Evergreen ink.
The floral patterned paper strip is 7/8″ x 3 1/4″.
Attach this strip to the top of the sentiment layer.
I die cut the large Crumb Cake stitched circle with one of the Stitched Shapes Dies.
The fussy cut Camellia is ashered to the circle with Stampin’ Dimensionals.
Since I was mostly in organizational mode this week, my creative muscle simply didn’t want to work. Inspiration was just not coming and I wanted to cut this DSP. I took a look at my Project Gallery and CASE’d a card I posted last year. You can see the original post here. Below is the card.
So, when you really want to cut some paper and the inspiration is just not there, take a look at some of your past projects and create something quick and easy!
Happy Friday! I hope you enjoy some weekend time in your craft space.
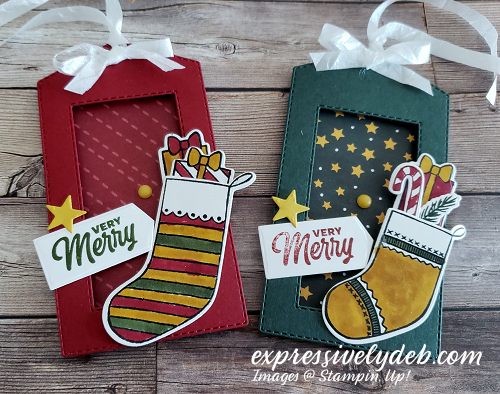
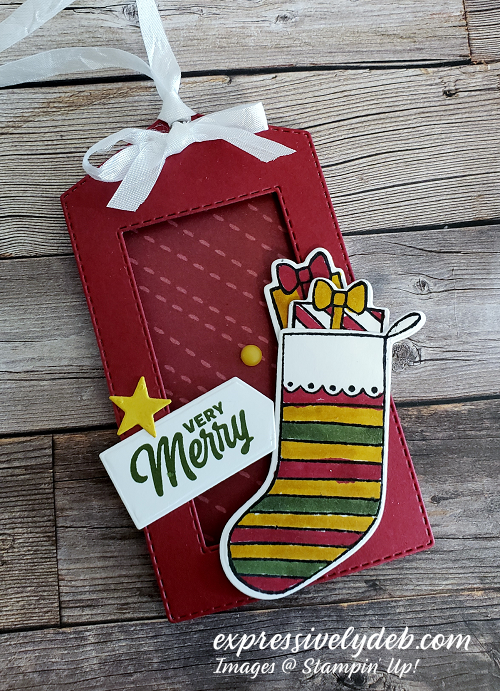
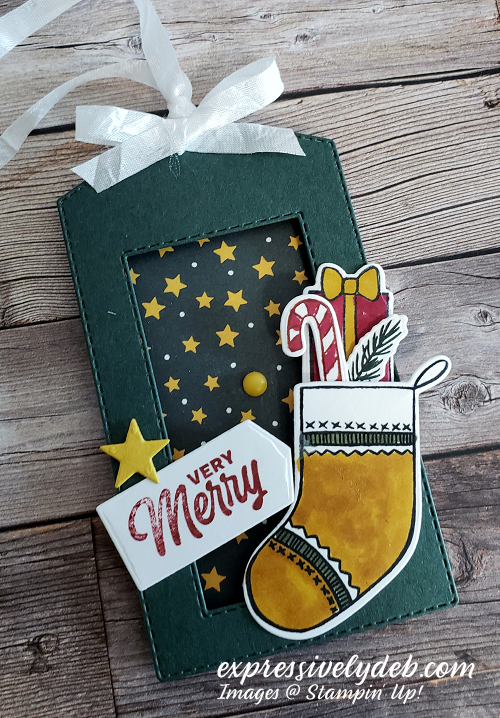
Today’s post features the Sweet Stockings Bundle to create tags. These frame tags were easy to put together. You can follow the instructions in the downloadable FREE PDF for holiday tags or for a gift tag for any occasion.
The tags I created here are for the stamper who loves to color! If you follow my posts, you might remember I was not a fan of coloring. It was a labor of love to put a Stampin’ Blend into my hands and actually use it. Stampin’ blends are a great tool to quickly and easily add color to any stamped image.
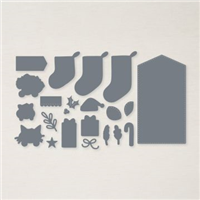
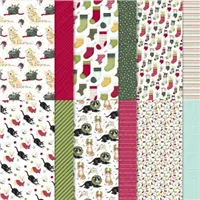
All of the elements for these tags are stamped and die cut with matching dies from the Sweet Stockings Bundle. The Sweet Stockings Designer Series Paper and the Matte Decorative Dots are part of theSweet Stockings Product Suite.
Cherry Cobbler, Evening Evergreen and Bumblebee is a bold and classic holiday color combination.
You can click on the button below to download the FREE PDF Tutorial for these tags.
So, take a look at the Sweet Stockings Product Suite, pull out your Stampin’ Blends and create colorful holiday tags.
Kit contains enough supplies to create 12 tags—3 each of 4 designs.
Includes printed die-cut tags, decorative die cuts, adhesive, embellishments, and pink baker’s twine.
Features an exclusive stamp set and a Night of Navy Classic Stampin’ Spot.
Finished tag size: approximately 2-1/2″ x 4-3/4″
CHRISTMAS WHIMSY CARD KIT
The Christmas Whimsy card kit is an adorably festive card kit with a modern design! The simple steps of this kit are perfect for the beginner crafters and kids, too! Grab a kit or two and gather around for a simple Christmas activity that everyone will enjoy. The kit contains everything you need to create eight elf-centric Christmas cards including printed card bases, die cuts, embellishments, an exclusive stamp set, a Night of Navy Classic Stampin’ Spot, and more!
You can click on the image below for more details.
Here’s a preview of the whimsical card designs in the Kit.
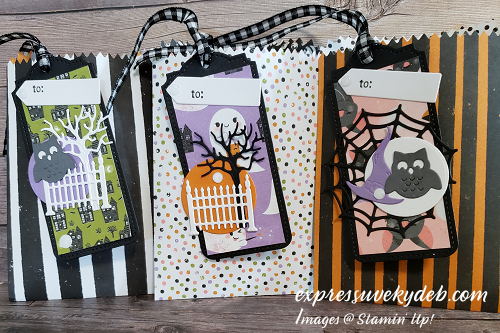
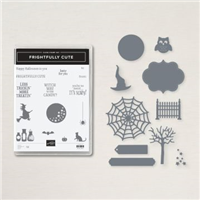
Hello friends! It’s Friday and I’m sharing more cuteness from the Frightfully Cute Bundle and the Cute Halloween Designer Series Paper.
I know I’ve said it in the past. I am probably the biggest fan of Designer Series Paper. It inspires me with great color combinations and card designs. The Cute Halloween Designer Series Paper is amazingly cute and inspired me to create a few treat bags and Halloween tags. These bags and tags are fun to put together. With both the DSP and the Frightfully Cute Bundle, your creativity will run high. That is my promise to you.
I took single pictures of each of my tags and I’ll give you a quick and easy how to after each one. Have fun adding your own twist.
The Basic Tag Recipe:
Each tag is die cut using the largest die in the Tailor Made Tags Dies.
The Basic Black tags measure 4″ x 1 3/4″ if you want to create your own tag.
The patterned paper layer for each tag measures 3 1/2″ x 1 1/2″.
The tag die cuts a small hole in the top for ribbon or twine.
Die cut a bunch of fun images with the Frightful Tags Dies matching the images and colors to your tag.
Attach the die cuts to your tags with Multipurpose Glue, Dimensionals or whatever adhesive you prefer.
Most importantly… Have fun mixing and matching!
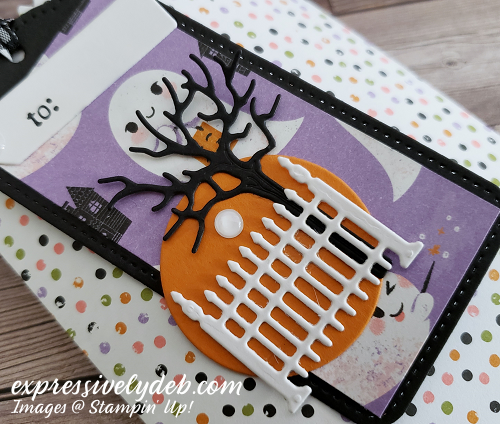
The Hiding Ghost Tag:
I cut the Designer Series Paper so the ghost would be hiding behind the tree in the image above.
The tree, fence and “orange” moon are all die cuts.
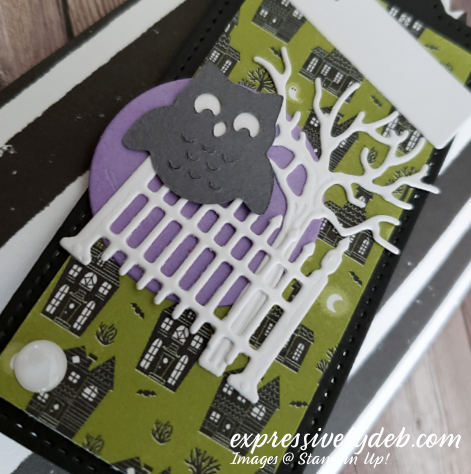
The Wise Owl Tag:
The fence, tree, “purple moon” and owl are all die cuts attached to the Haunted House DSP in the tag above.
When you die cut the owl, his eyes are open circles. I slipped a tiny scrap of white cardstock behind his eyes.
The Witch’s Hat And Web Tag:
The spider web, witch’s hat, owl and “white moon” are all die cuts.
I also slipped a scrap of white cardstock behind the owl’s eyes.
Notice the embossed detail in the die cut images.
I wanted a small treat bag for these tags and found an oldie but goodie in my die collection. The Dies are called the Mini Treat Bag Thinlits Dies. If you have them, they are a quick and easy way to create the treat bag I used today.
If you don’t have the Mini Treat Bag Dies, check in tomorrow for a quick PDF tutorial.
So, pick up the Frightfully Cute Bundle, die cut lots of fun images and create fun tags for your Halloween treats!
…the only limitation is your imagination!
For today’s product details, click on the images below.
Stampin’ Up! has added a new kit to their awesome Kit Collection! The Christmas Whimsy card kit is an adorably festive card kit with a modern design! Santa’s elves might be hard at work in the North Pole but with this all-inclusive kit, the hard work is done for you! All pieces are printed, die cut, and ready for you to craft. The simple steps of this kit are perfect for the beginner crafters and kids, too! Grab a kit or two and gather around for a simple Christmas activity that everyone will enjoy. The kit contains everything you need to create eight elf-centric Christmas cards including printed card bases, die cuts, embellishments, an exclusive stamp set, a Night of Navy Classic Stampin’ Spot, and more!
You can click on the image below for more details.
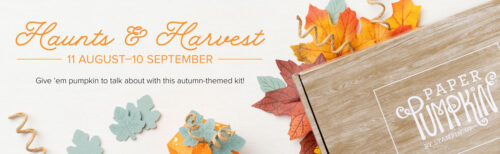
HAUNTS & HARVEST PAPER PUMPKIN KIT
Today is the last day to order the September Haunts & Harvest Paper Pumpkin Kit.
Haunts & Harvest Kit Details
Kit contains enough supplies to create 12 treat packages—4 each of 3 designs. The all-inclusive kit includes printed die-cut boxes, die-cut sheets, adhesive, and more!
Finished treat box size: 2-1/2″ x 2″
Includes an exclusive stamp set and a Classic Stampin’ Spot
This month’s Kit has a unique offering: The box turns into a wheelbarrow to display your too-cute-to-spook treat packages.
To sign up for the Haunts & Harvest Kit, click the banner below.
SALE-A-BRATION
Sale-A-Bration is in full swing. For every $50 Product Purchase from any current catalog, you can choose a FREE item from the Sale-A-Bration Brochure. You can download the Brochure by clicking the image below:
A GIFT FROM ME:
For every $50 product purchase through my online store, you will receive a FREE pack of Metallic Pearls embellishments. They’re in the Annual Catalog on page 143/ These pearls are a great staple for your embellishment collection.
It’s the end of April and today’s post is full of new inspiration for you.
Speaking of inspiration, if you are an existing customer of mine, you’ve already received the new Annual Catalog. It’s full of beautiful new products and lots of new project ideas. If you would like to receive a Catalog, email me and I’d be happy to get one out to you.
My Team and I had our regular monthly meet-up this week. Once again I’m showcasing the projects we all created. Each and every one is beautiful and it was fun to be together. Every time we meet, one of us always says, “I needed this”… it’s so true. Just a few hours of creative time is so important. The card above is my favorite for April.You can click here to view my original post. I actually had more than one favorite, but I thought this was a nice way to say thank you to my fabulous Team of creative ladies, my wonderful and creative customers, those who read my posts, those who’ve recently signed up for more and those who’ve been checking in for a while now. So, thank you and I hope I continue to inspire you.
My new April Monthly Newsletter will be going out next week and my new Customer monthly inspiration will be going out within the next two weeks. The Customer monthly inspiration is private and will include fun projects and PDF’s for all who have placed orders with me. I am grateful to all of you.
Now, let’s get to the good stuff… the inspiration…
Barbara was our host this month. She came up with the cutest snail wishes card. There’s a lot of dimension in Barbara’s design, but she made it so simple for us. This design has lots of layers, beautiful coordinating colors and I can honestly say this was a “Quick & Easy” without a doubt. That snail looks so cozy in her little frame.
Georgia surprised us with an amazing 3-D card. Amazing is about all I can say. It was easier than you think to put together. There was not a word spoken while we worked on this project. That’s rare for our group! Monica couldn’t wait to “play” with the animals!! The card base is Basic White Thick cardstock and the layers are all Purple Posy. Georgia also designed a custom envelope for the card. The animals are from a local store, but the card design is Georgia’s.
Next up is Monica’s design. She created a pretty little tag box and a set of tags. What a cute gift this would be! Clearly, our little snail was presented well. The tags fit perfectly in the box but the box is so cute, I’m sure you can find many uses for it. I love the black and white polka dots and the colors Monica chose for the snail embellishment. This was another simple project.
Karen designed two cards which we inked at the same time. We got to use Blender Brushes and had a great time moving ink around the beautiful die cut from the Potted Succulents Die. This Die is going to be around until the beginning of June as part of the Simply Succulents Bundle and is being carried over to the new Annual Catalog. I didn’t get this set, but am having serious second thoughts! We used the die cut as a stencil on the Mother’s Day card and used the inked die cut piece on the Thinking of You card. The ink colors are Blushing Bride, Blackberry Bliss and Pear Pizzazz. I honestly didn’t want to put down the Blender Brushes. This was easy, fun and looks like fine art!
And last but certainly not least is Sally. Sally is a customer of mine who sent her two latest creations to me. When she emailed her cards, she said to me that she decided to sit down and have fun that day. That’s what it’s all about. Just have fun and share. Sally asked me which one I liked better and it was a hard decision. They’re both adorable. I love the bling on both “hot dogs”! I always loved polka dots and am partial to blue, but I love the party hat background. It’s so festive. What do you think? Thank you, Sally. I very much enjoy seeing your cards. These are adorable.
I hope you enjoyed my April Inspiration!
So, as Sally said, sit down, have fun and create something adorable to share!
…the only limitation is your imagination!
Only 3 days left to check in on the last chance products. Click on the image below.
I am Debbie Crowley and welcome to my blog. Here you'll find fun projects that are sure to inspire you. I hope you'll stop
by often and leave a comment or two. To contact me, you can email me at: expressivelydeb@gmail.com
Current Catalogs
What are you looking for?
The content of this blog is the sole responsibility of Debra Crowley, expressively deb.com, as an Independent Stampin' Up! Demonstrator. The use of and content of classes, services or products offered is not endorsed by Stampin' Up!