Aug 24, 2022 | Gallery, Halloween, Pretty Packaging, Tutorials |

Today’s post features a quick and easy scalloped edge Halloween treat bag and tag.

Here’s a Halloween idea! A sweet treat bag you can fill to the brim for your favorite ghosts and goblins. I made these bags and tags in very little time.
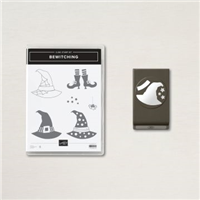
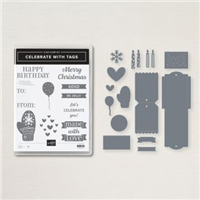
Two panels of your favorite Designer Series Paper, a few score lines, and some adhesive finishes this treat bag. The tag is die cut from the Celebrations Tag Dies (page 67 in the July-December 2022 Mini). These Dies are part of the Celebrate With Tags Bundle. They’re great for cards, as well. I stamped and punched the scary witch’s hats using the Bewitching Bundle. It’s on page 57.
Today’s Card Parts And Pieces

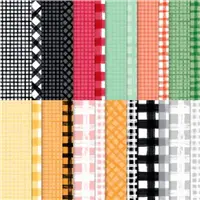
- I cut two pieces of Gingham Cottage Designer Series Paper for the treat bag.
- The tag is die cut using Basic Black cardstock. The tag folds in half to create inside space for your message.
- For this project, I cut the tag in half at the top score line so I had two tags.
- I stamped the witch’s hat with Pumpkin Pie ink and punched it, along with the star embellishments.
- When the bag was complete, I ran the large scalloped die across the top.
- I used my 2 1/4″ circle punch to punch a tab in the front.
- The tags are easy to stamp, punch and assemble.
- The black and white gingham bow makes this little treat bag a special gift!
You can click the button below to download and print the PDF Tutorial for this project.


So, cut a few squares, add some adhesive, a pretty tag, fill with candy and create a spooky and special Halloween gift!
… the only limitation is your imagination!

Today’s Product Details
STAMPIN’ UP! NOTES & NEWS
- The Pool Party and Soft Sea Foam Notes And Envelopes and the Tree Lot Dies from the Sale-A-Bration Brochure are no longer available.
- Stampin’ Up! has made more products available for FREE with a qualifying purchase so we all can continue to enjoy the benefits of Sale-A-Bration.
- Click the flyer below for details.

DON’T FORGET TO SALE-A-BRATE NOW THROUGH AUGUST 31ST


Jan 5, 2022 | Gallery, Pretty Packaging, Tutorials, Valentines |

Hello Friends!
Today’s post features a sweet little treat box with a custom insert for a Lindor Chocolate Truffle. Dark chocolate truffles are my favorite. I’ve been giving in to that little habit of mine a bit too much lately so it’s time to share them. I decided to create a little Valentine Treat Box with an insert that fits the truffle. This idea gives me another opportunity to showcase more of the Sweet Talk Designer Series Paper.
About The Box
The box is a 2″ square and is quick and easy to assemble. There are three pieces; the box bottom, top and insert. You can click on the button below to download the FREE PDF tutorial.

I hope you enjoy creating this little project as much as I did.

So, get out your cardstock and pretty patterned paper and create a cute little candy box.
…the only limitation is your imagination!

Click image to download catalog PDF

Click image to download Sale-A-Bration Brochure PDF

Sep 11, 2021 | Gallery, Halloween, Pretty Packaging, Stampin' Up! Specials & News, Tutorials |

Hello Friends!
The weather is beautiful here in New Jersey and we’re being promised a great weather weekend. It’s a much needed change for us. I hope you have some fun weekend plans and can also spend some time in your craft room!
One of my Mini Treat Bags is standing alone today. This one happens to be my favorite and I thought I’d showcase it. As promised, I put together a quick tutorial for the Mini Treat Bags. The treat bag in the picture above is die cut from a retired Stampin’ Up! set called the Mini Treat Bag Thinlit Dies. They are a favorite and served me well over the years getting treat bags ready for my daughter’s students. I have a few of those favorites that will remain in their designated space in my craft room!
You can download the PDF by clicking the button below. I hope you enjoy the tutorial and have fun designing your own treat bags.

So, grab your favorite DSP, make a few cuts, score a few lines and create something fun to fill and give!
…the only limitation is your imagination!
TODAY’S STAMPIN’ NEWS:
THE NEW CHRISTMAS WHIMSY CARD KIT
Stampin’ Up! has added a new kit to their awesome Kit Collection! The Christmas Whimsy card kit is an adorably festive card kit with a modern design! The simple steps of this kit are perfect for the beginner crafters and kids, too! Grab a kit or two and gather around for a simple Christmas activity that everyone will enjoy. The kit contains everything you need to create eight elf-centric Christmas cards including printed card bases, die cuts, embellishments, an exclusive stamp set, a Night of Navy Classic Stampin’ Spot, and more!
You can click on the image below for more details.

Here’s a preview of the whimsical card designs in the Kit.

SALE-A-BRATION
- Sale-A-Bration is in full swing. For every $50 Product Purchase from any current catalog, you can choose a FREE item from the Sale-A-Bration Brochure. You can download the Brochure by clicking the image below:

A GIFT FROM ME:
For every $50 product purchase through my online store, you will receive a FREE pack of Metallic Pearls embellishments. They’re in the Annual Catalog on page 143/ These pearls are a great staple for your embellishment collection.

Click to shop my online store at Stampin’ Up!
Sep 10, 2021 | Gallery, Gift Tags, Halloween, Pretty Packaging, Stampin' Up! Specials & News |
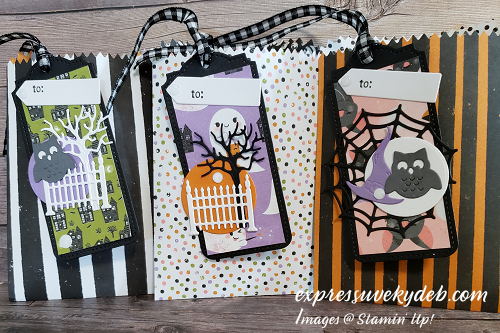
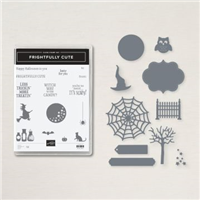
Hello friends! It’s Friday and I’m sharing more cuteness from the Frightfully Cute Bundle and the Cute Halloween Designer Series Paper.
I know I’ve said it in the past. I am probably the biggest fan of Designer Series Paper. It inspires me with great color combinations and card designs. The Cute Halloween Designer Series Paper is amazingly cute and inspired me to create a few treat bags and Halloween tags. These bags and tags are fun to put together. With both the DSP and the Frightfully Cute Bundle, your creativity will run high. That is my promise to you.
I took single pictures of each of my tags and I’ll give you a quick and easy how to after each one. Have fun adding your own twist.
The Basic Tag Recipe:
- Each tag is die cut using the largest die in the Tailor Made Tags Dies.
- The Basic Black tags measure 4″ x 1 3/4″ if you want to create your own tag.
- The patterned paper layer for each tag measures 3 1/2″ x 1 1/2″.
- The tag die cuts a small hole in the top for ribbon or twine.
- Die cut a bunch of fun images with the Frightful Tags Dies matching the images and colors to your tag.
- Attach the die cuts to your tags with Multipurpose Glue, Dimensionals or whatever adhesive you prefer.
- Most importantly… Have fun mixing and matching!
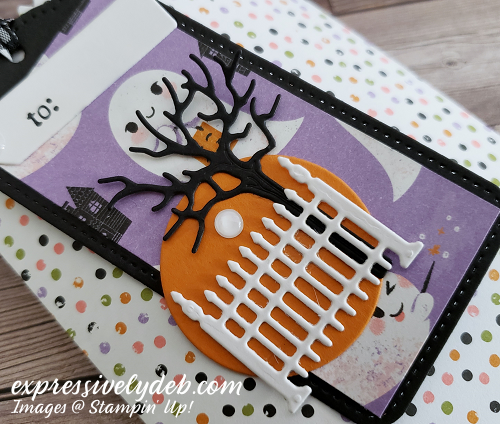
The Hiding Ghost Tag:
- I cut the Designer Series Paper so the ghost would be hiding behind the tree in the image above.
- The tree, fence and “orange” moon are all die cuts.
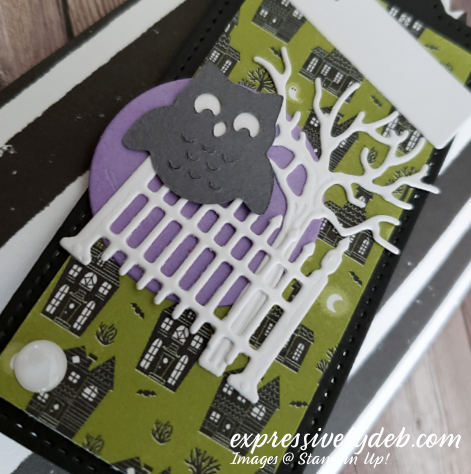
The Wise Owl Tag:
- The fence, tree, “purple moon” and owl are all die cuts attached to the Haunted House DSP in the tag above.
- When you die cut the owl, his eyes are open circles. I slipped a tiny scrap of white cardstock behind his eyes.

The Witch’s Hat And Web Tag:
- The spider web, witch’s hat, owl and “white moon” are all die cuts.
- I also slipped a scrap of white cardstock behind the owl’s eyes.
- Notice the embossed detail in the die cut images.
I wanted a small treat bag for these tags and found an oldie but goodie in my die collection. The Dies are called the Mini Treat Bag Thinlits Dies. If you have them, they are a quick and easy way to create the treat bag I used today.
If you don’t have the Mini Treat Bag Dies, check in tomorrow for a quick PDF tutorial.
So, pick up the Frightfully Cute Bundle, die cut lots of fun images and create fun tags for your Halloween treats!
…the only limitation is your imagination!
For today’s product details, click on the images below.
TODAY’S STAMPIN’ NEWS:
The New Christmas Whimsy Card Kit
Stampin’ Up! has added a new kit to their awesome Kit Collection! The Christmas Whimsy card kit is an adorably festive card kit with a modern design! Santa’s elves might be hard at work in the North Pole but with this all-inclusive kit, the hard work is done for you! All pieces are printed, die cut, and ready for you to craft. The simple steps of this kit are perfect for the beginner crafters and kids, too! Grab a kit or two and gather around for a simple Christmas activity that everyone will enjoy. The kit contains everything you need to create eight elf-centric Christmas cards including printed card bases, die cuts, embellishments, an exclusive stamp set, a Night of Navy Classic Stampin’ Spot, and more!
You can click on the image below for more details.
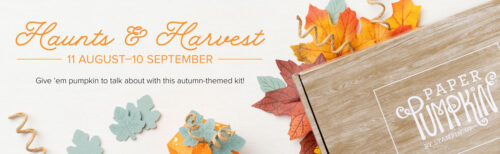
HAUNTS & HARVEST PAPER PUMPKIN KIT
- Today is the last day to order the September Haunts & Harvest Paper Pumpkin Kit.
- Haunts & Harvest Kit Details
- Kit contains enough supplies to create 12 treat packages—4 each of 3 designs. The all-inclusive kit includes printed die-cut boxes, die-cut sheets, adhesive, and more!
- Finished treat box size: 2-1/2″ x 2″
- Includes an exclusive stamp set and a Classic Stampin’ Spot
- Coordinating colors: Basic Black, Pale Papaya, Poppy Parade, Pumpkin Pie, Soft Succulent
- This month’s Kit has a unique offering: The box turns into a wheelbarrow to display your too-cute-to-spook treat packages.
To sign up for the Haunts & Harvest Kit, click the banner below.
SALE-A-BRATION
- Sale-A-Bration is in full swing. For every $50 Product Purchase from any current catalog, you can choose a FREE item from the Sale-A-Bration Brochure. You can download the Brochure by clicking the image below:
A GIFT FROM ME:
For every $50 product purchase through my online store, you will receive a FREE pack of Metallic Pearls embellishments. They’re in the Annual Catalog on page 143/ These pearls are a great staple for your embellishment collection.
Click to shop my online store at Stampin’ Up!
May 12, 2021 | Blog Hops, Gallery, Note Cards, Pretty Packaging |

Hello, welcome to the Stampin’ Pretty Pals’ Blog Hop! This month our Design Team’s theme is “2021-2023 New In-Colors.” We hope you enjoy and will be inspired by them! Don’t forget to leave comments because we love hearing from you. Then, at the end of my post, you will find the full line-up to help you “hop” along from Pal to Pal.


Our new In Colors are amazing and complement our other color groups beautifully. Along with each of the new In Colors, I’m featuring the new Garden Birdhouses stamp set. I’ll have more posts showcasing this stamp set, so be sure to check back.
My project is a 3″ x 3″ note card set with a matching stamped gift box. I did a lot of stamping for today’s post and used my acrylic blocks. The stamps are photoplymer so that made it easy, but I have to say that I haven’t stamped with an acrylic block in a while. I enjoyed it! Did you ever think about how we stamped images and sentiments before we had the Stamparatus? I did use my Stamparatus for the sentiments.
The matching gift box is also stamped. It’s a simple pattern cut with Thick Basic White Card Stock. I think these stamped images are so pretty. They’re stamped with Evening Evergreen ink and the flowers are colored with Polished Pink Blends. The box holds 4 note cards and matching envelopes very nicely.

I colored some White Crinkled Seam Binding with my Dark Polished Pink Blend. It was a quick process using the brush tip of the Blend and the ribbon dries almost immediately. The tags are die cuts from the new Tailor Made Tags Dies. They’re “no frills” and cute and I’m sure you’ll be seeing a lot more of them.

I’m planning to have a full PDF tutorial for you in tomorrow’s post. It’ll include the note card and box dimensions along with pictures. I think you’ll enjoy making this quick and easy box.
Below is an In Color swatch graphic you can save. I keep all of them in a separate file. They help with quick color inspiration for projects.

So, pull out everything In Colors, cut a few layers, add a birdhouse and matching gift box and surprise a special friend!
…the only limitation is your imagination.
More inspiration awaits! Use the Blog Hop Line-up below to visit the rest of this month’s Design Team. My fellow Pals are excited to show you what they’ve created! Mark your calendars for our next blog hop on June 9th with “Fun Ways to Use Your Stampin’ Up! Products.” Participants showcase at least one of their favorite product tips. Don’t miss the fun! Until then, please stay safe and have fun in your craft space.
Stampin’ Pretty Pals Blog Hop
- Mary Fish at Stampin’ Pretty
- Windy Ellard at Windy’s Wonderful Creations
- Rae Harper Burnet at Wild West Paper Arts
- Mary Hanson at Up North Stampin’
- Karen Hallam at Karen’s Stamping Habit
- Megan Cooper at Lazy Daze Stampin’
- Beth McCullough at Stamping Mom
- Peggy Noe at Pretty Paper Cards
- Debbie Mageed at Secrets to Stamping
- Deb Walker at Deb Stamps Life
- Jeanie Stark at Just Stampin’
- Lori Pinto at LollyPop Paper and Ink
- Melissa Seplowitz at The Stamping Ninja
- Lisa Ann Bernard at Queen B Creations
- Stesha Bloodhart at Stampin’ Hoot!
- Pamela Sadler at Stampin Pink Rose
- Tricia Chuba at ButterDish Designs
- Lori Webb at Clever Copies
- Debbie Crowley at expressively deb…
- Su Mohr at Aromas And Art
- Lisa Milligan at Stamping Made Simple