Mar 20, 2016 | Clean and Simple, Design Tips, Gallery, Quick & Easy, Spring, Thinking of You |

Just playing with patterned paper again. Here’s another Simple Sunday Sampler.
This project was quick and easy. Here’s the “How to” and a few Design Tips:
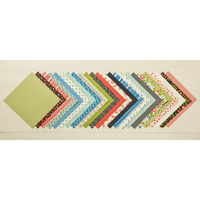
- Pull out some of your favorite patterned paper and choose three coordinating patterns. For this project, I used patterns from Stampin’ Up!’s “Pretty Petals” Designer Series Paper Stack.
- Design Tip: Always use the same or similar color palette, or similar patterns (either curvy or straight lines – which include florals and graphics). If you use both curvy and straight lines, make sure the elements (focal point, embellishments, sentiment, etc.) in your design are both curvy and straight. You need this for design “balance”.
- I used a standard A-2 card base in Whisper White – 5 l/2″ X 4 1/4″;
- The black polka dot pattern strip in the background is 2 1/2″ X 4 1/4″,
- My “anchor” horizontal strip is 5″ X 3 1/4″,
- The sentiment banner is 1″ X 4″
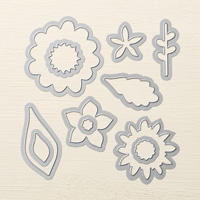
- For this card, I cropped some flowers with the “Flower Fair” framelits dies and added some Baker’s Twine for just a little embellishment.
- Design Tip: Because my patterns are so busy, there wasn’t much embellishment necessary.
- The “forever FRIENDS” sentiment from “First Sight” is stamped with Tuxedo Black Memento ink and the font is a good match to the patterned paper.

So, here’s a simple and quick project you can create with your favorite ingredients.
Enjoy your Sunday Stampin’!

Mar 2, 2016 | Birthday, Clean and Simple, Design Tips, Gallery, Spring |

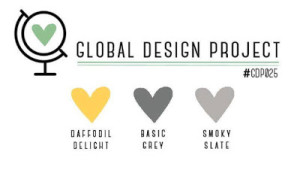
What a sweet Color Challenge over at the Global Design Project! Daffodil Delight, Basic Gray and Smoky Slate are so pretty together… Spring is in the air.
Here’s a quick “can do” for you:
- The Basic Gray card base is A-2 – 4 1/4″ X 5 1/2″;
- The Whisper White second layer is 4 1/8″ X 5 3/8″,
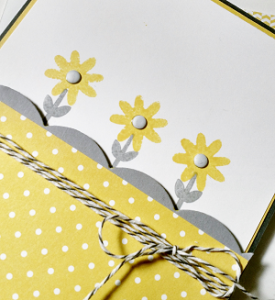
- The Daffodil Delight polka dot layer is 2 1/2″ X 4 1/8″,
- The scalloped edgelit is cropped using Smoky Slate card stock and I cut it just enough to tuck behind the patterned paper.
- To get those little blooms into the right spot, I measured up 2 1/2″ from the base of my Whisper White layer and knowing that each “scallop” is one inch wide, I made sure the dots were an inch apart starting from the center out.
- Stamp the center flower stem first, then stamp a stem on each side. Use your pencil marks as a guide and… the stamp is photopolymer, so you’ll see your marks easily.
- Add your flower, which I stamped with Daffodil Delight ink.
- A few Whisper White Candy Dots and some Basic Gray Baker’s Twine from a past Paper Pumpkin Kit is all the embellishment needed.
Stampin’ Up! Supplies Used:
- Card Stock – Basic gray, Whisper White, Smoky Slate and Brights Designer Series Paper Stack;
- Stamp Set – Flower Patch from Stampin’ Up!’s Annual Catalog;
- Embellishments – Neutrals Collection Candy Dots and Basic Gray Banker’s Twine.
- Tools – Large Scalloped Edgelit from Stampin’ Up! (retired).

Feb 21, 2016 | Birthday, Children, Clean and Simple, Design Tips, Thinking of You |

Here’s a “Simple Sunday Sampler” for you today with a new “Design Tip”.
Design Tip for pattern mixing:
- Mixing patterns is a neat way to use patterned paper as a single design element. Patterns mix well when they have contrasting designs. An illustration of this is to look at the Cucumber Crush plaid pattern matched with the Crushed Curry horizontal dotted pattern strip under the oval… lines and circles… but because the colors are “analogous” or next to each other on the color wheel, they work together.
- The pattern in the first card layer, the white background with the Crushed Curry dots, is dots in a linear square pattern. This acts as an anchor to the linear plaid pattern and the dotted pattern. Interesting, isn’t it? I really enjoy researching and sharing these tips.
- I’ve always been the type of person that has to know “why?” Many of you may not be, but not to worry because Stampin’ Up! does all of that for us.
I chose these patterns from Stampin’ Up!’s “Cherry On Top” Designer Series Paper Stack.

The stamp set, “Honeycomb Happiness” is FREE with a $50.00 product purchase from either current catalog during Sale-A-Bration until March 31st.
Click on the Sale-A-Bration Brochure below for stamp set details

So, grab some patterned paper, create a “design element” and make something wonderful!
Feb 15, 2016 | Clean and Simple, Design Tips, Gallery, Masculine, Quick & Easy, Thinking of You |
We are just about half way through Sale-A-Bration. On Tuesday, Stampin’ Up! will add four new products to the Sale-A-Bration products. (I’ve seen them and they are fun). They’ll be featured in my posts at the end of this week, so be sure to check back. I can safely say that the Sale-A-Bration stamp set, “Botanicals For You”, and the DSP, “Wildflower Fields” will be around until March 31st.
Inside of card…

I created four cards for today’s post, because I wanted to show you how one stamp set and one package of Designer Series Paper can create the same card but set a very different tone.
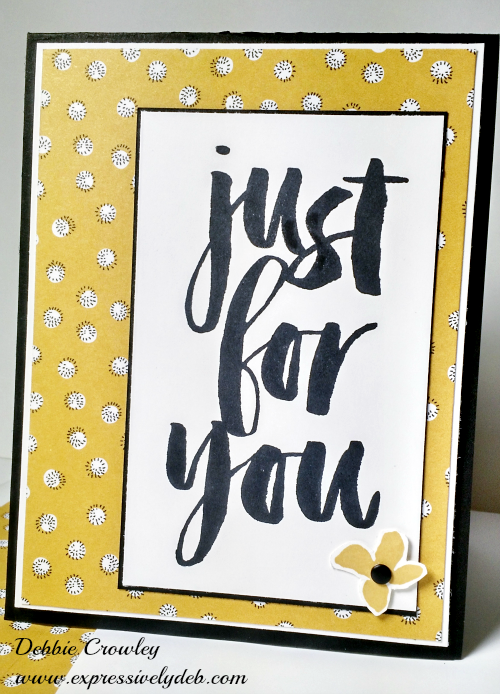
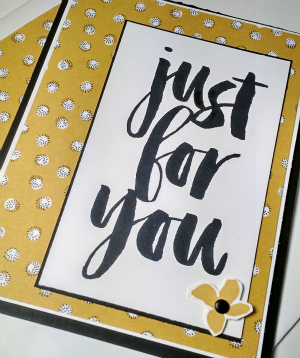
- The first card featured above is what I call the “Contemporary Elegant” version. Basic Black, Hello Honey and Whisper White are gorgeous together. The patterned paper is simple, contemporary and fun. The flower embellishment is also simple and fun. It’s the pattern, colors and embellishment that sets the tone for this card. It has a simple elegance to it, don’t you agree?
- Next is my “Classic Quiet” card… simple and classic. Basic Black and Whisper White, that’s all. The Basic Black Candy Dots set the mood here. Very straight and uniform. They work nicely with the pattern paper, but set a completely different tone than the card above. Same card design, same stamp, different patterned paper, colors and embellishment.

- Next stop is my “Cottage Charmer”. Very different from the two above. Lots of color, floral patterned paper which has more going on, a doily and flower embellishments. Not as “quiet” as the first two… it has a different personality. And that Lost Lagoon is beautiful with Blackberry Bliss… very warm and inviting like a country cottage.

- And, finally my “Contemporary Fun” card. This is colorful, bright and bold. Buttons, more buttons and some eye-catching patterned paper. This card has a lot of movement… in the flow of the pattern and the placement of the buttons, not to mention the colors! Blackberry Bliss and Old Olive pair nicely together, but they are not “quiet” at all.

So, there you have it. Just one stamp set and one pack of patterned paper. They’re all pretty, but my favorite is the first one. Which is your favorite?
Both the “Botanicals For You” stamp set and Wildflower Fields DSP are each FREE with any $50.00 catalog product purchase. Click on the Sale-A-Bration Brochure below for more details.
Jan 31, 2016 | Design Tips, Valentines |

A SUNDAY SIMPLE SAMPLER AND LOTS OF LOVE IS IN THE AIR…
With February upon us and Valentine’s Day fast approaching, I thought this card would be appropriate for today. Love is in the air… Stampin’ Up!’s “Bloomin’ Love” stamp set and “Love Blossoms” Designer Series Paper Stack were made for each other. The stamps are photopolymer, which to me means, adheres very well on your clear blocks, and are so clear, you can see where you’re stamping making it super easy to place your image wherever you want… and the images in this set are just simply pretty and can be used with other occasion projects, not just Valentines.

“Love Blossoms” DSP Stack is a definite must. The designs are simple, soft and great for many Spring into Summer projects.

Color and pattern go a long way in creating any design project. Sometimes the simplest of elements create a pleasing design. There are only two colors in this project plus a neutral, and three design elements that are very simple – rectangles, a square and hearts.
If you’ve been reading my blog regularly over the years, you’ll remember a while back I talked about some rules of design… the “Rule of Thirds” comes to mind for today’s card. I usually stick to that rule when embellishing, or creating a collage focal point.
Here are the dimensions so you can create a “simple sampler”:
- The card base is a standard A-2 (5 1/2″ X 4 1/4″)
- The first Rose Red layer is 5 1/4″ X 4″
- The second Whisper White layer is 5″ X 3 3/4″
- The top left rectangle is 3/4″ X 2 1/8″
- The bottom left square is 2″
- The bottom right rectangle is 3/4″ X 2″
- The sentiment rectangle is 1 1/8″ X 2 3/8″
- The dimensions above are for the patterned paper without the matting
So, grab some patterned paper, stamp an image, add a sentiment and create your favorite “simple sampler”.