Aug 4, 2022 | Encouragemet, Fall Themed, Gallery, Thinking of You |
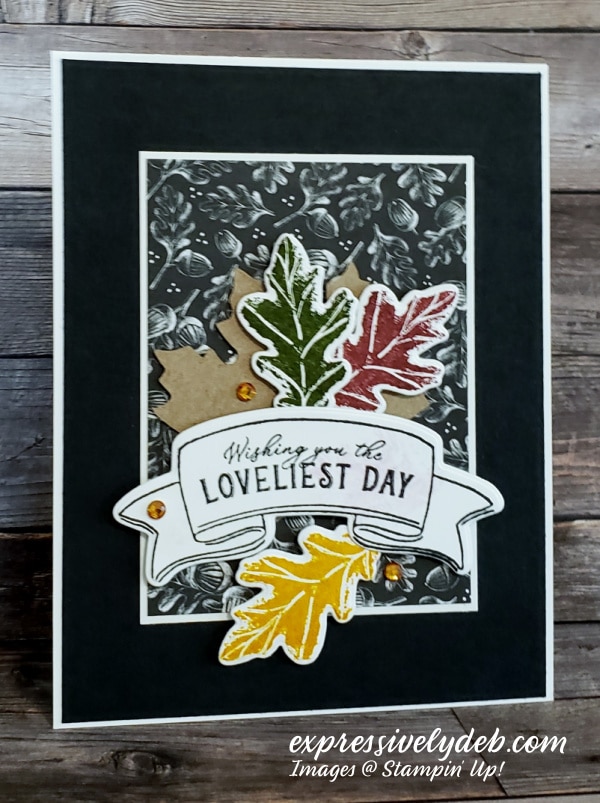
If you look closely at the Designer Series Paper layer in today’s card, you’ll see amazing art. This photo doesn’t do it justice, but the white dots almost sparkle. I created this card with the design term, “pattern repeat”, in mind. The maple and oak leaves repeat in the patterned paper and the card front elements.
When I first saw the Rustic Harvest Product Suite, this sentiment stamp and banner die spoke to me, not to mentioned the deep toned color palette. So, let’s get right to creating this simple and pretty card.
Today’s Card Pieces And Parts
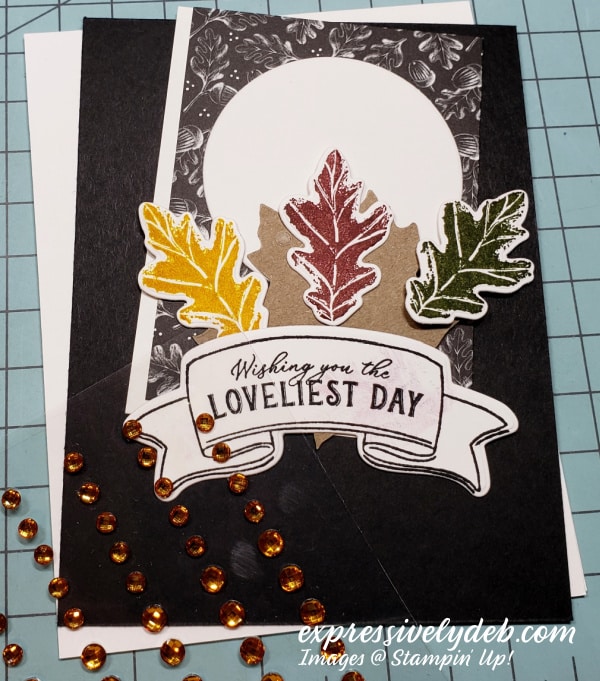
- The die cut circle is in my “pieces and parts” photo because I was going to use it as an element anchor. When I started putting the card together, I thought it covered too much of the patterned paper, so I left it out. I think it looks so much nicer without it. What’s your opinion?
- I cut a standard Basic White card base 4 1/4″ x 11″ and scored at 5 1/2″.
- The large Basic Black layer is 4 1/8″ x 5 3/8″.
- The smaller Basic White layer is 2 7/8″ x 3 7/8″.
- The patterned paper layer is 2 3/4″ x 3 3/4″.
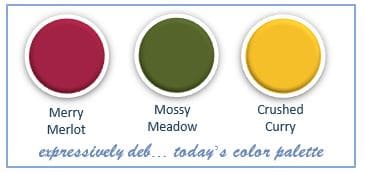
- Stamp the oak leaves with Crushed Curry, Mossy Meadow and Merry Merlot ink and die cut them with the coordinating die.
- Stamp the sentiment with Black Memento ink and die cut it with the coordinating die.
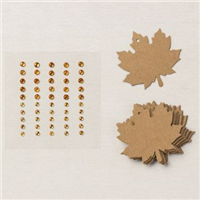
- The Crumb Cake maple leaf is actually a die cut tag from the Leaf Label and Amber Gems Combo Pack. This is the embellishment set that is part of the Rustic Harvest Suite.
- The Amber Gems have an amazing sparkle. It’s hard to see in the photo.
- Assemble and adhere the card layers as shown.
- Adhere the maple leaf to the center of the card front.
- Attach two of the oak leaves with Dimensionals on the maple leaf as shown.
- Attach the sentiment banner with Dimensionals as shown.
- Adhere the third oak leaf with Dimensionals under the sentiment banner, as shown.
- Add a few Amber Gems.
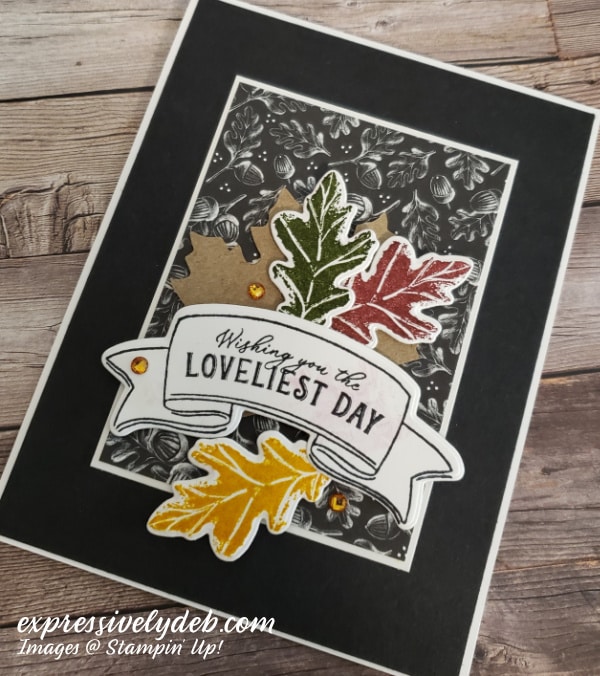
This is such an easy card to put together, and it looks so special. It’s a great way to make someone’s day!
So, think Fall – cut a few layers, add beautiful Fall leaves, and wish someone a lovely day!
… the only limitation is your imagination!

Today’s Product Details
STAMPIN’ UP! NOTES & NEWS
- The Pool Party and Soft Sea Foam Notes And Envelopes and the Tree Lot Dies from the Sale-A-Bration Brochure are no longer available.
- Stampin’ Up! has made more products available for FREE with a qualifying purchase so we all can continue to enjoy the benefits of Sale-A-Bration.
- Click the flyer below for details.

DON’T FORGET TO SALE-A-BRATE NOW THROUGH AUGUST 31ST

A FREE GIFT FROM ME
FESTIVE PEARLS WITH A MINIMUM OF $50.00 PRODUCT PURCHASE


Jul 22, 2022 | Fall Themed, Gallery, Thinking of You, Tutorials |

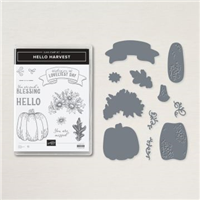
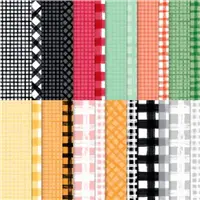
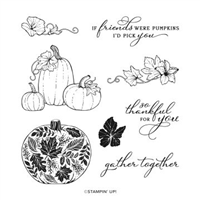
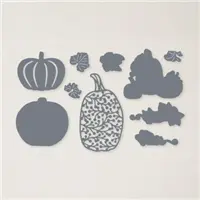
Today’s post is a soft, subtle, and happy hello card showcasing the Hello Harvest Bundle along with the Gingham Cottage Designer Series Paper.
It’s quick and easy to put together and is the perfect way to let someone know you’re thinking of them.
Today’s Card Pieces And Parts

- I cut a Basic White card base 11″ x 4 1/4″, scored at 5 1/2″.
- The Gingham Cottage Designer Series Paper is die cut using the Deckled Rectangles Dies.
- The smaller Gingham patterned layer measures about 3 1/4″ x 4 3/4″.
- The larger Gingham patterned layer measures about 3″ x 4 1/4″.
- Stamp the large pumpkin with Pumpkin Pie ink.
- Shade the pumpkin with a Blender Pen and Pumpkin Pie ink.
- Stamp the sunflower cluster with Crumb Cake ink.
- Add color to the sunflower cluster with your Blender Pen. I used Crushed Curry, Granny Apple Green and Pumpkin Pie ink.
- The shading with your Blender Pen goes quickly.
- Add color only to the lines in the stamp.
- The shading in the sunflower cluster is done with a small bit of ink on the tip of the Blender Pen.
- Be sure to clean your Blender Pen by running the sides along a scrap of paper until it’s clean. Lightly touch the tip of the brush to the scrap paper to clean it.
- Now you can go to your second color.
- I used Crushed Curry first, Pumpkin Pie, then Granny Apple Green.
- Die cut the pumpkin and sunflower cluster with the matching dies.
- I stamped the sentiment with Crushed Curry ink onto a small piece of Basic White cardstock.
- Using the smallest Deckled Edge Die, die cut the sentiment layer. The layer measures about 1″ x 2 1/4″.

Assemble The Card
- Attach the larger layer to the card base front as shown, then attach the smaller layer as shown. I offset both layers on the card front.
- Attach the pumpkin with Dimensionals.
- Add two Dimensionals to the top portion of the sunflower cluster and a line of glue to the bottom.
- Attach the flower cluster to the top of the pumpkin, as shown.
- Attach the sentiment to the card front with Dimensionals.
- Add your embellishment. I used one of the Amber Gems from the Rustic Harvest Suire.
The Inside

- The Basic White layer is 4 1/4″ x 5 1/2″.
- I cut two strips from scraps of DSP to create a bottom border.
- They both measure 4 1/4″ long. One strip is 3/4″ wide, and the other is 1/4″ wide.
- I stamped the small sunflower stamp with Pumpkin Pie ink.
So, “deckle” the edges of Gingham Cottage DSP, stamp a pumpkin and some sunflowers, blend in some color, add a bold sentiment, and create a card to say hello.
… the only limitation is your imagination!
Today’s Product Details
- From today through July 31st, 2022, for every minimum order of $50.00 through my online store, you will receive a FREE package of Festive Pearls from me.
- Please use the July Host Code QUHMHEFX.
- Click the shopping bag below and the Host Code will automatically come up.
- If your order is $150.00 or more, do not use the Host Code. You will receive Stampin’ Rewards from Stampin’ Up! and you will also receive the Festive Pearls from me.
A FREE GIFT FROM ME
FESTIVE PEARLS WITH A MINIMUM OF $50.00 PRODUCT PURCHASE
Jul 7, 2022 | Fall Themed, Gallery, Thinking of You |
Hello and Happy Thursday!
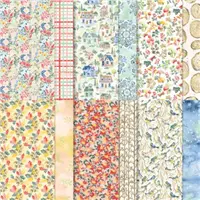
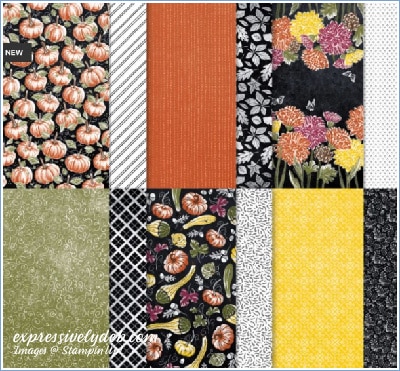
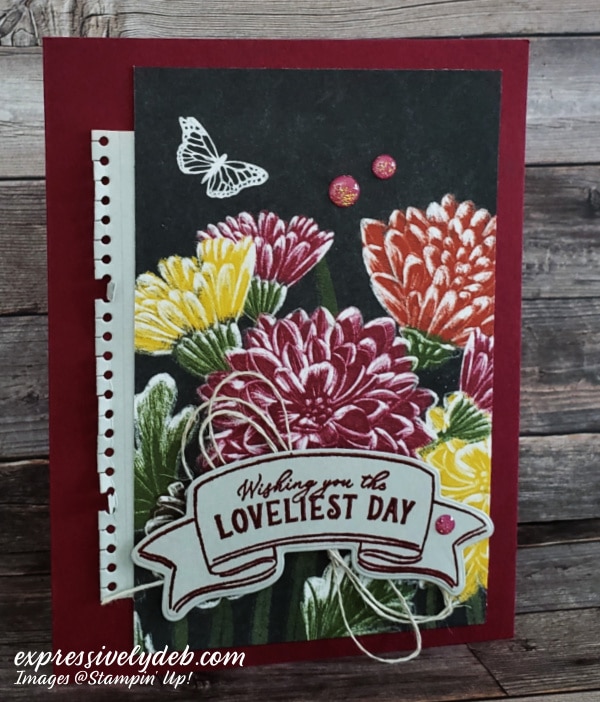
It took a bit of contemplation, but I relented and cut this beautiful patterned paper. The Rustic Harvest Designer Series Paper has a deep toned color palette that is perfect for Fall projects. This card is a CASE from the current Mini Catalog. I absolutely love the color palette and the simple design.
Today’s Card Pieces And Parts
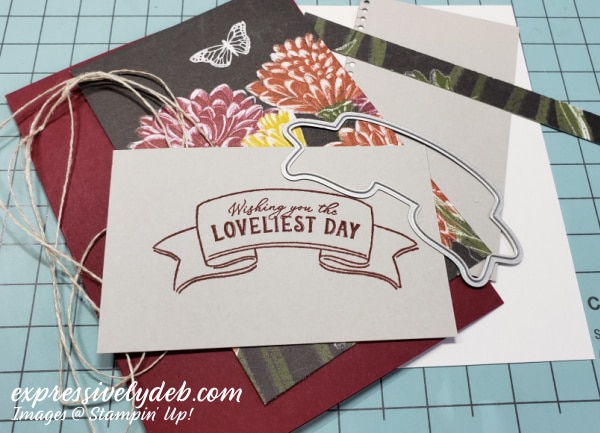
- The card base is Merry Merlot. I cut this one differently. It measures 5 1/2″ x 8 1/2″, scored at 4 1/4″. This is normally my landscape measurement (horizontal). This design has a vertical (or portrait) layout.
- Two sheets of the Rustic Harvest Designer Series Paper feature a large border of Fall mums with white butterflies. You can get five cards from each sheet cut strategically.
- I first cut the 12″ x 12″ DSP down the center to get two 6″ sheets. Trim off one inch from the bottom. Now you can cut your DSP card layers. I kept a butterfly in each layer I cut.
- This DSP card layer is the first image on the left side. It measures 3 1/4″ x 5″. Once you cut this, you’ll be able to see how to trim the rest.
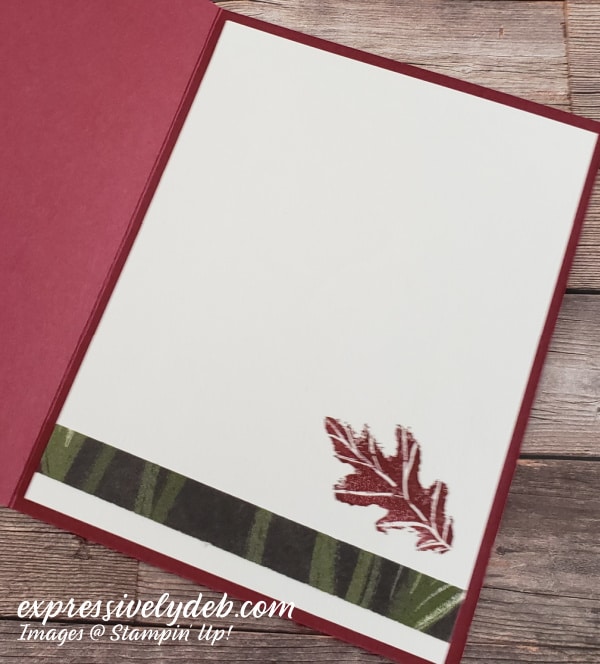
- I stamped the sentiment with Merry Merlot ink onto Sahara Sand cardstock.
- I cut a second cardstock layer 2 1/2″ x 4″ and die cut the edge with the “notebook” edge die from the Blossoming Happiness Dies.
- A Linen Thread loop bow is tucked behind the sentiment.
- I attached the die cut sentiment banner with Dimensionals.
- The inside of the card has a Basic White writing layer. I added a strip of the unused DSP and stamped a leaf from the Hello Harvest stamp set.
so, cut a panel of amazing patterned paper, make it your focal point, add a little Linen Thread and create something lovely!
,,, the only limitation is your imagination!
Today’s Product Details
You can find the Rustic Harvest Suite on pages 48 and 49 in the July-December 2022 Mini Catalog. Click on the Catalog image below to download a virtual copy.

FREE product with a $50 product purchase during Sale-A-Brtion.
- From today through July 31st, 2022, for every minimum order of $50.00 through my online store, you will receive a FREE package of Festive Pearls from me.
- Please use the July Host Code QUHMHEFX.
- Click the shopping bag below and the Host Code will automatically come up.

- If your order is $150.00 or more, do not use the Host Code. You will receive Stampin’ Rewards from Stampin’ Up! and you will also receive the Festive Pearls from me.
A FREE GIFT FROM ME
FESTIVE PEARLS WITH A MINIMUM OF $50.00 PRODUCT PURCHASE
Jul 2, 2022 | Birthday, Fall Themed, Gallery, Stampin' Up! Specials & News |
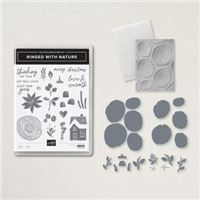
Today, is another Ringed With Nature Bundle Creation. On page 62 in the July-December 2022 Mini Catalog, the Bundle includes the Ringed With Nature stamp set and Tree Rings Hybrid Embossing Folder and Dies. The coordinating Rings of Love Designer Series Paper is in the Sale-A-Bration Brochure. This paper pack is FREE with a $50 product purchase through July and August. This is a simple decision. You can purchase the Ringed With Nature Bundle, get the Rings of Love Designer Series Paper FREE, and create lots of fun Fall, Holiday and “just to say Hi!” projects. You’ll also get a gift from me! The details are at the end of this post.
Today’s Card Pieces And Parts
- It’s always easy when you have the right tools! Don’t you agree?
- This is most definitely an easy card to put together.

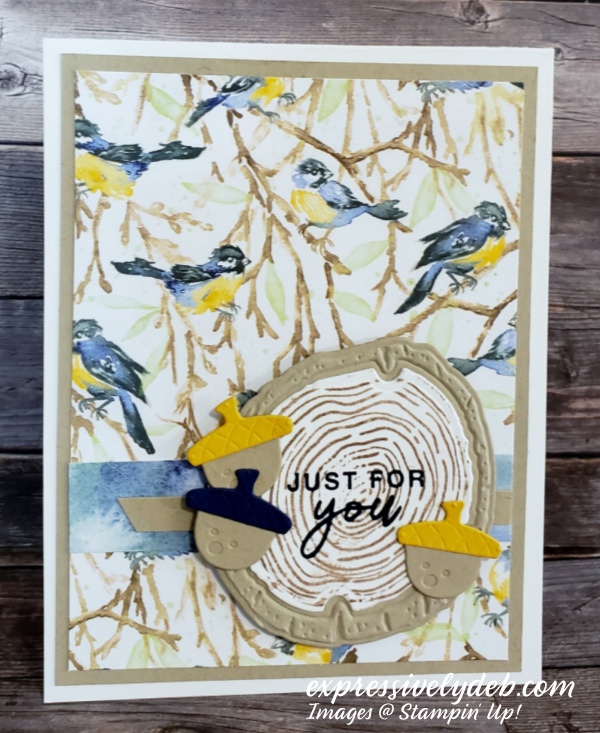
- Start with a Basic White Thick cardstock card base cut 4 1/4″ x 11″, and score at 5 1/2″.
- Cut a Crumb Cake cardstock layer 4″ x 5 1/4″.
- The patterned paper layer is 3 3/4″ x 5″.
- The blue patterned paper strip is 3/4″ x 3 3/4″ and the Crumb Cake strip is 1/4″ x 3 1/4.
- Both strips will attach to the patterned paper layer to anchor the tree ring sentiment.
- Die cut a Crumb Cake large tree ring using the Tree Ring Hybrid Embossing Folder.
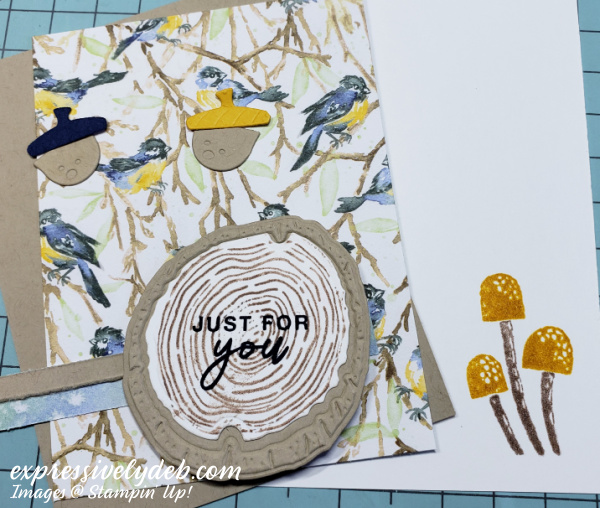
- Die cut three acorn bottoms using Crumb Cake cardstock, two acorn tops using Crushed Curry cardstock and one acorn top using Night of Navy cardstock.
- Stamp the tree rings onto Basic White cardstock and Crumb Cake ink and die cut the stamped image with the coordinating die.
Put It All Together
- Adhere the card layers to the card base as shown.
- Adhere the blue patterned paper strip across the patterned paper top layer about an inch up from the bottom.
- Adhere the Crumb Cake strip to the blue patterned paper layer, making sure the right side is even with the right edge of the patterned paper layer.
- Attach the stamped Basic White die cut tree rings to the Crumb Cake cut and embossed tree ring.
- Attach the acorn tops to the Crumb Cake Bottoms. I used a thin line of glue across the top of the acorn bottom.
- Stamp the sentiment to the middle of the die cut tree ring with Night of Navy ink.
- Attach the sentiment to the card front with Dimensionals as shown, and attach the acorns as shown.
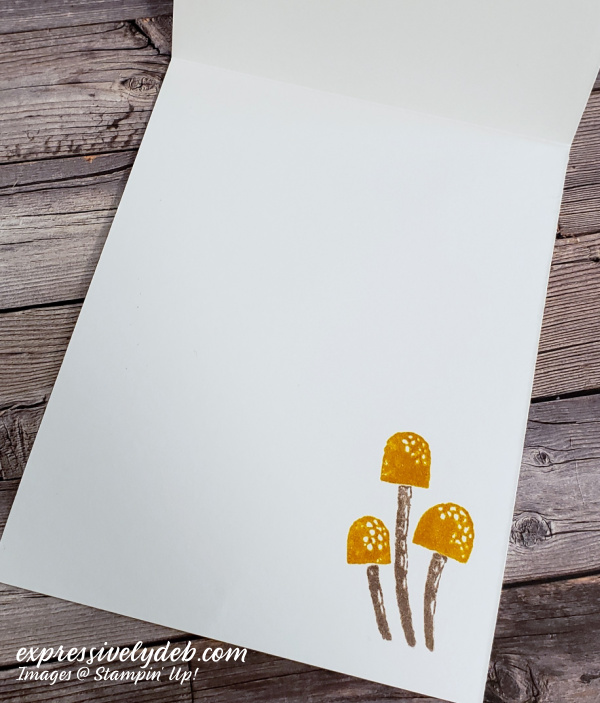
- I stamped the inside of the card with the mushroom stamps. The bottom with Crumb Cake and the top with Crushed Curry ink.
- Those stamped mushrooms are adorable! You can create a quick card just using them and a sentiment!
You can find the Ringed With Nature Bundle on page 62 in the July-December 2022 Mini Catalog. Click on the Catalog image below to download a virtual copy.
For more Ringed With Nature inspiration, click on the Sale-A-Brtion Brochure below and turn to pages 6 and 7.
So, look at the Ringed With Nature Bundle, get the coordinating Ringed With Love Designer Series Paper FREE and create lots of wonderful projects and more!
… the only limitation is your imagination!
Today’s Product Details
Sale-A-Bration FREE With $50 Catalog Product Purchase
- From today through July 31st, 2022, for every minimum order of $50.00 through my online store, you will receive a FREE package of Festive Pearls from me.
- Please use the July Host Code QUHMHEFX.
- Click the shopping bag below and the Host Code will automatically come up.
- If your order is $150.00 or more, do not use the Host Code. You will receive Stampin’ Rewards from Stampin’ Up! and you will also receive the Festive Pearls from me.
A FREE GIFT FROM ME
FESTIVE PEARLS WITH A MINIMUM OF $50.00 PRODUCT PURCHASE
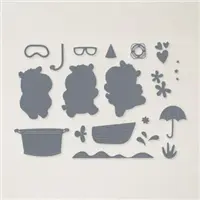
Oct 10, 2021 | Fall Themed, Gallery, Thank You, The Paper Players |

Happy Sunday, Friends! The Paper Players are challenging you again! Anne Marie is hosting this week with a super fun Color Challenge. She chose Pumpkin Pie, Pale Papaya , Early Espresso and any other color. I decided to go with Bermuda Bay.

A New Stampin’ Story
Today’s card has some interesting inspiration that I want to share. When I saw Anne Marie’s color choices I thought my Pretty Pumpkins Bundle would be perfect. I thought about my 4th color and Evening Evergreen came to mind. I went into the kitchen for some tea. A nice cup of ginger tea is always good in my craft room. I noticed my Fall dish towel hanging on the front of the stove.

As much as Evening Evergreen would have worked, I decided on Bermuda Bay. Inspiration can be anywhere!!
Another Change
The rest of the card came together quickly. I did make a change mid way through while putting the card together. I inked up the edges of the layers with Early Espresso ink and scrapped that idea fast. As much as I love inky cards with curled edges and a vintage vibe, I suppose I’m a clean card maker at heart.
My secret stash of Candy Dots from way back always serve me well. One Candy Dot helped balance the color and added that extra somthing I wanted for this card.

So, take a look around, see what your 4th color might be and create something fun and fabulous to link up with us over at the Paper Players. We always enjoy seeing your creations.
…the only limitation is your imagination!

Click on the images below for details on the products I used today.
Click to shop my online store at Stampin’ Up!