Apr 17, 2016 | Birthday, Bridal Shower, Clean and Simple, Encouragemet, Gallery, Quick & Easy, Spring, Wedding |
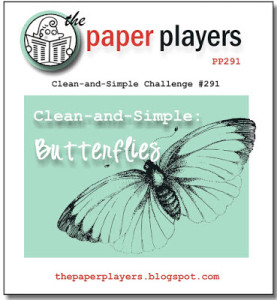
Today, when I checked in on The Paper Players Challenge, I saw that Sandy posted a Clean and Simple Spring theme. I created this card to celebrate Spring and wanted to feature it in today’s Simple Sunday Sampler blog post. I thought it would be perfect for the Challenge also.
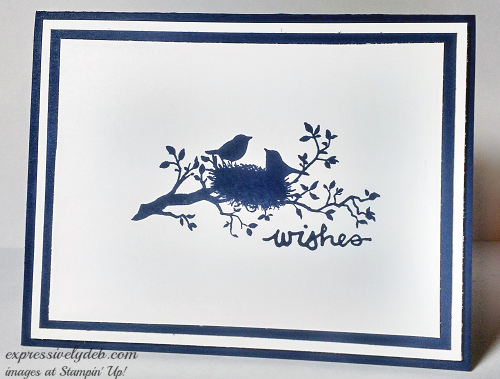
A few days ago, I noticed a few birds in my yard beginning the work on their nest. As I watched them carry small twigs to the tree, I thought that soon enough their little ones will be popping their heads just above the nest while their mother feeds them. So, I titled this card “Two New Wishes”. Isn’t this a nice way to celebrate Spring? Year after year, the birds make my weeping cherry tree their home and it seems this year is no exception.
I chose Night of Navy because it’s so classic and peaceful… I just love those blues! Of course, the silhouette stamped image is simple and serene, as well. It’s from the “World of Dreams” stamp set.

The silhouette stamp image is so detailed that I wanted to keep the card clean and simple to emphasize the image. By design, I chose a sentiment that would blend with the image so the image would remain the focal point. The “wishes” sentiment is from “Endless Birthday Wishes”.
So, I’m watching the nest take form and soon enough, I’ll know when the “little ones” arrive.

Mar 20, 2016 | Clean and Simple, Design Tips, Gallery, Quick & Easy, Spring, Thinking of You |

Just playing with patterned paper again. Here’s another Simple Sunday Sampler.
This project was quick and easy. Here’s the “How to” and a few Design Tips:
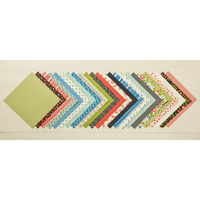
- Pull out some of your favorite patterned paper and choose three coordinating patterns. For this project, I used patterns from Stampin’ Up!’s “Pretty Petals” Designer Series Paper Stack.
- Design Tip: Always use the same or similar color palette, or similar patterns (either curvy or straight lines – which include florals and graphics). If you use both curvy and straight lines, make sure the elements (focal point, embellishments, sentiment, etc.) in your design are both curvy and straight. You need this for design “balance”.
- I used a standard A-2 card base in Whisper White – 5 l/2″ X 4 1/4″;
- The black polka dot pattern strip in the background is 2 1/2″ X 4 1/4″,
- My “anchor” horizontal strip is 5″ X 3 1/4″,
- The sentiment banner is 1″ X 4″
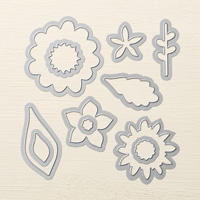
- For this card, I cropped some flowers with the “Flower Fair” framelits dies and added some Baker’s Twine for just a little embellishment.
- Design Tip: Because my patterns are so busy, there wasn’t much embellishment necessary.
- The “forever FRIENDS” sentiment from “First Sight” is stamped with Tuxedo Black Memento ink and the font is a good match to the patterned paper.

So, here’s a simple and quick project you can create with your favorite ingredients.
Enjoy your Sunday Stampin’!

Mar 9, 2016 | Blog Hops, Gallery, Spring, Tutorials |
Welcome to the Pals Blog Hop for March 2016. We are thankful you stopped by to take a look at our new 2016 Blog Hop monthly themes. This month we are featuring Spring and Spring related projects. We hope you enjoy our creations.
You may just be starting the Blog Hop or may have come from the previous link from the Line-up on the Pals Blog Hop listing shown below. The full lineup will help you move along from blog to blog so you may see all the projects.
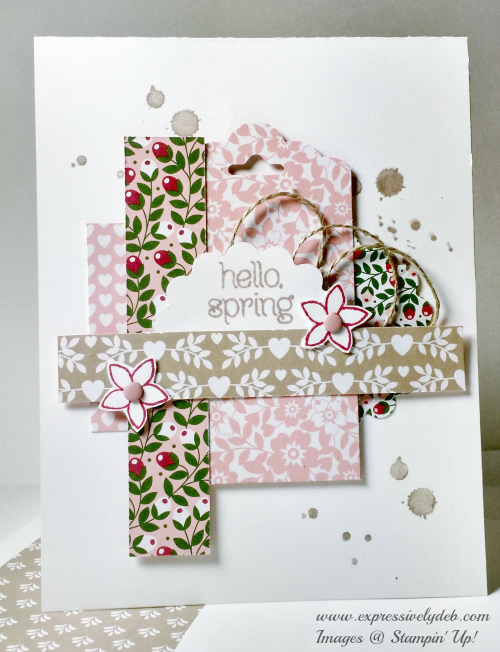
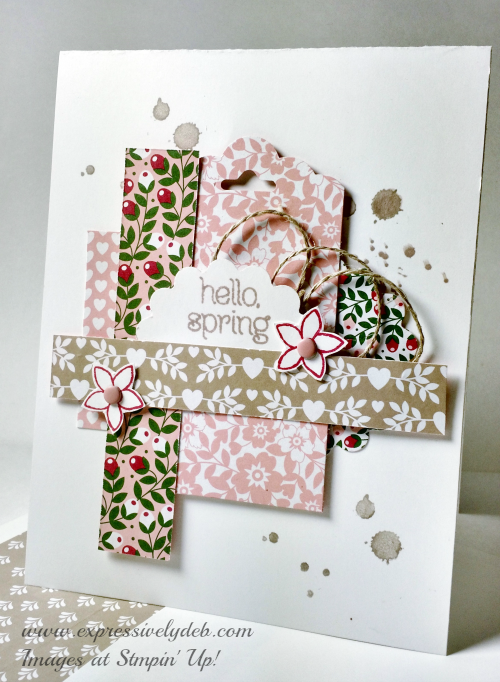
It’s been a while since I created one of my CAS collage cards. I simply adore moving cropped, patterned shapes around until I get the “look” I want. This design began with the floral scalloped tag and just evolved from there.
Here’s a photo of my pieces and a quick how to:
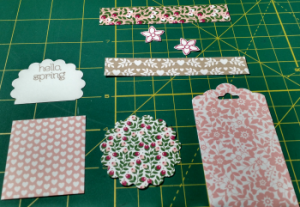

- I started with a Whisper White A-2 card base and stamped a little splatter dots with images from the “Gorgeous Grunge” stamp set.
- Dimensions for the scalloped tag are 2″ X 3 1/2″ (punched using the “Scalloped Tag Punch”). This was my first cut piece.
- I didn’t like the was it looked with the tag in the center of the card, but I needed that large piece there to carry the rest of the design, so I punched the floral scalloped circle and cut a rectangle 1 7/8″ X 1 1/2″. These shapes would balance the center tag on either side and continue keep the “straight line” and “scallop” theme.
- So, I glued the heart patterned rectangle and the scalloped circle to the center of the card, then placed the scalloped tag on dimensionals over these pieces… now I was getting somewhere!
- Two more rectangles would create my sentiment “frame”. The vertical floral rectangle is 3/4″ X 4″ and the Crumb Cake heart patterned rectangle is 3 7/8″ X 5/8″. I attached them both using dimensionals.
- I stamped the “hello spring” image in Crumb Cake ink onto a second scalloped circle and trimmed the bottom just enough to tuck under the horizontal crumb cake strip.
- I tucked in some Linen Thread and added two flowers from the “Circle of Spring” stamp set. Two “Blushing Bride” candy dots finished the flowers.
All of the patterned paper is from the “Love Blossoms” DSP Stack. When creating a pattern collage design, the 6″ X 6″ “stacks” make it so easy to choose the patterns you want to use.
Stampin’ Up! Supplies Used: Card Stock – Whisper White, Love Blossoms DSP Stack. Ink – Crumb Cake and Rose Red. Stamp Sets – Gorgeous Grunge and Circle of Spring. Tools – Scallop Tag Topper Punch and 1 3/4″ Scallop Circle Punch, Paper Snips. Embellishments – Linen Thread and Subtles Candy Dots.
To continue with the hop, please refer to the Blog Hop Line-up below. We hope to see you on next month’s Pals Blog Hop!
- Mary Fish at Stampin’ Pretty
- Nicole Everitt at Stamp Scrap Love
- Shawn de Oliveira at ShawnStamps
- Maggie Mata at Maggie Made Cards
- Tricia Chuba at ButterDish Designs
- Pam Dotts at Clearly Southern Stampin’
- Jackie Diediker at Stampin’ Jackie
- Kim Jolley at Stampin’ Artfully
- Beth Beard at My Little Craft Blog
- Debbie Crowley at expressively deb… you are here!
- Debbie Mageed at Secret Stamper
- Dawn Tidd at Tiddbits from Dawn
- Wendy Klein at Doggone Delightful Stampin’
- Natalie Bradley at NatalieBradley.com
- Becky Volpp at inkblossomwithBecky
- Lisa Ann Bernard at Queen B Creations
- Michelle Gleeson at StampinMojo
- Patti MacLeith at Papercrafts by Patti
- Jennifer Michalski at Stamping Serenity
- Pamela Sadler at Stampin pink rose
- Peggy Noe at prettypapercards
- Beth McCullough at Stamping Mom
- Karen Hallam at Karen’s Stampin’ Habit!
- Jennifer Spiller at Westside Paper Creations
Mar 2, 2016 | Birthday, Clean and Simple, Design Tips, Gallery, Spring |

What a sweet Color Challenge over at the Global Design Project! Daffodil Delight, Basic Gray and Smoky Slate are so pretty together… Spring is in the air.
Here’s a quick “can do” for you:
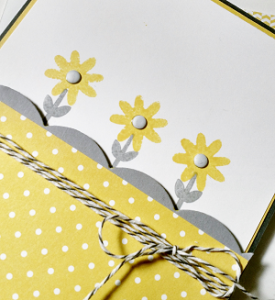
- The Basic Gray card base is A-2 – 4 1/4″ X 5 1/2″;
- The Whisper White second layer is 4 1/8″ X 5 3/8″,
- The Daffodil Delight polka dot layer is 2 1/2″ X 4 1/8″,
- The scalloped edgelit is cropped using Smoky Slate card stock and I cut it just enough to tuck behind the patterned paper.
- To get those little blooms into the right spot, I measured up 2 1/2″ from the base of my Whisper White layer and knowing that each “scallop” is one inch wide, I made sure the dots were an inch apart starting from the center out.
- Stamp the center flower stem first, then stamp a stem on each side. Use your pencil marks as a guide and… the stamp is photopolymer, so you’ll see your marks easily.
- Add your flower, which I stamped with Daffodil Delight ink.
- A few Whisper White Candy Dots and some Basic Gray Baker’s Twine from a past Paper Pumpkin Kit is all the embellishment needed.
Stampin’ Up! Supplies Used:
- Card Stock – Basic gray, Whisper White, Smoky Slate and Brights Designer Series Paper Stack;
- Stamp Set – Flower Patch from Stampin’ Up!’s Annual Catalog;
- Embellishments – Neutrals Collection Candy Dots and Basic Gray Banker’s Twine.
- Tools – Large Scalloped Edgelit from Stampin’ Up! (retired).
Feb 28, 2016 | Clean and Simple, Quick & Easy, Spring, Thank You |

Today’s post is for the Pals Paper Arts Color Challenge this week. Lynn came up with a beautiful combination of soft and classic, Blushing Bride, Pear Pizzazz and an absolute favorite of mine, Night of Navy.

Do you remember those cute “Flower Fair” Framelits Dies from the Annual Catalog? My “Big Shot” did all the work to create this Clean and Simple “Thank You”. A few flowers, a few leaves and a “White Perfect Accent” embellishment… done!
That strip of Blushing Bride and Whisper White floral pattern is from the “Love Blossoms” DSP stack… it added just a little frame to balance the flowers.