May 11, 2022 | Fun Folds, Gallery, Get Well |

Welcome to the Stampin’ Pretty Pals’ Blog Hop!
This month, the theme is New 2022-2024 In Colors. We hope the Pals’ amazing creations will inspire you! As you hop from blog to blog, we would love for you to leave a comment. You will find the lineup at the end of my post to help you “hop” along from Pal to Pal.

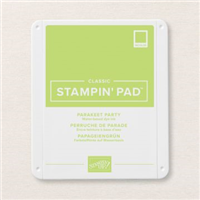
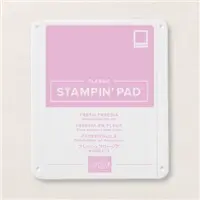
The new 2022-2024 In Colors are vibrant and add so much to the current Stampin’ Up! color family. As I’ve been creating with them, I’ve noticed how nicely they blend with a wide variety of other Stampin’ Up! Colors. A hard decision to make, I showcased Parakeet Party. I mixed it with Fresh Freesia, one of last year’s In Colors. These two are beautiful together. I made a Double Flap Fun Fold design for today. I’ve done it before and enjoy putting it all together. It’s simple and there’s lots of space to decorate and embellish.

Today’s Card Pieces And Parts
- The Parakeet Party card base is 4 1/4″ x 11″, scored on the 11″ side at 2 3/4″ and 5 1/2″.
- Fold and burnish the card base in half to the right, then fold the 2 3/4″ scored section to the left. (it’s really an accordion fold).
- Cut a second Parakeet Party layer 8 1/2″ x 3 1/4″. This is the smaller “card” that will attach to the inside of the main card base, and “flaps” over the front of the card.

- Each Basic White layer for the inside of the “flap layer” is 4″ x 3″.
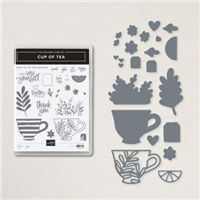
- I attached my stamped and die cut tea cup and flowers to the right side of this layer and added a die cut heart to the left side.
- You can put this layer aside for now.
- The Basic White layer for the right side of the open main card base is 5 3/8″ x 4 1/8″.
- The Parakeet Party striped DSP layer is 5 1/4″ x 4″.
- The picture below shows the main card base opened to show the accordion fold.

- The Basic White layer for the far left scored panel is 4 1/8″ x 2 5/8″.
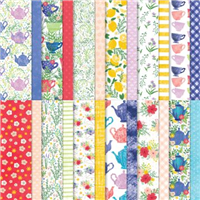
- The flower patterned paper from the Tea Boutique DSP is 2 1/2″ x 4″.
- I left the middle panel without layers, but you can add anything to it. This would be a brilliant spot for a pocket for a gift card!
- Back to the smaller front flap, the Basic White layer is 4 1/8″ x 3 1/8″ and the DSP layer is 3″ x 4″. The front of the flap layer is in the photo below.

A Tip And A Trick
- If you haven’t already tried this, I’m going to show you an old trick for layering a punched or die cut sentiment label.
- Stamp and die cut your sentiment. My sentiment is from the Cup of Tea stamp set, stamped with Garden Green ink on Basic White cardstock.
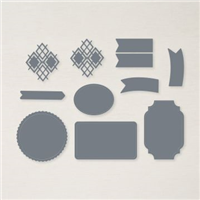
- I die-cut two Parakeet Party labels and cut them directly in the center, one horizontal and one vertical.
- I added glue to the front of each Parakeet Party piece and attached it to the back of the sentiment label, leaving about 1/8″ showing.
- Use glue so you have a little time to position the layer.

- I embellished the front with a die cut flower and one of the retired 2021-2023 In Color Jewels. I love them!
- Open your large card base and attach the smaller flap layer to the center of the right side.

If you haven’t tried this Fun Fold, try it. I hope you enjoy making cards with this design as much as I do.
So, cut, fold, burnish, attach layers, add a flower and create a card to send good thoughts!
… the only limitation is your imagination!

More inspiration awaits, so use the lineup below to visit the rest of the Design Team. The Pals are excited to show you what they’ve created! Then, please mark your calendars for our next blog hop on June 8th. Our theme will be “CASE the Catalog” when our Design Team creates a project found in the new Annual Catalog and CASE it with their own creative twist.
Until then, have fun in your craft space.
Stampin’ Pretty Pals Blog Hop
- Mary Fish at Stampin’ Pretty
- Beth McCullough at Stamping Mom
- Windy Ellard at Windy’s Wonderful Creations
- Lori Pinto at LollyPop Paper and Ink
- Sue Jackson at Just Peachy Stamping
- Deb Walker at Deb Stamps Life
- Mary Hanson at Up North Stampin’
- Tricia Chuba at ButterDish Designs
- Lisa Ann Bernard at Queen B Creations
- Peggy Noe at Pretty Paper Cards
- Pamela Sadler at Stampin Pink Rose
- Debbie Crowley at expressively deb…
- Stesha Bloodhart at Stampin’ Hoot!
- Debbie Mageed at Secrets to Stamping
- Su Mohr at Aromas And Art
- Jill Loveland at Simple Stamping
- Amanda Howard at Papercrafting With Amanda
- Melissa Seplowitz at The Stamping Ninja
- Lori Webb at Clever Copies
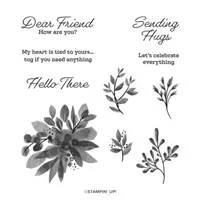
Today’s Product Details
Nov 4, 2021 | Encouragemet, Gallery, Get Well, Thinking of You |

Happy Thursday, Friends!
Today’s post features the new Eden’s Garden Bundle and the. Ever Eden Designer Series Paper
I kept my card design simple to show off the designer series paper, stamped sentiment and die cuts. I added a few sparkling embellishments from the 2021-2023 In Color Jewels.

Card Layer Dimensions
- The Evening Evergreen card base is a standard top fold A-2 base cut at 11″ x 4 1/4″ and scored at 5 1/2″.
- The bottom patterned paper layer is 2 1/2″ x 4″.
- The top patterned paper layer is a 3 1/2″ square.
- The top Evening Evergreen mat layer is a 3 5/8″ square.
- The Basic White sentiment layer is a 2 1/4″ square.
- The Evening Evergreen mat layer for the sentiment layer is a 2 3/8″ square.
Once your patterned paper and cardstock layers are cut, the card goes together quickly. I used the Multipurpose Glue to attach the layers. The glue gives you a little time to place your layers evenly. This works especially well when you’re working with thin layers.
The Bundle
The Eden’s Garden Bundle includes the Eden’s Garden stamp set and the Eden Dies. This Bundle is an early release from the upcoming Spring Mini Catalog.
The Stamp Set
- The stamp set is “Distinktive” . That means there are different opacities (shading and shadows) cut into the stamp so the stamped images have beautiful dimension.
- The sentiments are mixed fonts that are clean and crisp.
- The messages are generic “thinking of you”. I know I’ll use them often and you will, too!
The Dies
- The best description I can give for the Dies is they are detailed and stunning!
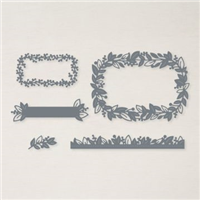
- The Dies include a large and small frame, a border die, a sentiment die and a floral sprig embellishment die.
- These Dies are perfect for multiple cards, framed photo cards and will add that extra something to a simple card or sentiment.
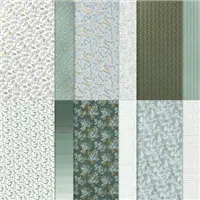
The Ever Eden Designer Series Paper
- I am a patterned paper hoarder and addict! I really tried to avoid getting the DSP but couldn’t resist.
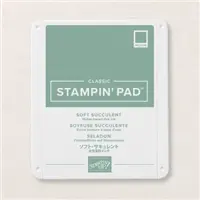
- The Soft Succulent, Gold Foil and Evening Evergreen color combination is beautiful.
- This is Specialty Designer Series Paper. On one side there are stamped gold foil images and the other side is simple and generic.
- The paper is not being carried over to the new Mini Catalog and is only available until January 2nd, so don’t hesitate.
The Eden’s Garden Collection
For more details on the entire Eden’s Garden Collection, you can click on the image below.

So, pull out some amazing Designer Series Paper, cut a few cardstock layers, add a sweet sentiment and send a beautiful hug to someone special!
…the only limitation is your imagination!

For additional product details, click on the images below.
Click to ship my online store.

Jul 14, 2021 | Blog Hops, Encouragemet, Gallery, Get Well, Sympathy |

Welcome to the Stampin’ Pretty Pals’ Blog Hop! This month, the theme is “Wonderful Cards/Projects from the Garden” where our design team showcase projects from things found in a garden, such as flowers, vegetables, fruits, or even a garden scene. We really hope that you enjoy and will be inspired by them! As you hop from blog to blog, don’t forget to leave comments because we love hearing from you. Once you finish here, you will find the lineup at the end of my post to help you “hop” along from Pal to Pal.

Today’s cards are Sneak Peeks of the Nature’s Harvest Bundle. Wow! That about sums it up. This Bundle caught my eye and was at the top of my list. The matching Harvest Meadow Designer Series Paper is my color and design inspiration today. I couldn’t put these gorgeous dies away, so I made a second card.

Both card designs are identical except that I added much more ink to my first card. (Which is also below).

Here’s How I Did It!
Included in the Nature’s Harvest stamp set is a background stamp which I used to spread some Misty Moonlight ink behind the die cuts. With my Blender Brush, I created a Misty Moonlight “shadow” around the die cuts. I inked the edges of the DSP layer, the white flower spray and the sentiment tag using a sponge dauber. Adding in the Misty Moonlight ink really gives this design a good amount of depth. My cards are usually “cleaner”, but I really liked the contrast in the inked version.
Below is my original, clean version of the same design. The Misty Moonlight wheat and Soft Succulent branch are perfect behind the crisp, clean flowers picked right from the garden for the Pals.

The sentiment is a beautiful get well, encouragement or sympathy message. The font in the sentiment matches the penned font in the Designer Series Paper. This is a perfect pattern repeat.
Both cards are embellished with the upcoming Matte Decorative Dots. They’re in three sizes and so much fun to use.
So, find some inspirational Designer Series Paper, ink it up, attach a few amazing die cuts and create something thoughtful!
…the only limitation is your imagination!

More inspiration awaits, so use the lineup below to visit the rest of the Design Team, because the Pals are excited to show you what they’ve created! Then, please mark your calendars for our next blog hop on August 11th. Our theme will be “My Happiest Season” when our Design Team creates a project showcase inspired by their favorite season of the year. Until then, have fun in your craft space.
- Mary Fish at Stampin’ Pretty
- Tricia Chuba at ButterDish Designs
- Windy Ellard at Windy’s Wonderful Creations
- Leah O’Brien at Honeybee Stamping & More
- Sue Jackson at Just Peachy Stamping
- Debbie Mageed at Secrets to Stamping
- Jackie Beers at Blue Line Stamping
- Rosanne Mulhern at Heartfelt Stamping
- Beth McCullough at Stamping Mom
- Peggy Noe at Pretty Paper Cards
- Melissa Seplowitz at The Stamping Ninja
- Stesha Bloodhart at Stampin’ Hoot!
- Su Mohr at Aromas And Art
- Debbie Crowley at expressively deb…
- Mary Hanson at Up North Stampin’
- Lori Pinto at LollyPop Paper and Ink
- Karen Hallam at Karen’s Stamping Habit
- Lisa Ann Bernard at Queen B Creations
- Lisa Milligan at Stamping Made Simple
- Pamela Sadler at Stampin Pink Rose
- Lori Webb at Clever Copies
- Megan Cooper at Lazy Daze Stampin’
- Michelle Quinno at Shell Stamps
- Amanda Howard at Papercrafting With Amanda

Mar 27, 2021 | Gallery, Get Well, Quick & Easy |

Happy Saturday! Hope you have a chance to get in some paper crafting time over the weekend!
Today’s card is a simple get well card. It’s always good to have a few get well cards on hand. If you know someone who might be a bit under the weather, sending a hand written note is a beautiful and thoughtful gesture.
Without a doubt, this is a quick and easy card. The most time consuming part of this card was fussy cutting the rose bloom. Since there aren’t many details in the lines of the flower, the fussy cutting was simple. Because there are only three elements on my card, I thought the textured background would give the design a little pop.

All of the supplies I used to make this card are retiring with the exception of the Basic White card base. Just Jade and Terracotta Tile are retiring In Colors. The Healing Hugs stamp set is also on the retired list. I’ve used this stamp set quite a bit. It’s simple and the sentiments are thoughtful. The texture and shading is amazing. This is one of Stampin’ Up!’s “Distinktive” stamp sets. The image stamps are cut in such a way that two step stamping isn’t necessary to get beautiful detail and dimension.
So, stamp a beautifully detailed rose, add a good wish and some texture and create something thoughtful.
…the only limitation is your imagination!

For more details on the supplies I used in today’s project, click on the picture below.
Click on the image below for complete details on the Last Chance Products.

Mar 13, 2017 | Birthday, Clean and Simple, Congratulations, Encouragemet, Gallery, Get Well, Quick & Easy, Spring, Thinking of You |

Happy new week!
If you’re in the midst of the winter storm coming to the Northeast early this week, I hope you are safe, warm and well. I just heard a forecast for New Jersey and we’re supposed to get the greater part of 18 inches of snow. I’m not looking forward to that since we had a taste of Spring last week. Snow is pretty though, especially when it’s falling, so I’ll enjoy the view.
Speaking of Spring, let’s get to today’s card. My “Spring Butterfly” is another generic card… happy birthday, thinking of you, get well, wedding, and I’m sure you can think of a few more occasions. Another “Clean and Simple” card, I finished this one in just a few minutes.
My inspiration for this card was Stampin’ Up!’s 2016-2017 Annual Catalog. Take a look at the image from the Catalog below. I used the cropped butterfly image with the gold thread behind it, the sentiment stamp is the same and the colors are the same.

The photo inspired me because I liked the softness of the color palette.


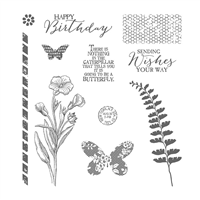
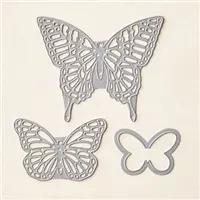
Here’s the simple “How To”: All images are from Stampin’ Up!’s Butterfly Basics stamp set and the cropped butterfly is from Stampin’ Up!’s Butterflies Thinlits Dies.
- Start with a Whisper White A-2 card base (4 1/4″ X 5 1/2″);
- Crop a Whisper White layer measuring 4″ X 5 1/4″;
- Directly in the center of the layer, stamp the fern image in Pear Pizzazz ink (stamp off once). Stamping off once means to ink your image, stamp it on a scrap piece of paper, then stamp onto your project. The image will stamp lighter.
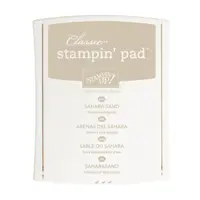
- Ink up the honeycomb stamp with Sahara Sand ink and, stamping off once, stamp the honeycomb on the bottom left corner and the middle right side of the layer. (I used half the honeycomb image on the middle right side).
- Stamp the sentiment onto the bottom right corner with Sahara Sand ink.
- Crop the medium butterfly from the Butterflies Thinlies Dies using Pool Party card stock.
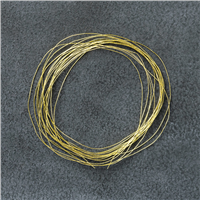
- Roll up some Gold Metallic Thread and anchor it to the stamped fern image about 1/3 from the bottom of the image.
- Attach the butterfly to the fern with some green glue
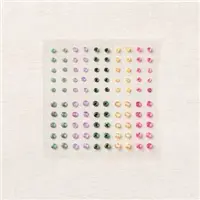
- Add a few embellishments (remember the design “rule of thirds”).
- Attach your finished layer to your card base with a few Stampin’ Dimensionals.
- Send your card to someone very special!
So, pull out your Stampin’ Up! 2016-2017 Annual Catalog, pour your favorite cup of tea and find your inspiration to create something stunning!


