Apr 1, 2022 | Congratulations, Design Tips, Gallery, Thinking of You |

Happy April!
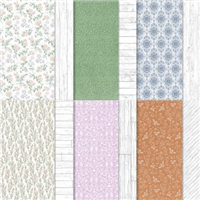
Today’s post features a “stamps, paper and ink” card. For fun, I added some pretty Designer Series Paper. This is a fun card design and very easy to put together. I’ve used it before with a completely different set of elements. You can too!
Today’s Card Parts & Pieces
- Cut a standard A-2 Basic White card base cut at 5 1/2″ x 8 1/2″. Score at 4 1/4″.
- The Basic Black layer is 4 1/8″ x 5 3/8″.
- The patterned paper layer is 4″ x 5 1/4″.
- The Basic Black center layer is 4 1/8″ x 2 7/8″.
- The Basic White top layer is slightly smaller. It’s 4″ x 2 3/4″.
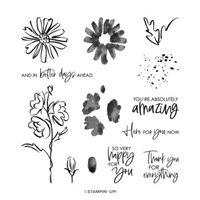
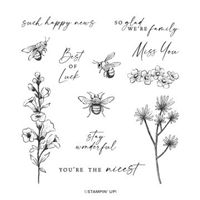
- I used the Color & Contour stamp set for all the stamped images.
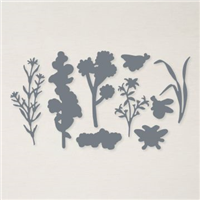
- The flower is die cut with a matching die from the Scalloped Contours Dies.
- Tuxedo Black Memento, Calypso Coral and Granny Apple Green ink are my color choices.
- I stamped the leaf and ink splatter before I attached the flower.
- I shade the center of the flower with a Light So Saffron Blend.

A Few Design Tips
- If you cut the bottom offset layer slightly larger than the top, you’ll be able to angle your layers more evenly. It works!
- Using a dark, thin layer under the patterned paper layer gives the patterned paper some dimension.
- I added a Calypso Coral resin dot under the sentiment. Adding a little Calypso Coral to the top corner of the focal point layer gives the design color balance. It’s more appealing to the eye.
So, ink up a favorite stamp, add a few offset layers and a colorful resin dot and create something amazing!
… the only limitation is your imagination!

Today’s Product Details

Mar 8, 2022 | Birthday, Design Tips, Gallery, Thank You, Thinking of You |

Hello Friends! I Hope you’re enjoying your week. The weather here in NJ is crazy! We were at 70 degrees over the weekend and this morning, we were back in the 30’s. I’m ready for some warmer weather and more daylight. Looking forward to our Spring Ahead clock change this coming weekend. It’ll take a week or so to get used to our new clock, but the change is welcomed by me.
Here’s Today’s Stampin’ Story
I had this post ready to go. When I went to post my pictures, I notices the back of a Stampin’ Dimensional right in the middle of my Pale Papaya die cut. I took the pictures, added my watermark, brought them into my picture file and never noticed it! A picture re-take fixed all that and I’m off to a fresh start.

Card Pieces And Parts
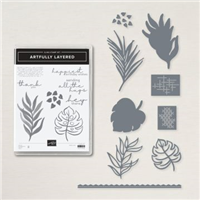
- Isn’t this Bundle fabulous? It’s the Artfully Layered Bundle on page 34 in the Mini Catalog.
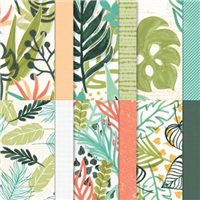
- Because I’m such a patterned paper fan, it was the coordinating Artfully Composed DSP that originally caught my eye.
- I relented and got the Bundle because I didn’t have anything like it in my stash. I’m happy I did. I’ve used it over and over.
- This is a 5″ square card. The Basic White card layer is 5″ x 10″, scored at 5″.
- I used one of the patterns in the Artfully Composed DSP. Since I wanted to add die cuts to this design, I needed a low profile background. This Calypso Coral, distressed design worked for a card front layer.
- As I was putting the card together, I changed my design. The patterned paper distressing inspired me to add texture to it.
- Now, I know this sounds “out there”, but I did it and, to me it looks great! Included in the Tropical Layers Dies are two “texture dies” . They pierce the paper so you can create a detailed, texture design.
- I took one of the dies and colored the back with my White Chalk Marker before running it through my cutting machine.
- It pierced the DSP and added more color to the already textured pattern. The die cut leaves are bold enough to work together with the texture.
- I like the result. A small detail that added that extra something.
- By the way, I cleaned my die with alcohol and a paper towel and it’s as good as new!

- The Basic White layer is a 4″ square and the top patterned paper layer with the added texture is a 3 3/4″ square.
Tips & Tricks
- I suppose you could say that chalking the back of a die is a tip and trick… it worked for this design.
- I wanted to shadow cut the white embossed sentiment but my eyes aren’t what they used to be. This is a cling red rubber stamp. I used the backing on the stamp as a guide to fussy cut the embossed sentiment. Take a look at the photo below. So easy! I will save these little tools from now on.

So, add some fun texture to a distressed patterned paper, die cut some strong, bold elements, emboss a sentiment and create something square!
…the only limitation is your imagination!
Product Details For Today’s Card
Jan 19, 2022 | Design Tips, Gallery, Valentines |

Happy Wednesday!
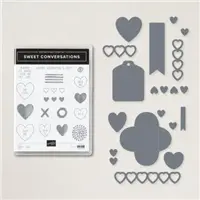
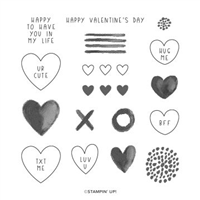
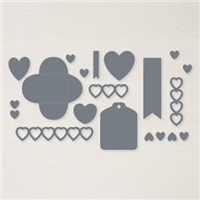
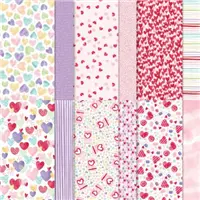
I realized I needed a few more Valentines so I went back to my Sweet Conversations stamp set and started stamping hearts. Today’s card is mostly stamps, paper and ink. I added a few die cut hearts and stamped the rest. It was interesting to me that I used my stamps and clear blocks. I’ve gotten so used to using my Stamparatus that it was a new and fun process to go back to stamping with clear blocks. The photopolymer stamps and clear blocks made it very easy to place the images where I wanted.
Below is the first version of this card. It’s a little cleaner. I noticed that little circle of dots stamp in the stamp set and thought I would add a few more images. That stamp matches the Designer Series Paper perfectly.

Card Bits And Pieces
- This is a simple A-2 top fold card base that measures 5 1/2″ x 8 1/2″ scored at 4 1/4″/
- The patterned paper layer is 5 1/2″ x 4 1/4″ and attaches to the front of the card base.
- The Basic White top layer is 4 3/4″ x 3 3/4″. It attaches to the center of the patterned paper layer.
- Design Tip: I stamped three large hearts, three “x o x” images, added three die cut hearts and stamped three circles. With the exception of the sentiment, all the elements are in groups of three. The Design Rule of Thirds!

So, I hope this card inspires you to make a few extra Valentines to send to those special someones!
…the only limitation is your imagination!

Today’s Product Details
NOTES AND NEWS
For each $50 or $100 product purchase, you can choose a FREE qualifying product from the Sale-A-Bration Brochure and you will also receive a FREE gift from me. The Classic Matte Dots will find their way onto many of your projects. They’re clean and simple and are a perfect finishing touch.

Jan 11, 2022 | Design Tips, Encouragemet, Gallery, Spring, Thinking of You, Tutorials |

Hello Stampers!
Today’s card is my first Slimline card. I suppose you would call this a Mini Slimline. The finished card dimensions are 3 1/2″ x 7″. I thoroughly enjoyed putting this together. It was a nice change from my A-2 cards.
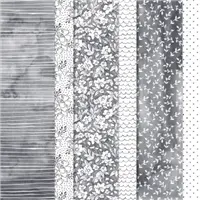
My inspiration for this card came from the beautiful, subtle designs in the Heart & Home Designer Series Paper. The card had to have a soft, delicate vibe to match he patterns. I laid out all of the patterns and made my choices. “Pattern Repeat” came to mind as I was making my pattern decisions. You can see the floral images repeated more than once in my card. Repeating a pattern in a card design, whether it’s flowers, circles or simple shapes always works!
Today’s Card Elements

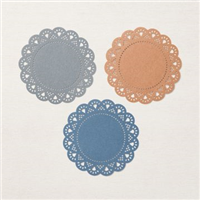
- Working with a Product Suite makes it easy to create. The Heart & Home Suite includes the Honeybee Home Bundle, Heart & Home Designer Series Paper and the Heart & Home Doilies.
- The Basic White card base is a 7″ square scored at 3 1/2″.
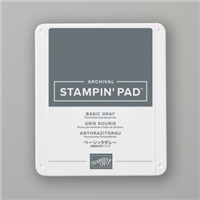
- The Basic Gray and White wood grain patterned paper layer is 7″ x 3 1/2″, attached to the card front.
- The large floral patterned paper is 2 1/2″ x 6″, attached to the right side of the card front, centered.
- The smaller floral patterned paper is 2 1/2″ x 1 1/2″. I attached this to the top of the larger floral DSP.
- I used Basic Gray ink for all of the stamped images, die cut them with the matching Honeybee Blooms Dies and added a bit of color with Fresh Freesia and Pale Papaya Blends.
- The pretty Basic Gray doily is the perfect “grounding” layer for all of the die cut elements.
- I punched the sentiment with the scalloped oval with the Double Oval Punch.
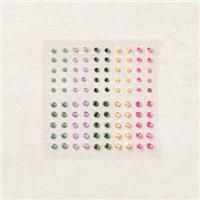
- I scattered some sparkle with a few 2021-2023 In Color Jewels. Love them!

The Envelope, Please
Now I have this pretty little card and no envelope. I went to Pinterest to see if I could fins slimline envelope templates to share with you. There were tons, but not with the dimensions of this card. With a piece of copy paper, I folded and scored until I got something I could share. Click the button below to download a quick PDF tutorial for the card envelope.


So, find that beautiful Designer Series Paper, add some pretty elements, create your own envelope and “Stay Wonderful”!
…the only limitation is your imagination!
Click on the images below for product details.
NOTES AND NEWS
For every minimum $50 product purchase, you can choose a FREE qualifying product from the Sale-A-Bration Brochure and you will also receive a FREE gift from me. The Classic Matte Dots will find their way onto many of your projects. They’re clean and simple and are a perfect finishing touch.
Aug 20, 2021 | Birthday, Children, Clean and Simple, Congratulations, Design Tips, Gallery, Tutorials |

It’s Friday! I hope you can make some time to “celebrate you” this weekend!
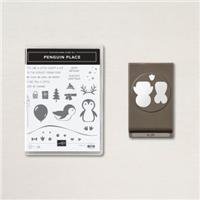
Look at the stamped balloon images. Don’t they look real? The balloons are one of the stamps from the Penguin Place Stamp Set. I’m not actually showcasing the Penguin Place Bundle today. I have a project ready for that soon. Today, I’m showcasing the Create With Friends stamp set from the Annual Catalog.
I had to get ink on these stamps and I thought there was no better way than to pair Create With Friends with Penguin Place and add a little slice of the Beautifully Penned Designer Series Paper from Sale-A-Bration. And that’s exactly what I promote Stampin’ Up! . You can mix and match and you’ll always have a great outcome. By the way, I’m also showing off almost all of the new In Colors ink.

Here’s the simple “How To” for today’s card:
- I used a Thick Basic White card base cut 8 1/2″ x 5 1/2″ and scored at 4 1/2″.
- The Basic Black card layer is 5 3/8″ x 4 1/8″. I like to use thin layers but if you feel more comfortable cutting a wider layer, that’s fine.
- The patterned paper layer is 4″ x 5 1/4″.
- The Basic Black center layer is 4 1/8″ x 2 7/8″.
- The Basic White top layer is slightly smaller. It’s 4″ x 2 3/4″.
- Design Tip: It’s easier to do a “fun layer” as I call it, or an offset layer if your bottom is cut slightly larger than the top. You’ll get more color exposure and it’ll be easier to angle your layer. Give it a try. It works.
- I stamped my sentiment with my Stamparatus and stamped and fussy cut the balloons.
- My layers are attached to each other with Multipurpose Glue. I like using it because it does give you a little time to set your layers.
Here’s a suggestion.
Purchase the “Create With Friends” stamp set along with the Penguin Place Bundle, and add in a bottle of Multipurpose Glue, you can get the Beautifully Penned Designer Series Paper absolutely FREE. You can create projects galore!
For the product details, you can click on the images below.
And, when you purchase through my website, you will also receive a package of the amazing Metallic Pearls as a gift from me.

So, cut your “fun layers”, add a large sentiment and a few balloons and create something to celebrate you!
…the only limitation is your imagination!

Download the virtual Holiday Mini catalog by clicking here or on the image below.

SALE-A-BRATION
It’s also time to Sale-A-Brate. For every qualifying purchase from any of the current Stampin’ Up! catalogs, including registering for Paper Pumpkin, you can choose a FREE product from the brochure below. The Sale-A-Bration sales period runs through September 30th.

I WOULD LOVE TO HAVE YOU JOIN MY TEAM
This is a great time to become a Stampin’ Up! Demonstrator. Along with the Starter Kit which includes $125.00 in products you choose, you will receive a Bundle of your choice from the new Holiday Mini and FREE shipping all for $99.00. There’s no better time than during Sale-A-Bration to join. There’s no obligation, you can cancel at any time. You can click here for all of the details or contact me directly. I would love to have you join my Team of fun and talented paper crafters. The Sale-A-Bration sales period runs through September 30th.